


Tutorial: Advanced photo manipulation: Create a quicksand abyss! [complete workflow]
 is licensed under a Create Commons Attribution-Non Commercial 3.0 Unported license.")
![Advanced photo manipulation: Create a quicksand abyss! [complete workflow]](/system/tutorial_steps/2571/23-en-final.jpg "Advanced photo manipulation: Create a quicksand abyss! [complete workflow] — Result")
Download GIMP workspace (.xcfbz2) (9.18 MB)
Motivation
This tutorial shows a way to create an abyss in a sandy environment. You could also call it quicksand, although real quicksand does not have such big and visible holes. We will let a young man sink into the abyss that tries to hold out until help is finally coming in form of a helicopter that whirles some sand when landing! The tutorial offers the complete workflow of a photo manipulation from idea to post-production. Hope you enjoy it ;)
Tutorial details
- Category: Digital Paintings & Composings
- Time to reproduce: ≈60.0 minutes

- Tested with GIMP 2.7
-
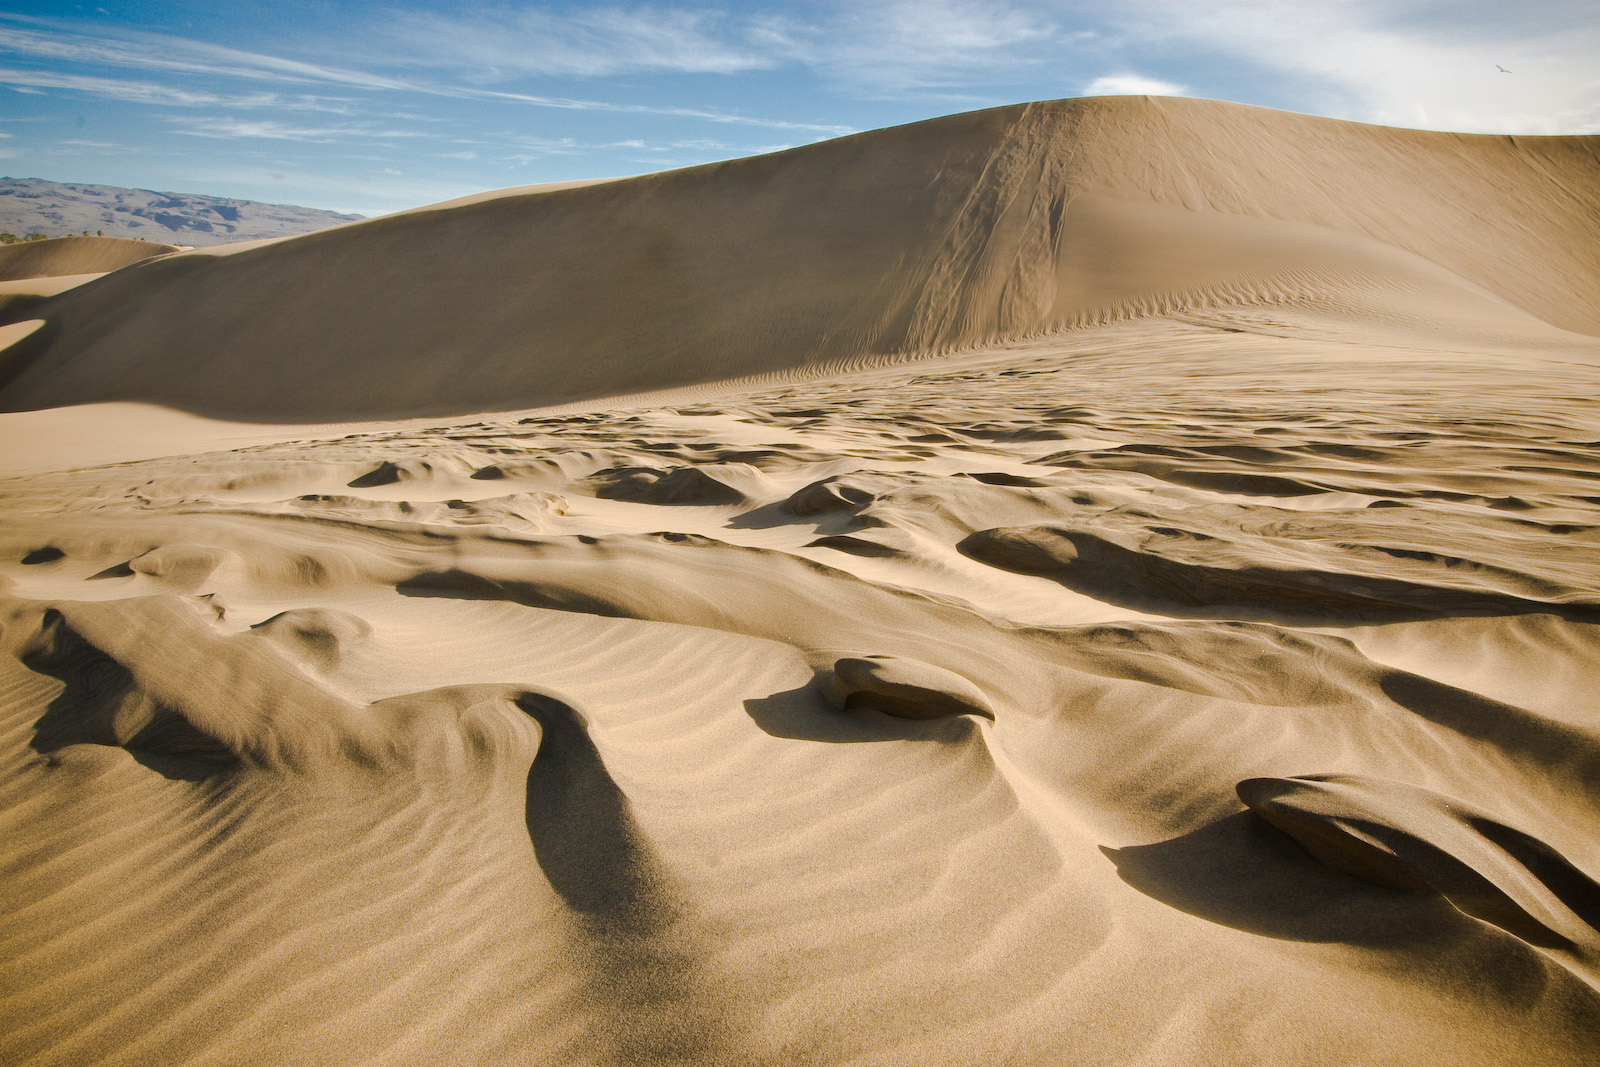
1
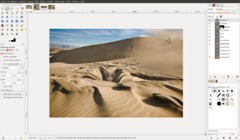
desert_sands.jpg
The workflow of a good photo manipulation is somehow similar to video production. There the steps are separated in this way:
Idea / script
In our case the idea came up when looking for a nice new desktop wallpaper. On flickr.com I found this desert photo and when looking at it the idea of letting a man sink into a sandy abyss came up to me.Pre-production
This would be the step to collect all the images that are used for the editing. I was again searching flickr.com using the extended search for editible photos under a CC licence.Production
This is the actual work of the photo manipulation itself (steps 2-18).Post-production
After the main work the image is getting its final touch, like color corrections and adjustments, sharpness, noise etc… this is shown from step 19.Marketing and distribution
Of course totally free and exclusive on gimpusers.com ;)Enough theory, lets get it on! Rightclick the download link at the beginning of this step and save the picture – then open it in GIMP. The image was made by Pedro Szekely
-
2
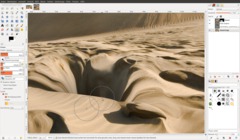
Creating the abyss
Duplicate the background layer and work on the upper one.
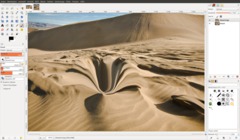
We’re using the IWARP filter under Filter / Distorts / IWarp.
There please set the mode to shrink. The following values depend on the size of the filter window (under MS Windows the filter doesn’t allow resizing, isn’t it? – so for that OS you need to adjust the values (use smaller ones). Deform radius: 60, deform amount: 0.2
Now find a part of the image where you want the create the abyss. Place the mouse below the chosen spot and hold the left mouse button while moving the mouse a few times from left to the right. Maybe you have to reset the filter and try it again until the result is looking nice. Take your time on this step – it is important!
-
3
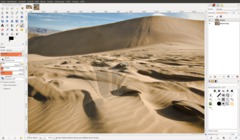
I’ve worked with the filter again – this time I used the “grow” mode and clicked the sand around the hole sometimes in a circle direction to get some small hills of sand around the hole.
-
4
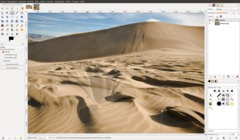
Now move the underneath layer to the top and set the opacity of the layer to 75%. Now you should see the hole a little bit.
-
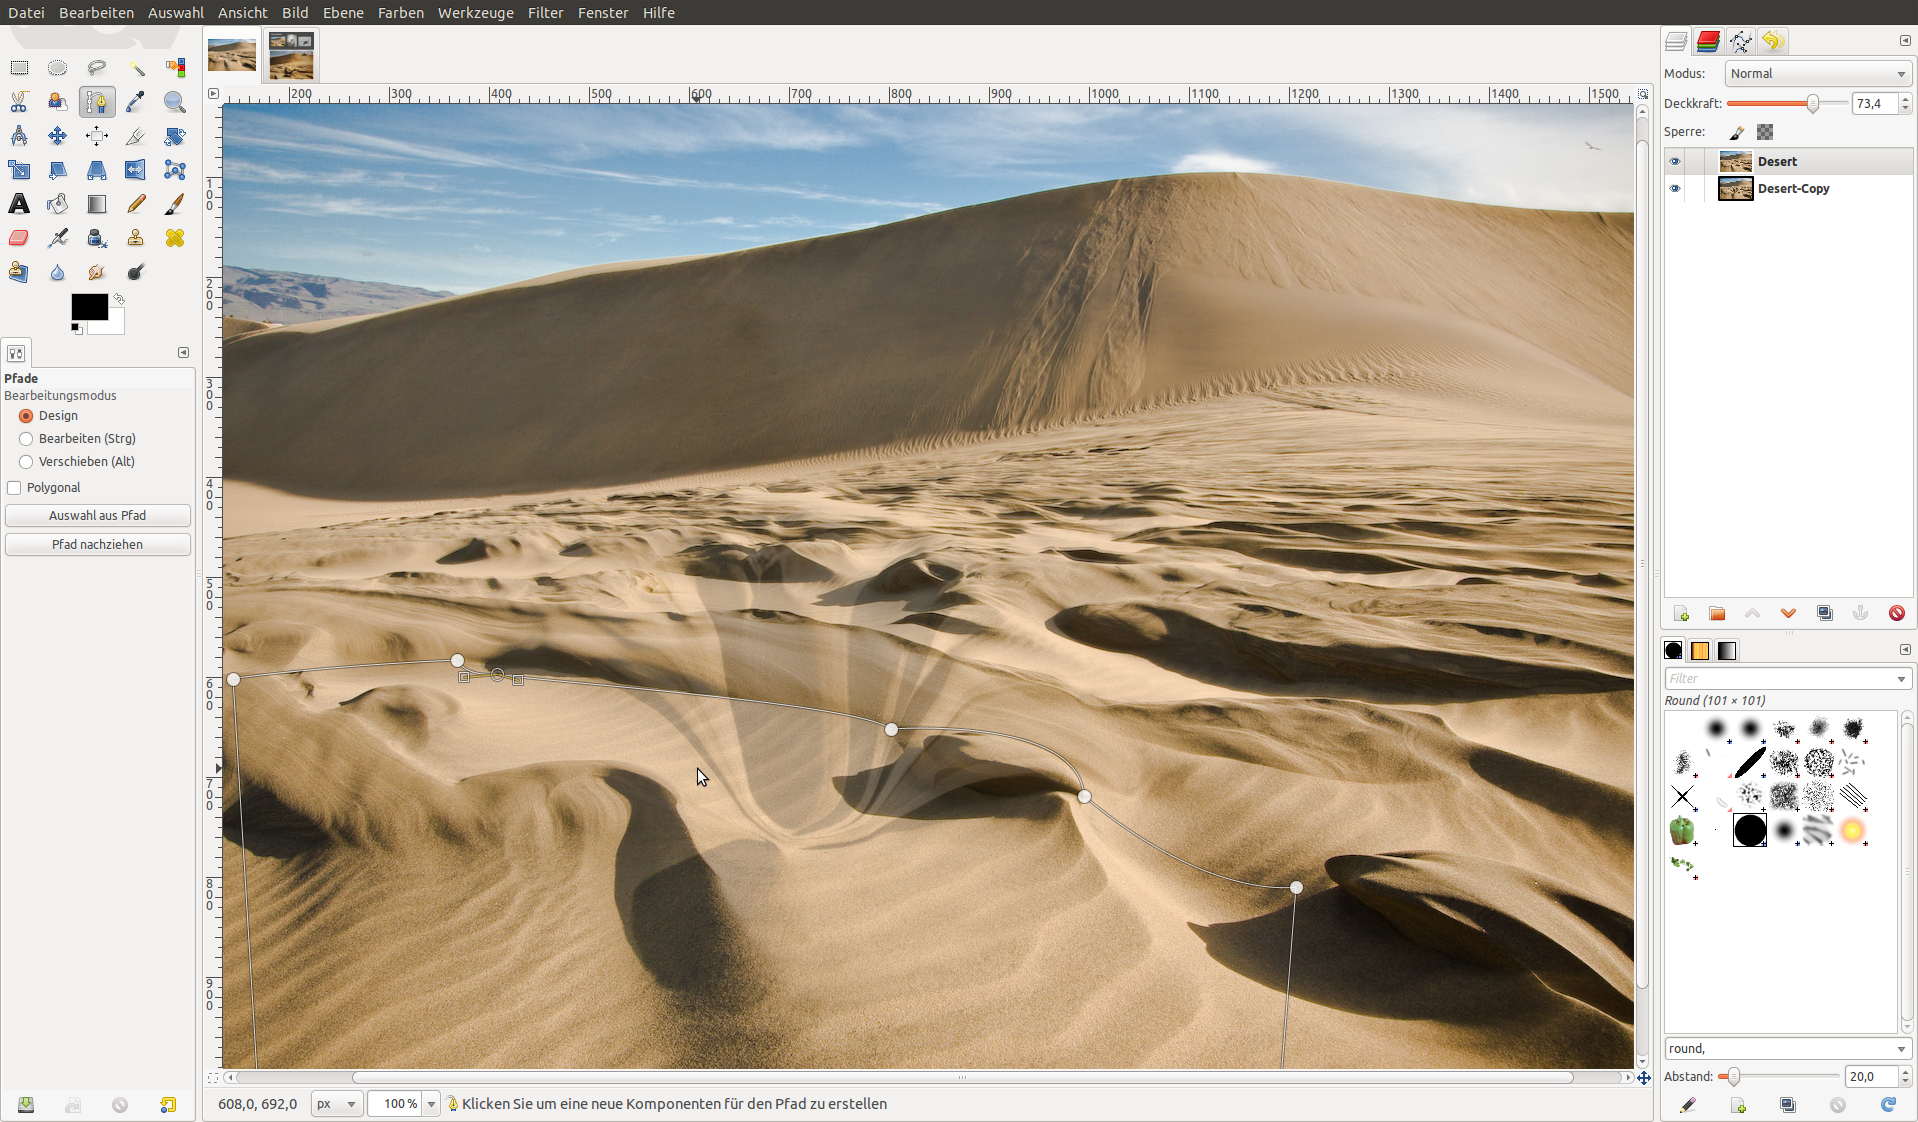
5
Use the paths tool now. Make a path around some part of the sand that should overlap (from the viewer of he scene) the sandy hole.
-
6

Create a selection from the path by pressing ENTER/RETURN – then apply a new layer mask by LAYER / MASK / NEW LAYER MASK: Choose “selection” from the pop up and add it. Now deactivate the selection by pressing CTRL+SHIFT+A and set the opacity back to 100%.
-
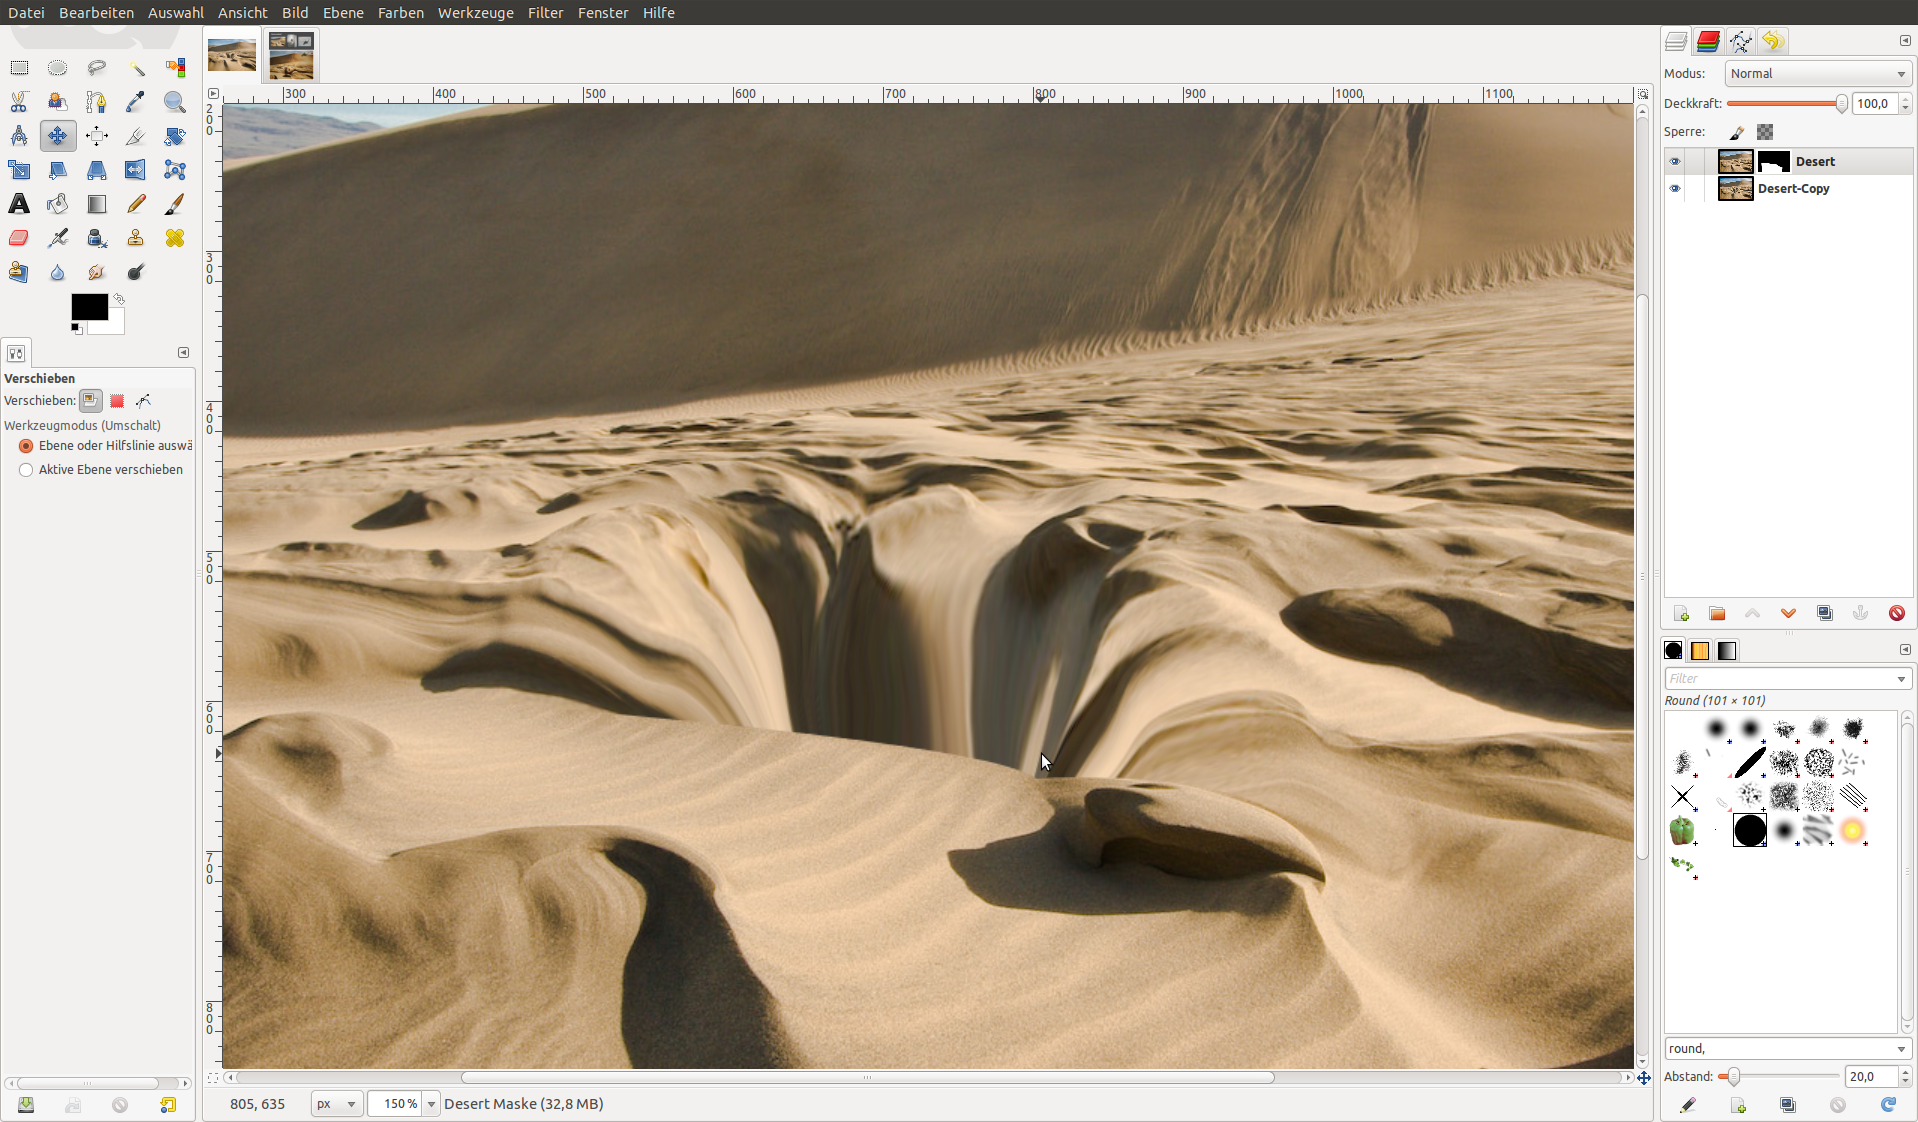
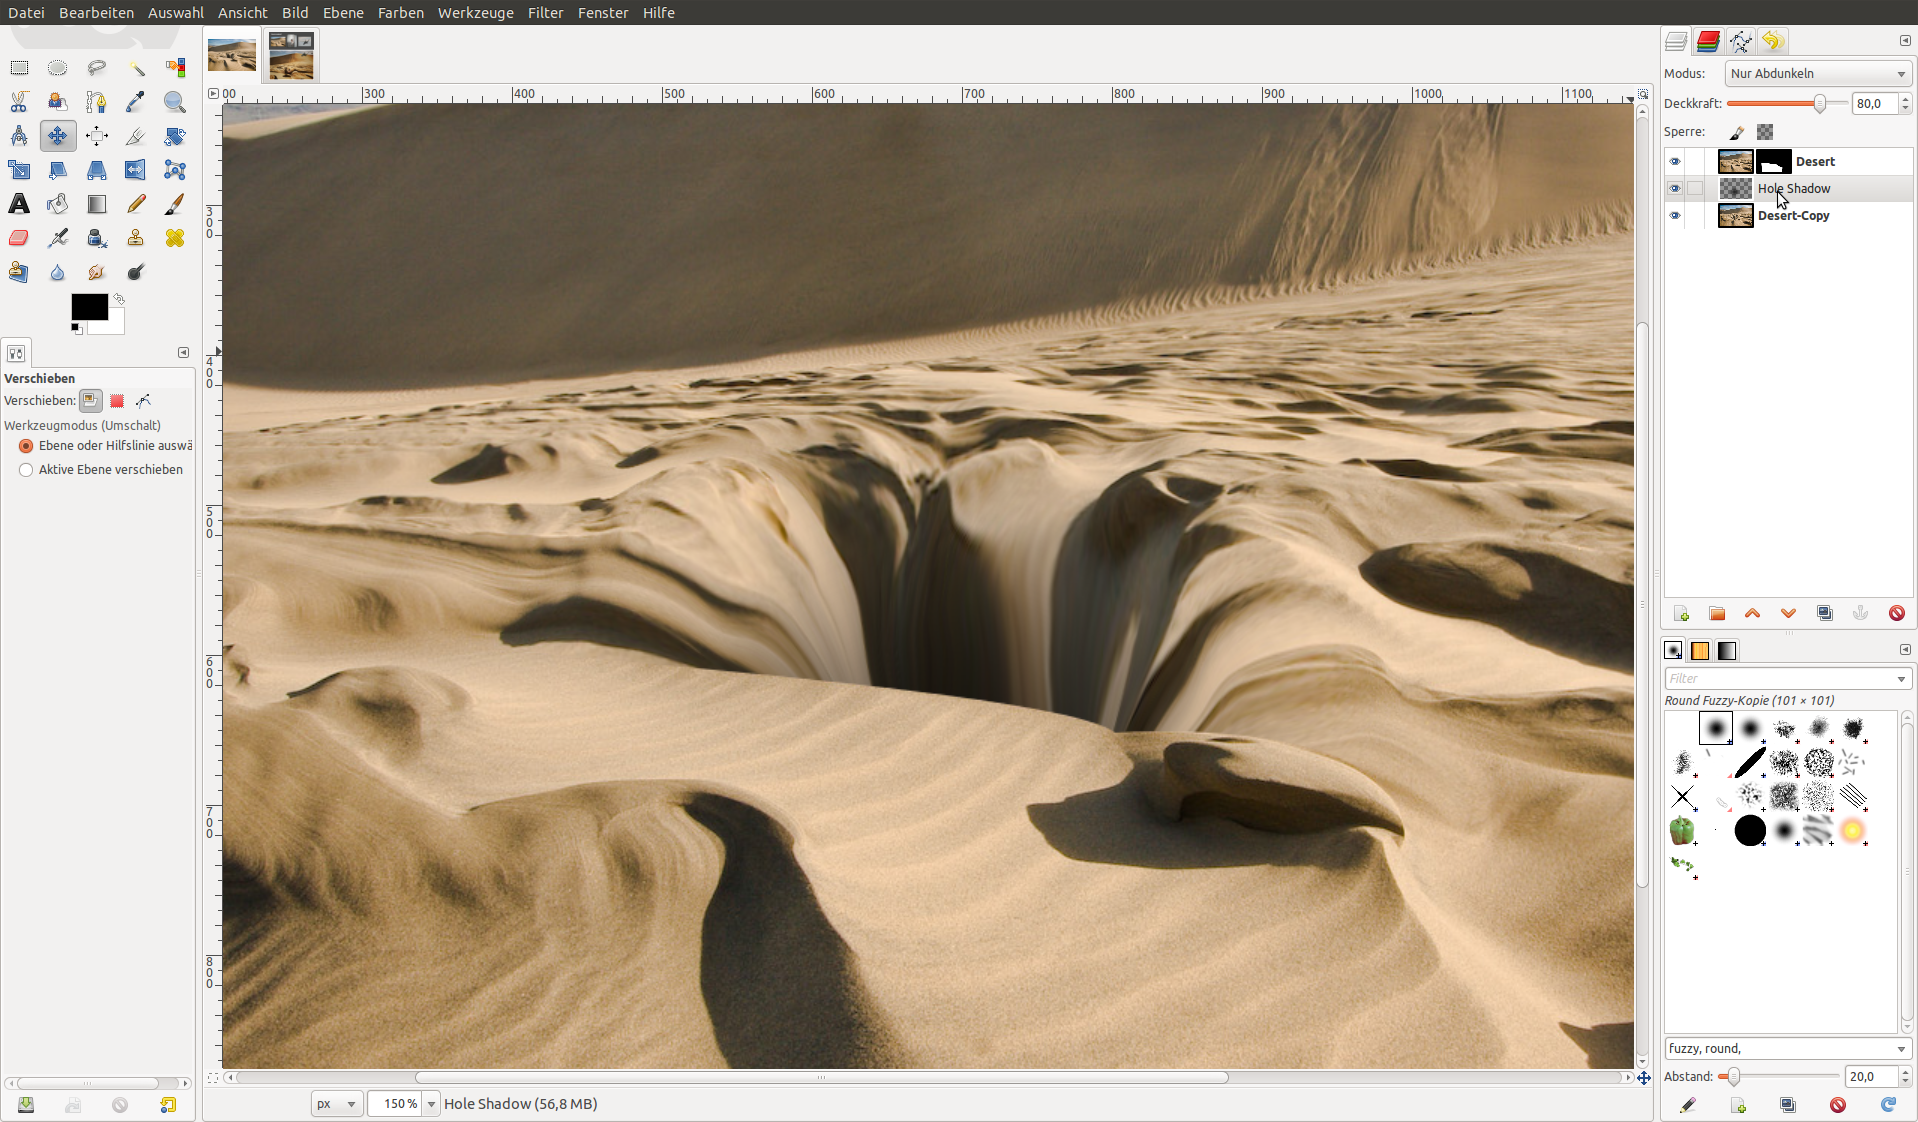
7

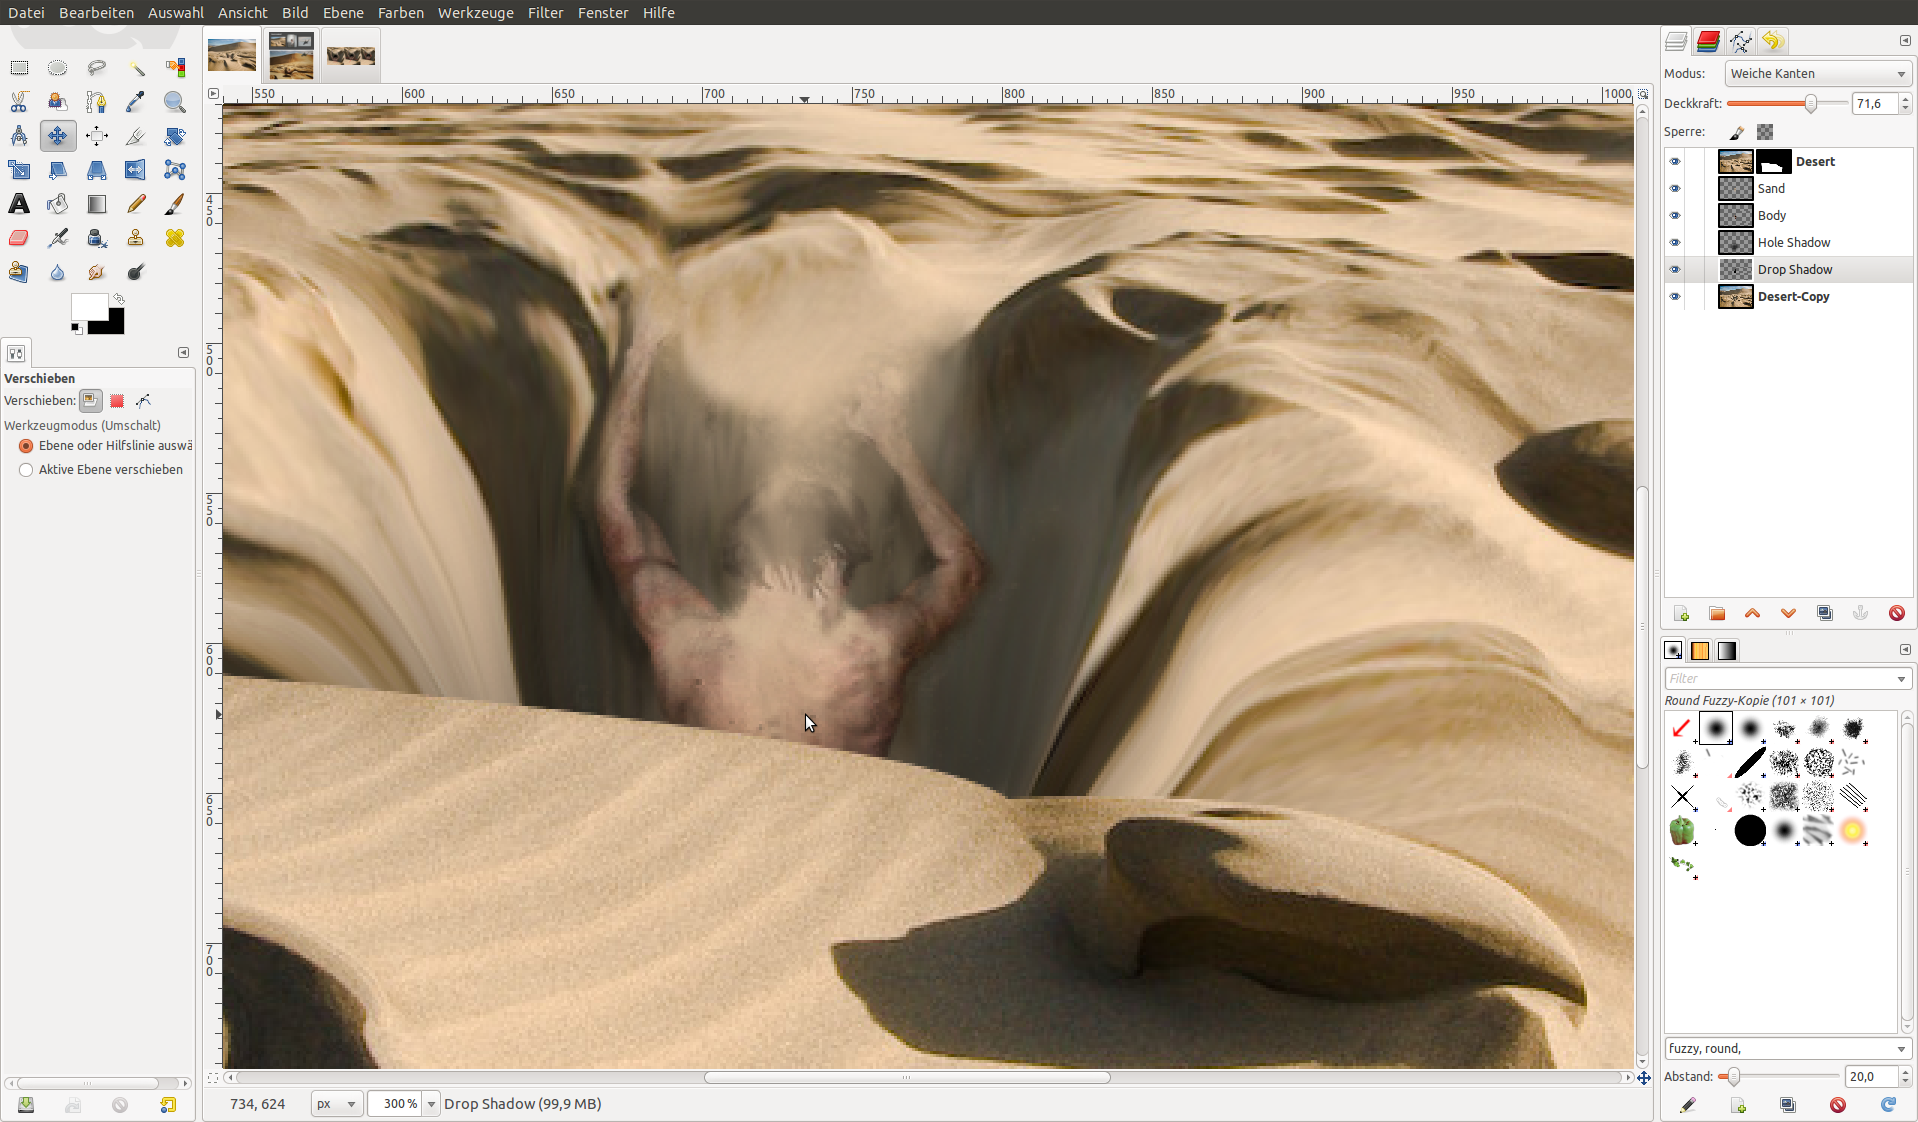
To make look the hole deeper, more like an abyss ;), we’ve to add some shadow.
- Create a new layer between the 2 desert photo layers
- Use the Paintbrush tool, use a soft big brush and black as foreground color. Then press the canvas once to create a large soft black circle on the layer. Set the opacity to around 60%. Then set the layers mode to “Darken only”. -
8
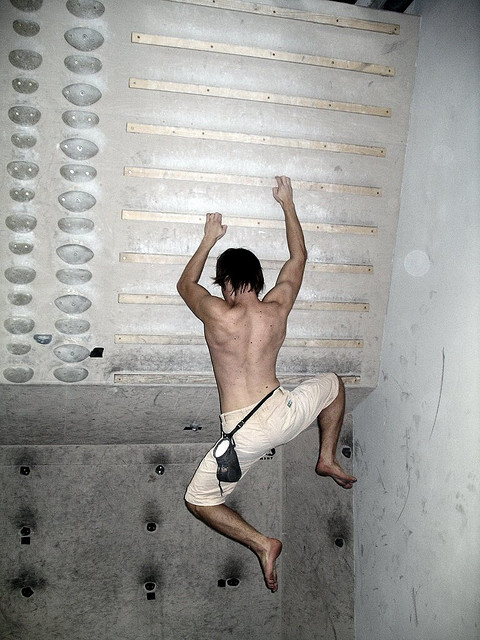
 climbing.jpg
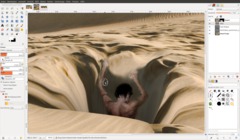
Letting a human sink into the sand
Next we’ve to create the illusion of a man sinking into the abyss that tries to hold out for help with his last bit of strength. This time i was searching for “climbing” and I thought the picture attached to the step would fit my needs.
The photo was taken by Michal Macura
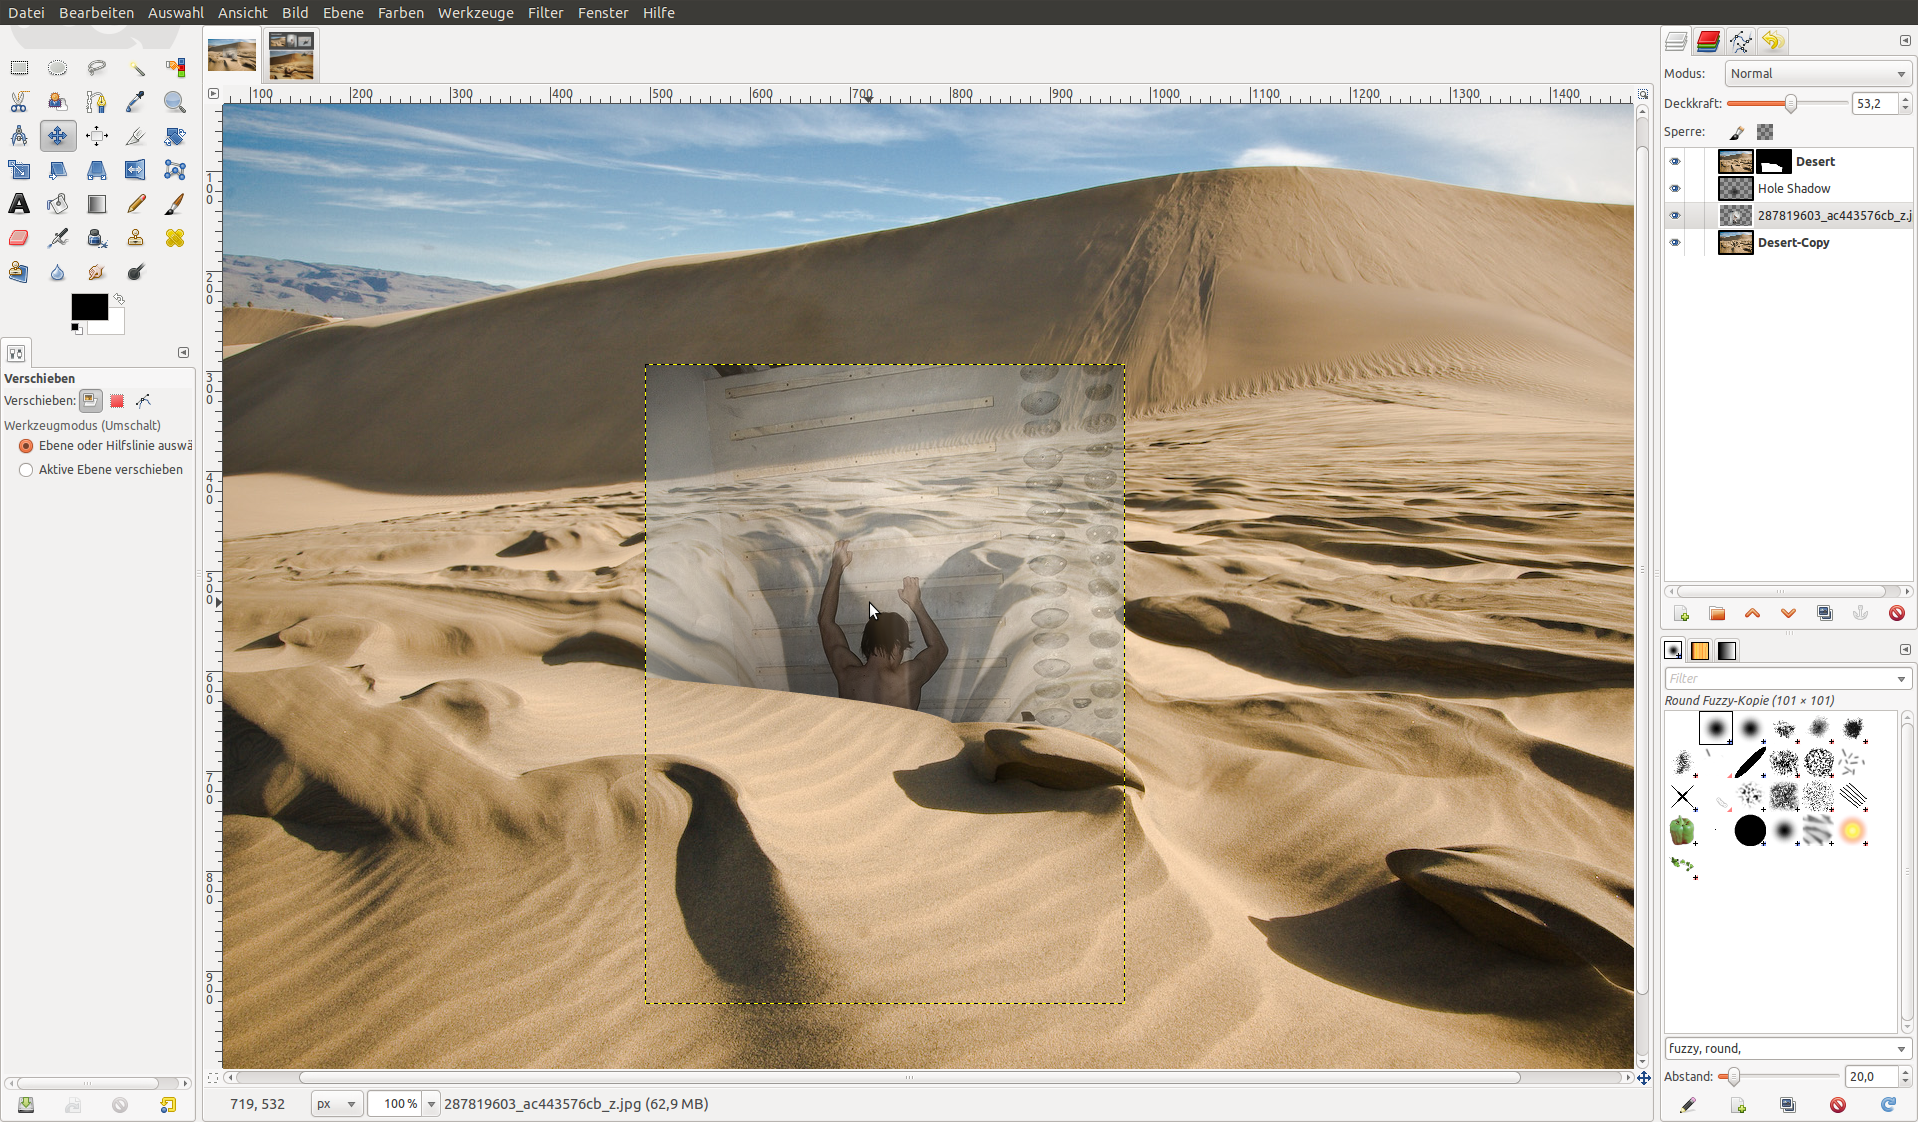
Make the layer semitransparent and move the boy to an appropriate part of the hole where it looks good. I flipped the photo horizontally.
-
9

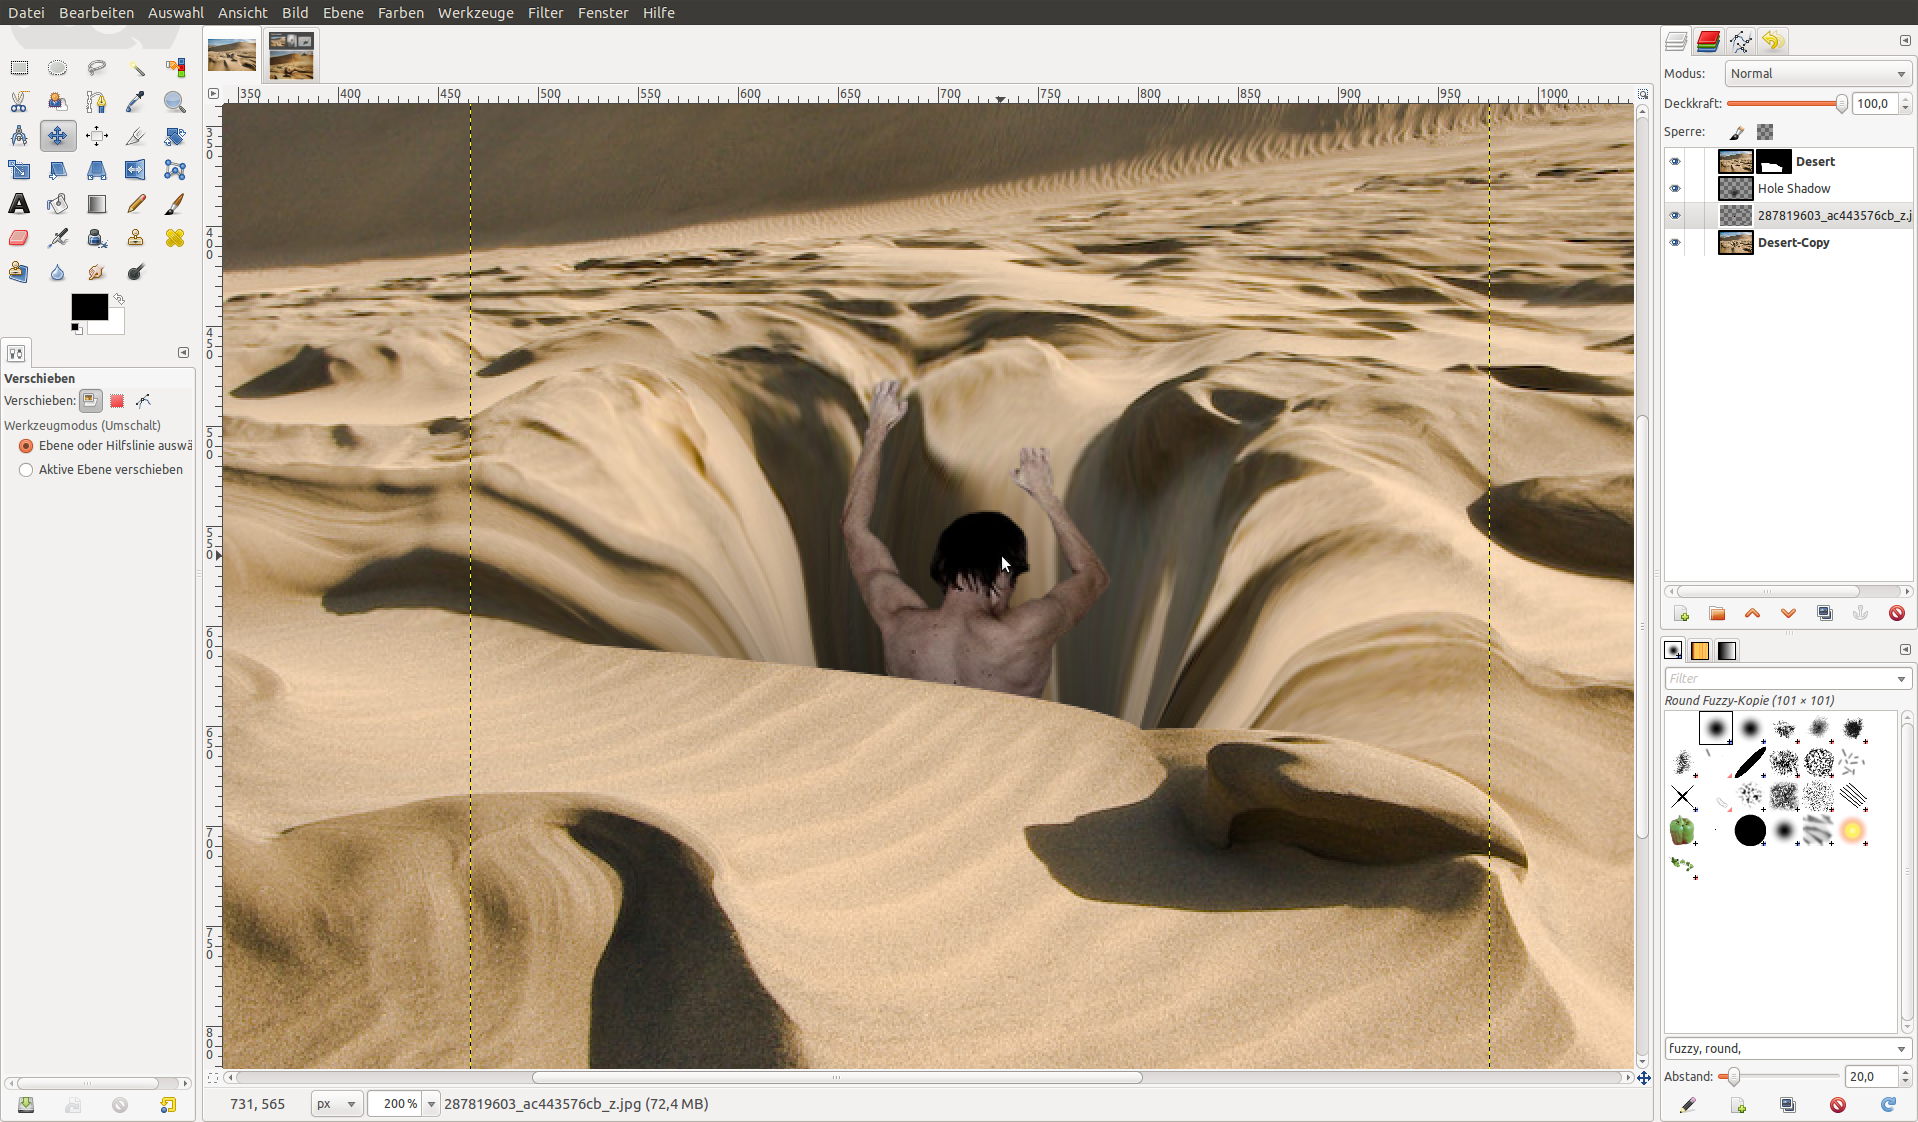
Mask the climber now. We only need some upper part of the image – I did this by just using the free select tool by havin zoomed in very much. Select the climber by placing a selection point by point around his body. When coming to the first point complete the selection and inverse it (Selection / Invert) and delete the rest of the image.
-
10
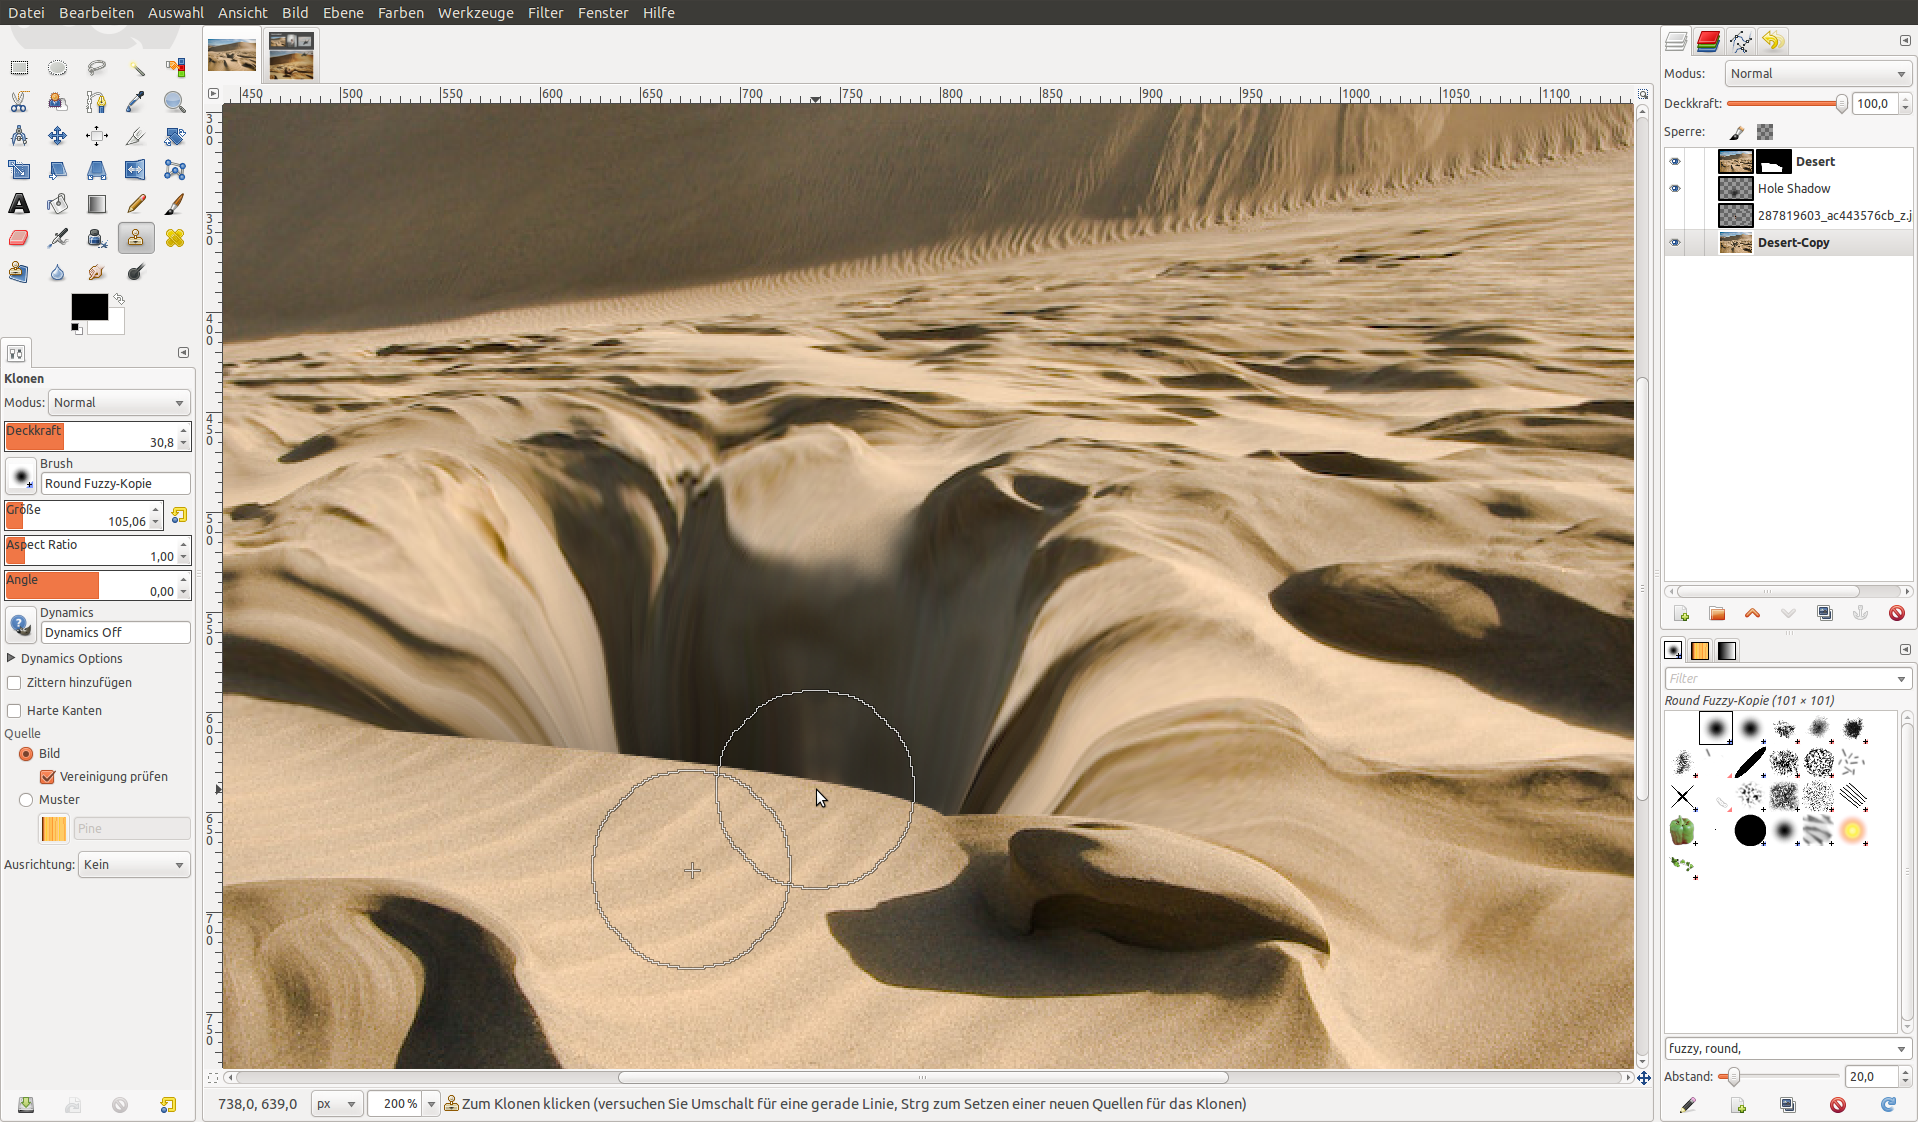
Now make the layer with the man invisible (click the eye symbol). Use the clone tool now to adjust the too bright parts of the sand in the hole which theoratically cannot be reached by the sun. Paint some shadowy parts on the bright ones to make these parts darker.
This does not have to be too exact, because most part of the hole is overlapped by the man anyway.
-
11

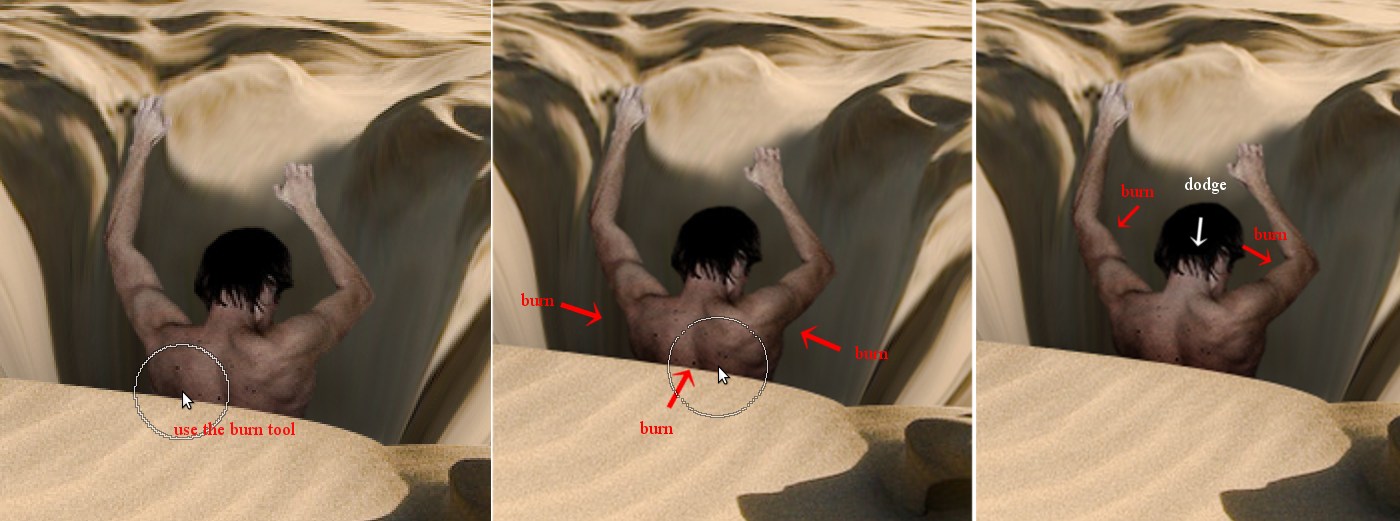
I have then worked on the layer with the man and used the Dodge/Burn tool to make the back of him a little darker. Set the mode to “burn” and choose a brush in the size of his head. Click some times at the border of the skin to darken the parts evenly. At the neck use the dodge mode and click only once to make it a bit brighter (this is in advance for some sand covering his neck afterwards).
-
12

In order that our survior not just “hangs around” I’ve now covered some parts of his hands and body with sand – that gives us a more realistic looking scene. Use the clone tool again and use the “acrylic #3” brush. Set the opacity of the tool to 25%, also set “sample merged” (this option allows you to clone from anything you right see, not just from the layer you’re working on).
- Create a new layer called “sand” and paint the cloned parts onto this layer. Paint above some parts of his body. Change the source point of the cloning appropriate to the parts you’re currently working on (ie use dark source sand when painting around his back).
-
13
After that I chose a bigger Acryl#3 brush and cloned some sand around his head. I used the smudge tool then with a very small acryl-brush to smudge the sand I just created on his head and neck. Important was to smudge only from top to bottom to create the illusion of sand just falling down. I’ve repeated this step sometimes until I was fine with it.
-
14
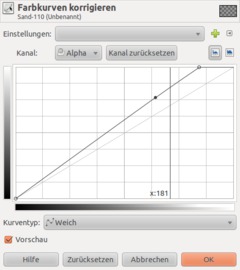
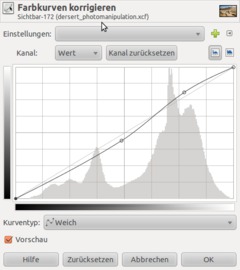
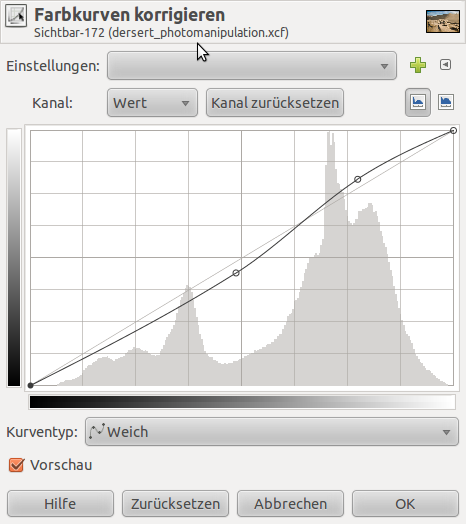
If you want to make the sand look like a little more you can use Colors / Curves and set the channel to alpha, the apply the curve shown in the image. This makes the semitransparent parts of the sand look more visible.
-
15

Now we’re making some more shadows to create a “deeper” feeling of the body. Select the body layer with the climber and choose Filters / Light and Shadow / Drop shadow: -10 / 8 / 5 – Opacity 70%. Set the layers mode to “Overlay” and move the layer a little to the bottom left (or where it looks realistic).
-
16

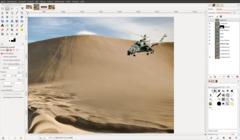
Rescue is on the way!
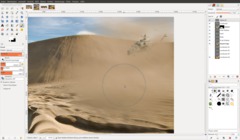
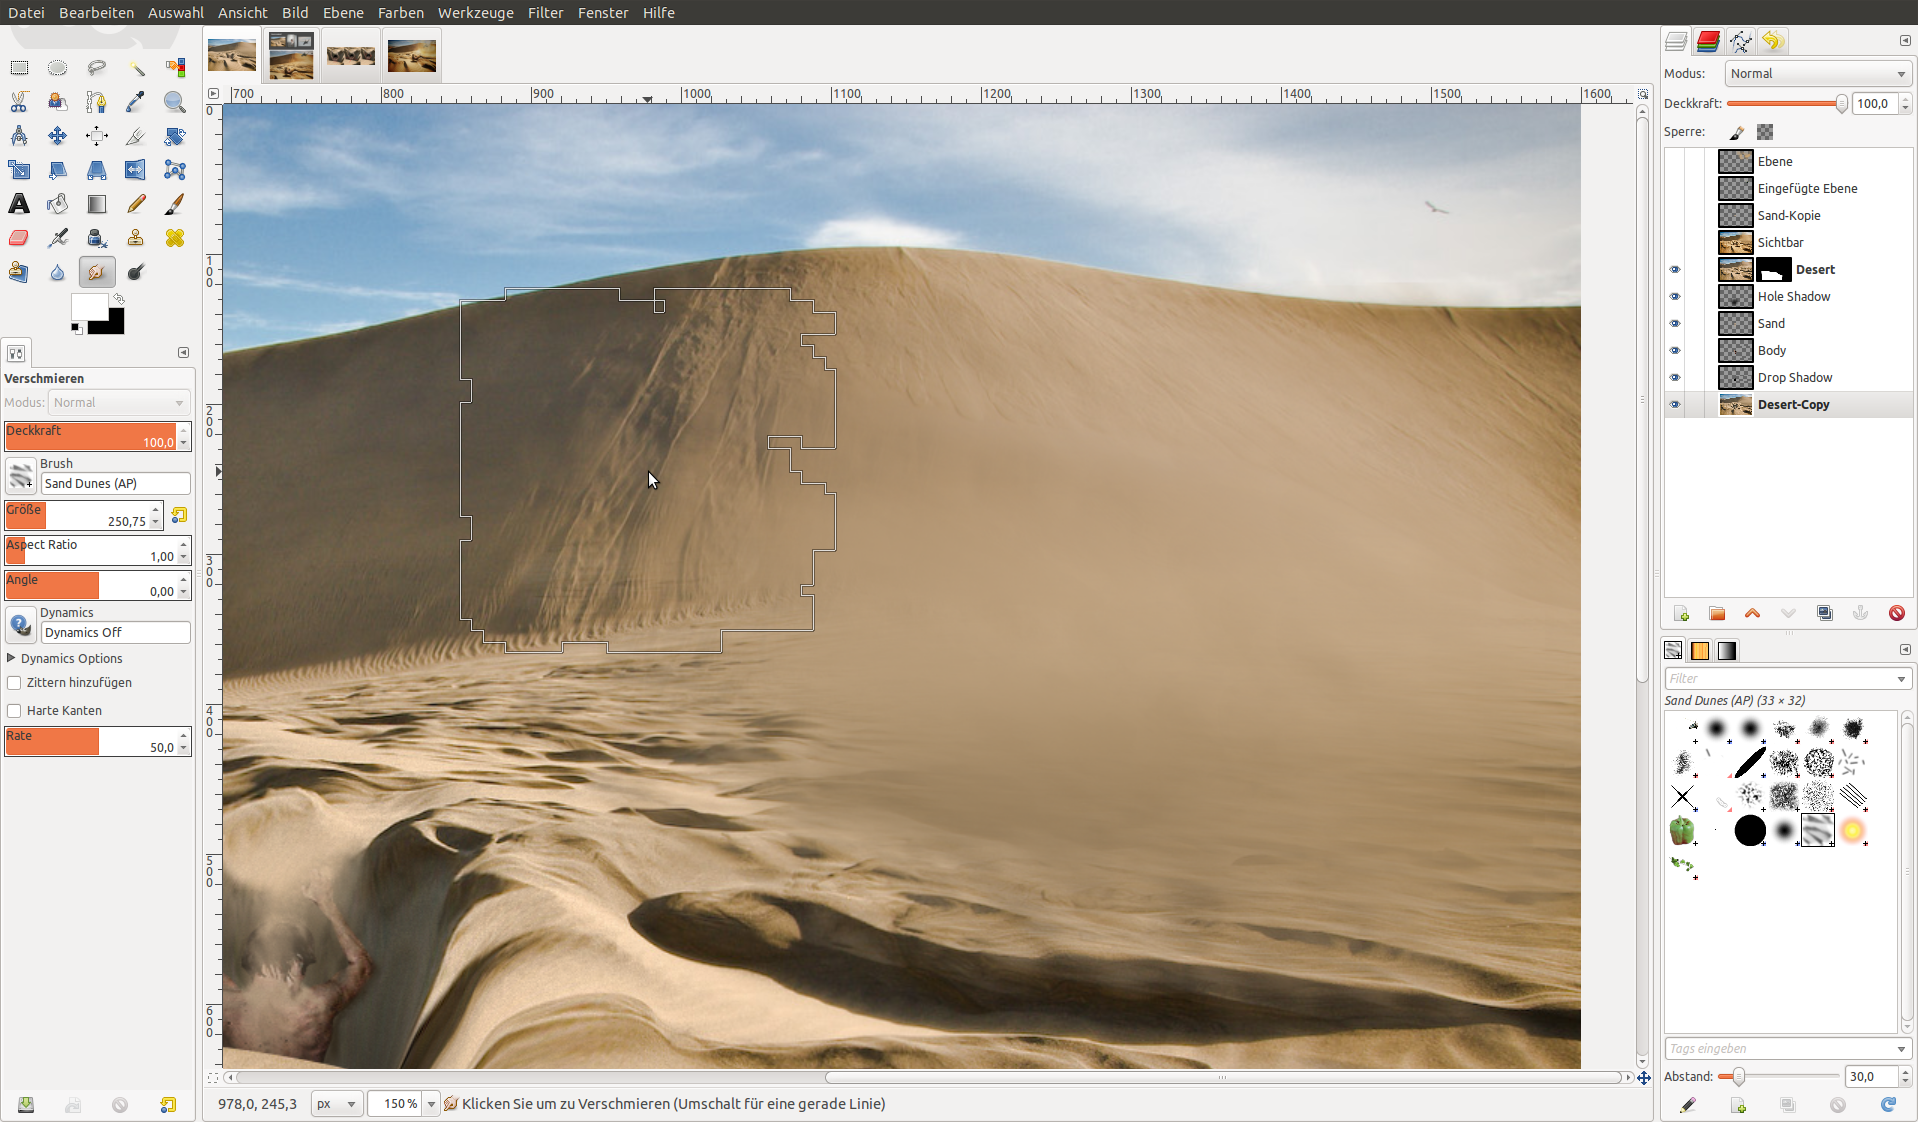
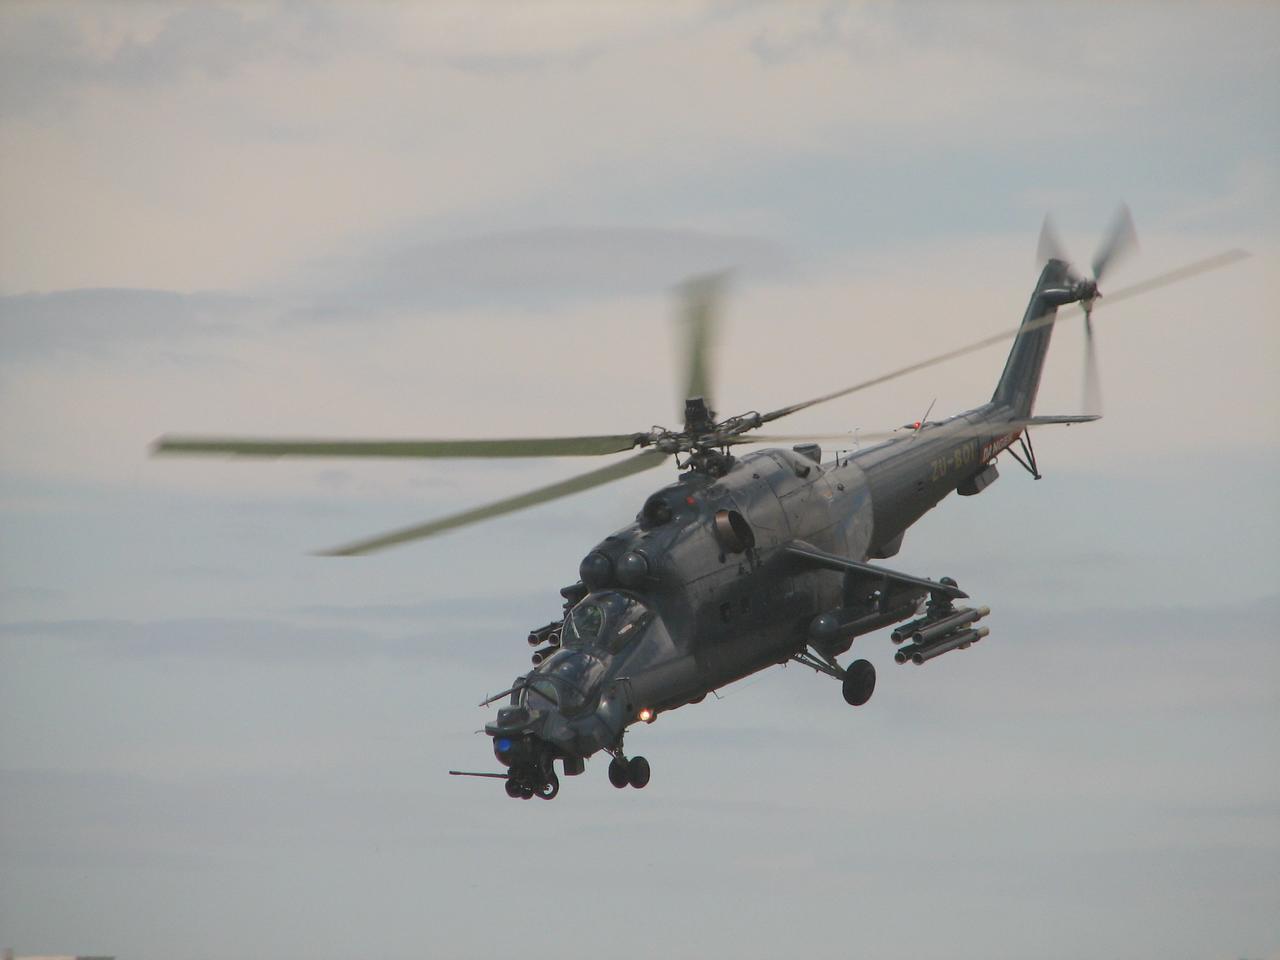
Now we want to give our potential survior a flicker of hope by letting a chopper (it is a russion helicopter btw) arrive. We want to create a dense sandy cloud at the ground.
For that step I used the “Sand Dunes” brush and set the size to 250px. Then I used the Smudge tool with 100% opacity and smudged the sand on the right – currently we’re working on the background desert photo.
-
17
 helikopter.jpg
Save and open the helicopter image attached to this step using File / “open as layers”. Mask it correctly (you maybe want to read the Masking hair with fine strands tutorial to get an excellent masked chopper :) ).
I’ve done this here, scaled and rotated the helicopter.
The photo was taken by Danie van der Merwe
-
18
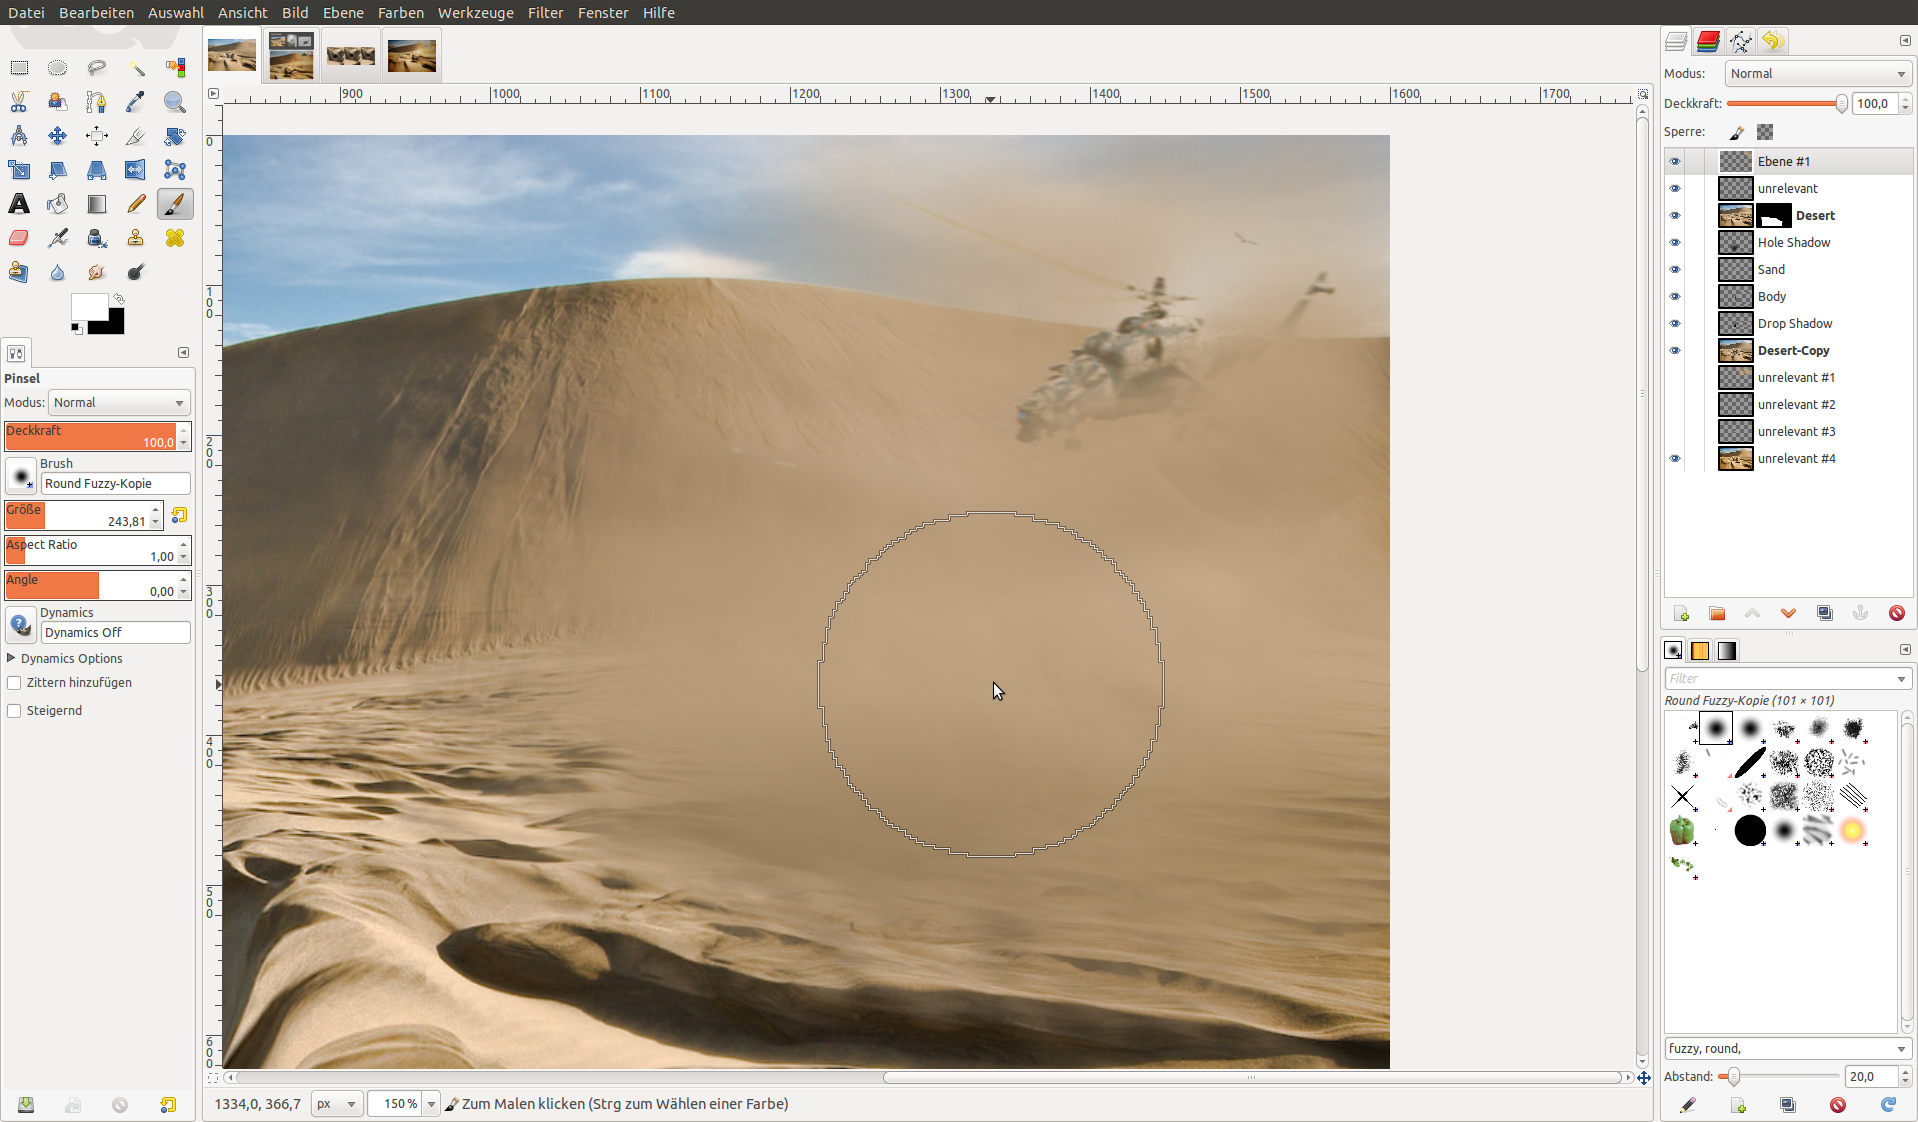
Create a new layer above the helicopter and clone some sand over it to make it look like being right in that dense whirled sand.
-
19
Post-production
We’re now done with the important scene of the photo manipulation :) The next steps are important to get a perfect looking image where you don’t see the manipulation because of different sharpness or noise of the image.
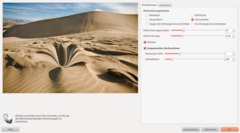
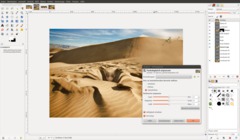
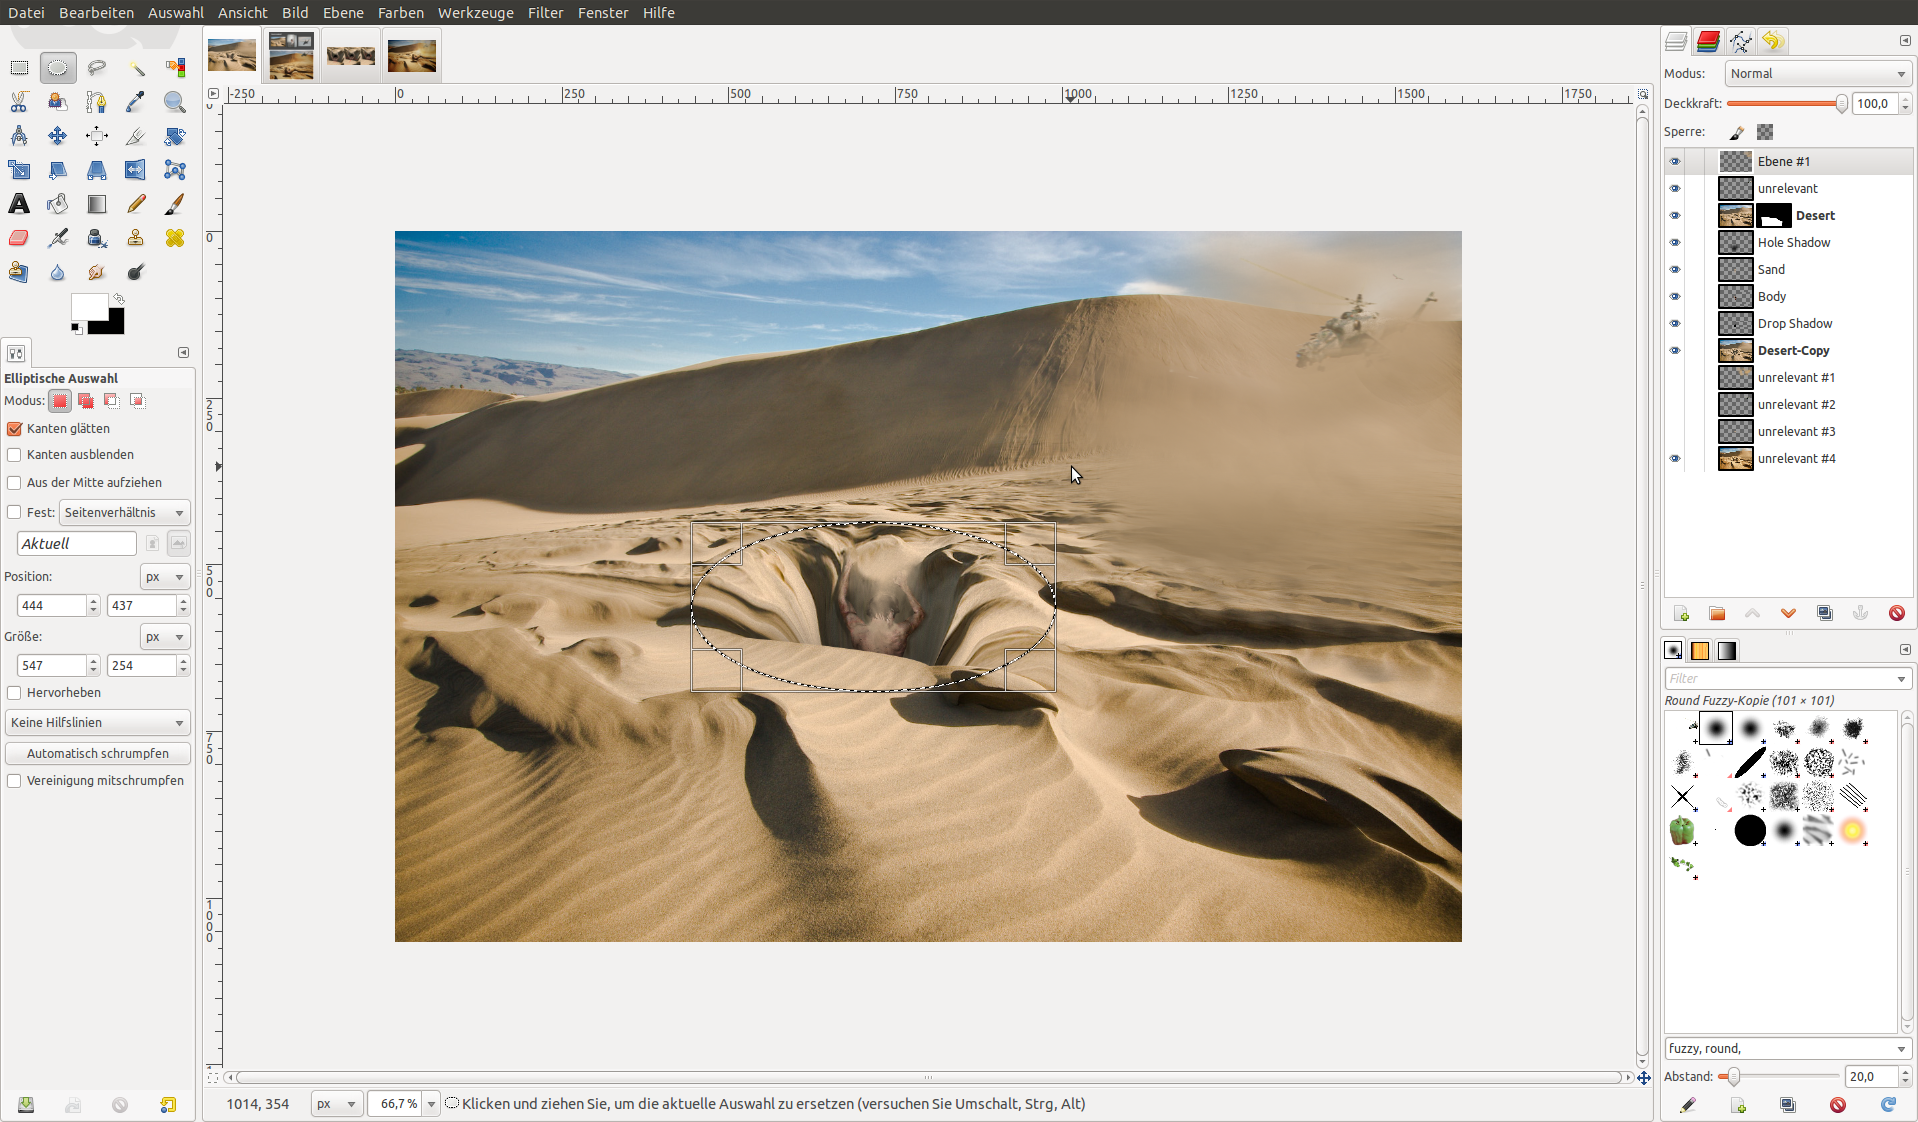
You can see differences in noise when looking closer to the abyss we created. The spots there are pretty smooth, no noise at all. Choose the desert photo layer (at the very bottom), then make an elliptical selection around the abyss. Now choose Selection / Feather: 250px and apply Filters / Noise / RGB-Noise using the values on the image.
Make that noise also for the layers with the cloned sand on the body, the helicoper, and the sand in front of the helicopter. Just press CTRL+F to repeat the noise filter on these layers.
-
20
I sharpened the body layer to make the muscles of our survivor look tougher: Filters / Enhance / Unsharp Mask: 5, 0.5, 0. After that apply Filters / Enhance / Sharpen: 20.
-
21
Right-click the layers dialogue and choose “New from visible”. On that newly created layer (where everything you just saw is merged onto a single layer) apply a slight S-curve to enhace contrast a bit.
-
22
Then I changed the overall colors to make the image look a little more interesting: Colors / Color balance:
Shadows: 5 / -5 / -10
Mids: 0 / 5 / -10
Highlights: -5 / -5 / -5 -
23
As a final touch, I created a new layer and used the blend tool to darken the 4 corners of the image. To do that set the blend tool to Shape: “radial” and as gradient use the “FG to transparent” with black color. Inverse the gradient and drag a gradient from the center of the image to one of the corners.
Thats it! Hope you like the tutorial ;)


Comments
Post your own comments, questions or hints here. The author and other users will see your posting and can reply to it.
Of course, you can also ask in the chat.
Subscription management
Please log in to manage your subscriptions.
New comments are disabled because of spam.