


Tutorial: Masking hair with fine strands
 is licensed under a Create Commons Attribution-Non Commercial 3.0 Unported license.")

Motivation
There are many ways of masking objects with GIMP. This tutorials shows a way that produces good results for fine details like strands of hair, especially for portrait photos with a simple background.
Tutorial details
- Category: Techniques
- Time to reproduce: ≈30.0 minutes

- Tested with GIMP 2.6
-
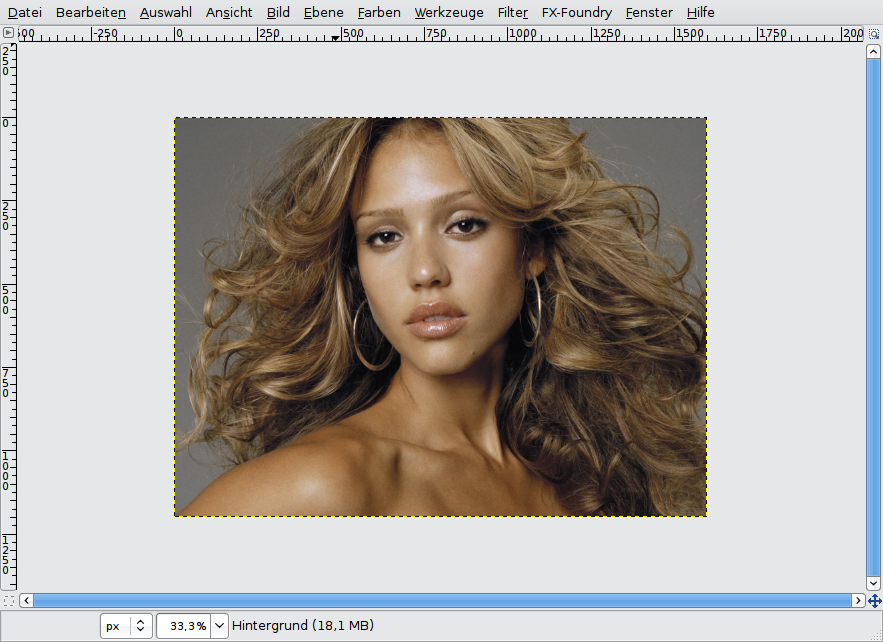
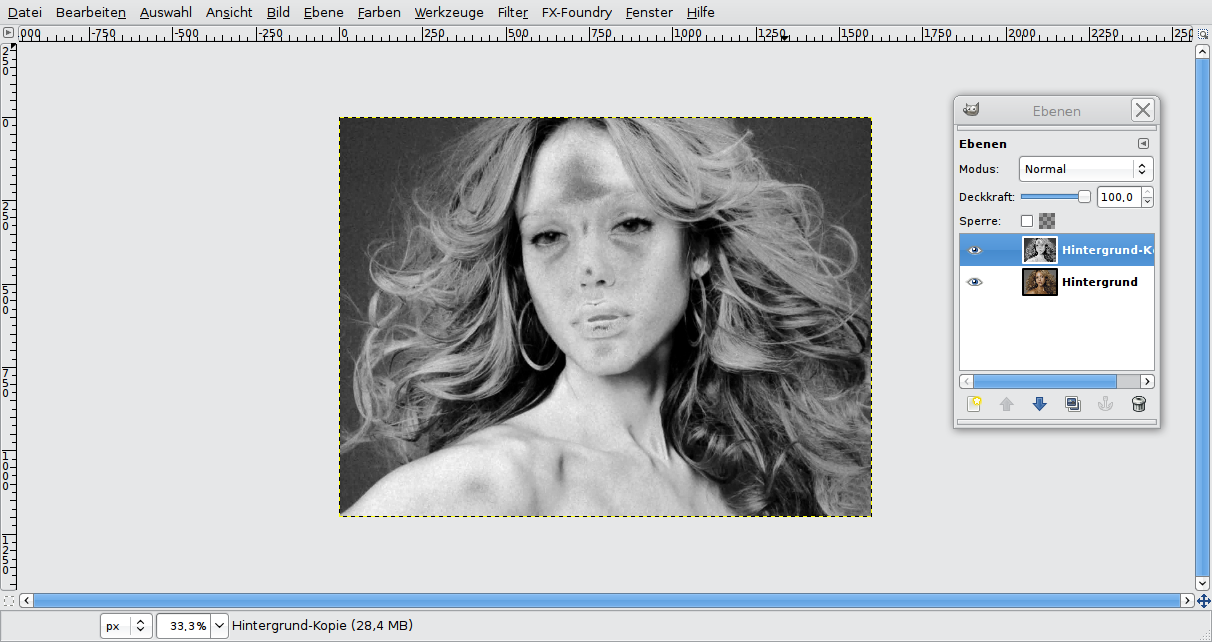
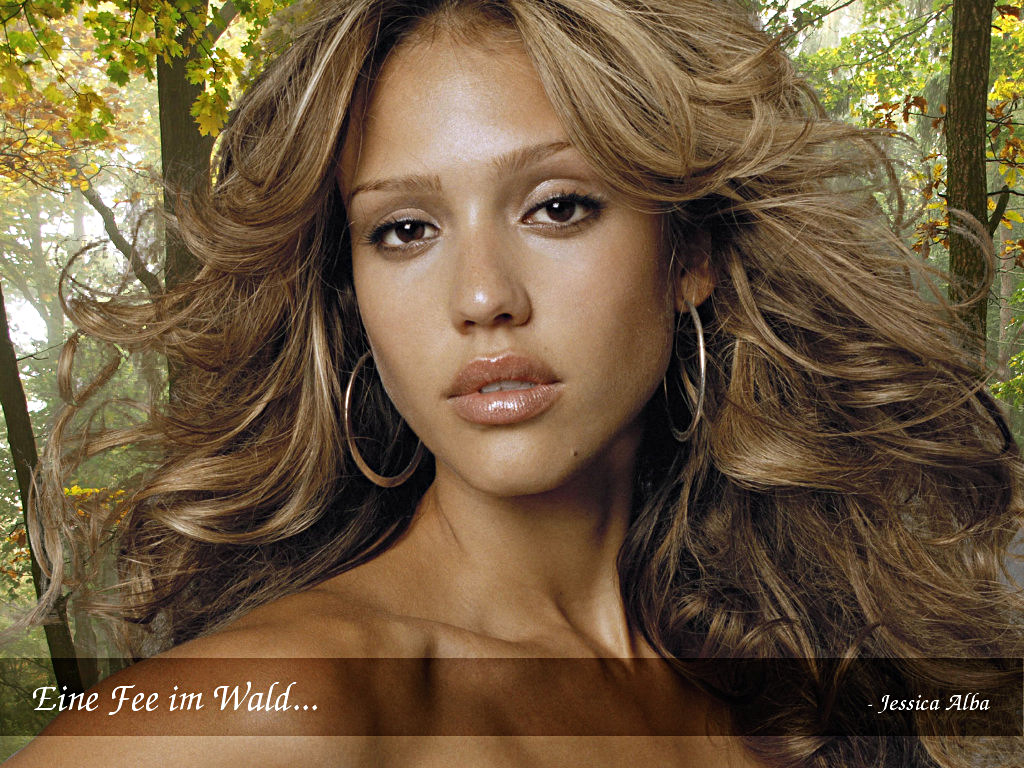
1
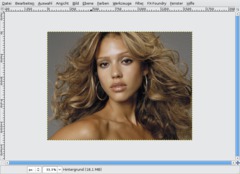
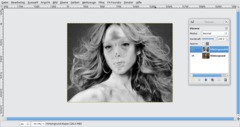
This masking technique is good for strands of hair or to replace the sky.
On the image, you can see the fine hair strands and the mat gray background.
-
2
Now we want to create a detailled layer mask that contains all fine details of the hair.
To do so, we have to create a copy of the background layer first:
Click on the “Duplicate layer” button in the layer dialog or press Ctrl+Shift+D.
-
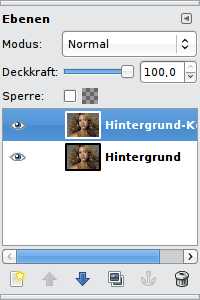
3
The next step is important: We reduce the layer’s color by disaturation. The best way to do so is using the channel mixer:
- Colors / Components / Channel Mixer
-
4
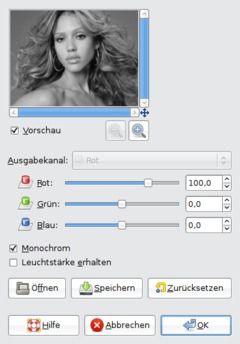
Now click on “Monochrome” so the image will become grayscaled.
-
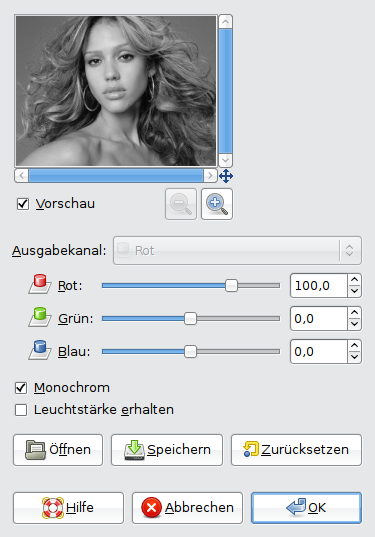
5
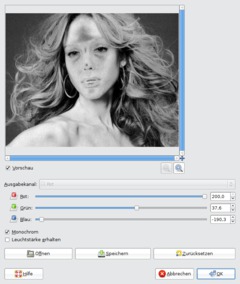
You can see in the preview that the image doesn’t have colors anymore.
Now it is important that we achieve a good contrast between the background and Jessica’s hair.
For this you have to find out the individual settings for each image. There are no working generic settings. Pay special attention on the fine hair parts. Try to make them light gray while the background (here: gray) should become darker or stay at least the same. It doesn’t have to be perfect because in the next step, we’ll do some fine-tuning.
The fine hair details should NOT blur with the background. It doesn’t matter if the image becomes granular or if the face looks strange (like on the screenshot). Only the HAIR matters.
I have also amplified the red color tones (the hair contains many of them and become brighter) and reduced the blue tones so that in sum the background doesn’t become brighter. I slightly amplified the green part. The green channel often contains details and contrasts, so the hair is masked even better.
-
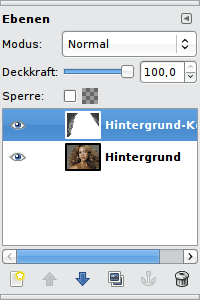
6
Now my image looks like this:
-
7
Now we paint the parts that don’t need masking with white (the skin and the hair where’s no background).
- Select the Paintbrush tool
- Use a big brush size (relatively hard with some soft edge)
- Choose foreground color: white
- Make the parts whiteHint: Choose a very hard brush for the region at the left bottom (shoulder skin). It’s often useful to combine different brushes.
Then start painting the regions that don’t contain details revelant for masking. You can paint them roughly/quickly.
Now my image looks like this:
-
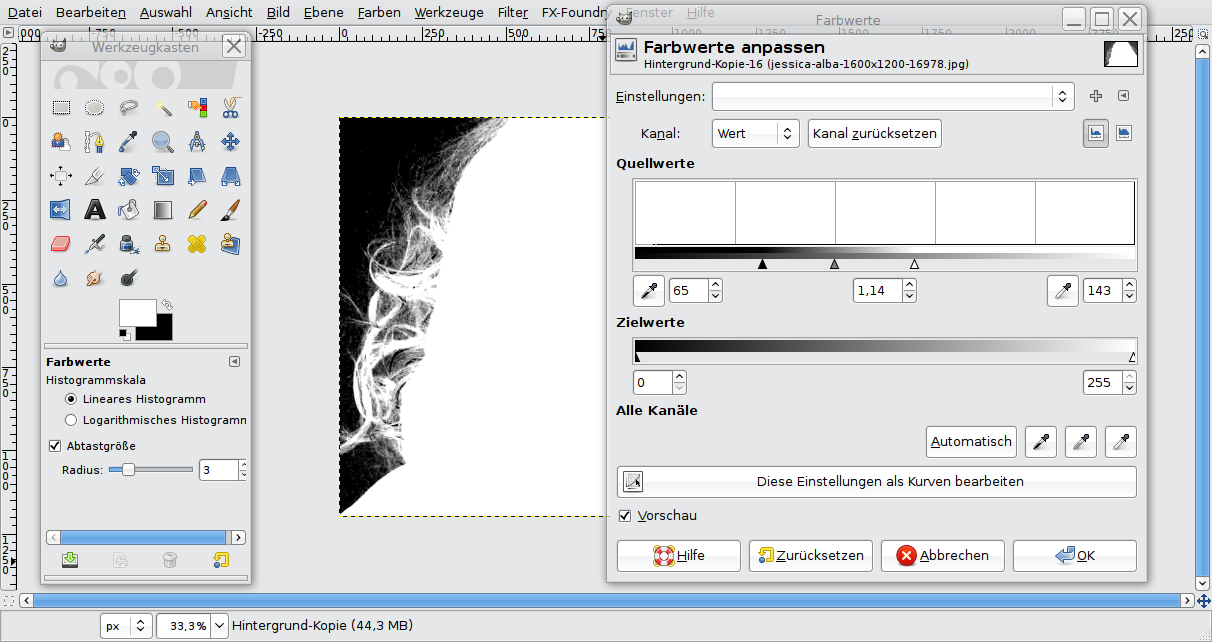
8
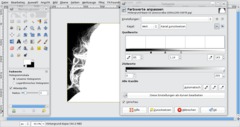
Now we adjust the gray tones of the picture. For this it is important to make the background completely black while the hair should become (nearly) white. In the next step everything that is white will become visible and black regions will become transparent.
Choose: – Colors / Levels
In the dialog, you can find three moveable control triangles. The gradient from black to white represents the amount of different gray tones in the image. If you move the left control triangle towards the center, the amount of black will be reduced and become a dark grey. The right control works vice versa. The middle control is for fine-tuning. You can use it to make the remaining grey tones a bit brighter or darker.
As you can see in the preview, the bright hair strands have become even brighter while the background has become darker.
-
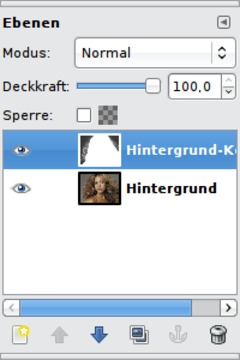
9
We have a perfectly adjusted grayscale layer now that determines which regions become visible or transparent.
Now we have to create a layer mask and copy the details from the grayscale layer to this mask.
-
10
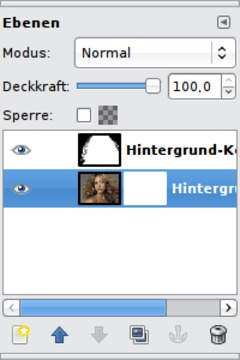
- Select / All (oder hit Ctrl+A)
- Edit / Copy (or hit Strg+C)
- activate background layer
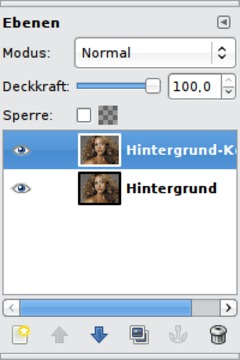
- Right-click into the layers dialog: “Add layer mask” (White) -
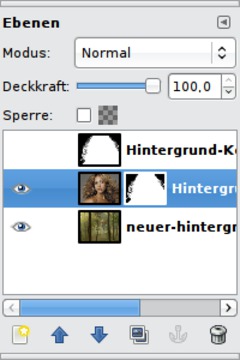
11

- Click on the small white area next to the background layer in the layer dialog to ensure that you’re working on the mask and not on the picture itself.
- Edit / Paste (or Ctrl+V)
Important: After that, the pasted layer is a floating selection. To fixate it on the layer, use the “Anchor” button of the layer dialog (at the bottom, 2nd from right). Your layers dialog should now look like this:
-
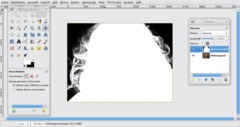
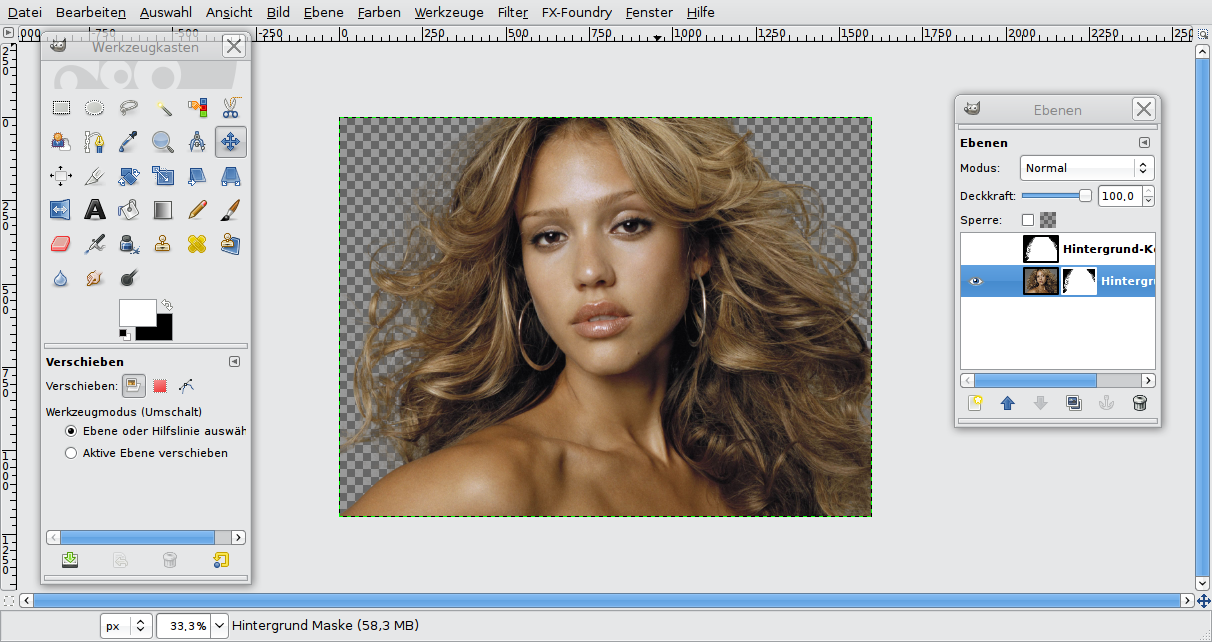
12
Click on the eye symbol next to the grayscale layer above. Then the layer will disappear and the hair details should be visible on a transparent background.
-
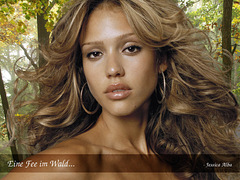
13
At the end, we want to insert a new background and do some final adjustments.
Save the “wood” background (you can find the download link at the beginning of the tutorial), choose File / Open as Layers and select the wood.
It should be an own layer in the image now. In the layers dialog, move the wood layer to the bottom.
-
14
Now it’s nearly perfect, but we can do even better (because when you zoom in, you can see some remaining gray of the original image background).
We can improve this with some color adjustments again:
- Select the layer mask
- Colors / LevelsThe aim is to get the hair strands even darker (i.e. more transparent). So I move the left control to the center. You can see the results in the preview immediately.
I hope you could learn something and it was fun for you.
Ideas for more improvements:
- On the layer mask, you could work with light/dark gray brushes to do some detailled corrections, for instance to remove regions that are not so beautiful.
- Use the Smear tool to “melt” the foreground with the background in order to remove too hard transitions.


Comments
Post your own comments, questions or hints here. The author and other users will see your posting and can reply to it.
Of course, you can also ask in the chat.
Subscription management
Please log in to manage your subscriptions.
User rating
This topic (Masking hair with fine strands) has been rated 4.2/5.0.
New comments are disabled because of spam.