Text gets enlarged automatically upon ...
This discussion is connected to the gimp-user-list.gnome.org mailing list which is provided by the GIMP developers and not related to gimpusers.com.
This is a read-only list on gimpusers.com so this discussion thread is read-only, too.
| Text gets enlarged automatically upon ... | chrisj | 20 May 00:52 |
| Text gets enlarged automatically upon ... | chrisj | 20 May 01:07 |
| Text gets enlarged automatically upon ... | rich404 | 20 May 08:41 |
| Text gets enlarged automatically upon ... | chrisj | 20 May 17:18 |
| Text gets enlarged automatically upon ... | chrisj | 21 May 04:40 |
| Text gets enlarged automatically upon ... | rich404 | 21 May 07:56 |
| Text gets enlarged automatically upon ... | chrisj | 21 May 16:33 |

- postings
- 16
Text gets enlarged automatically upon ...
When I try to edit a .xcf file (of text words), and select the correct layer, then select the Text tool, a box pops-up stating "Confirm Text Editing". When I select 'edit' that text layer enlarges automatically beyond the canvas area. Very annoying. Anyway to edit without that happening? I don't know how to easily edit at that point. What's going on there? Any help is appreciated
- postings
- 16
Text gets enlarged automatically upon ...
When I try to edit a .xcf file (of text words), and select the correct layer, then select the Text tool, a box pops-up stating "Confirm Text Editing". When I select 'edit' that text layer enlarges automatically beyond the canvas area. Very annoying. Anyway to edit without that happening? I don't know how to easily edit at that point. What's going on there?
Any help is appreciated
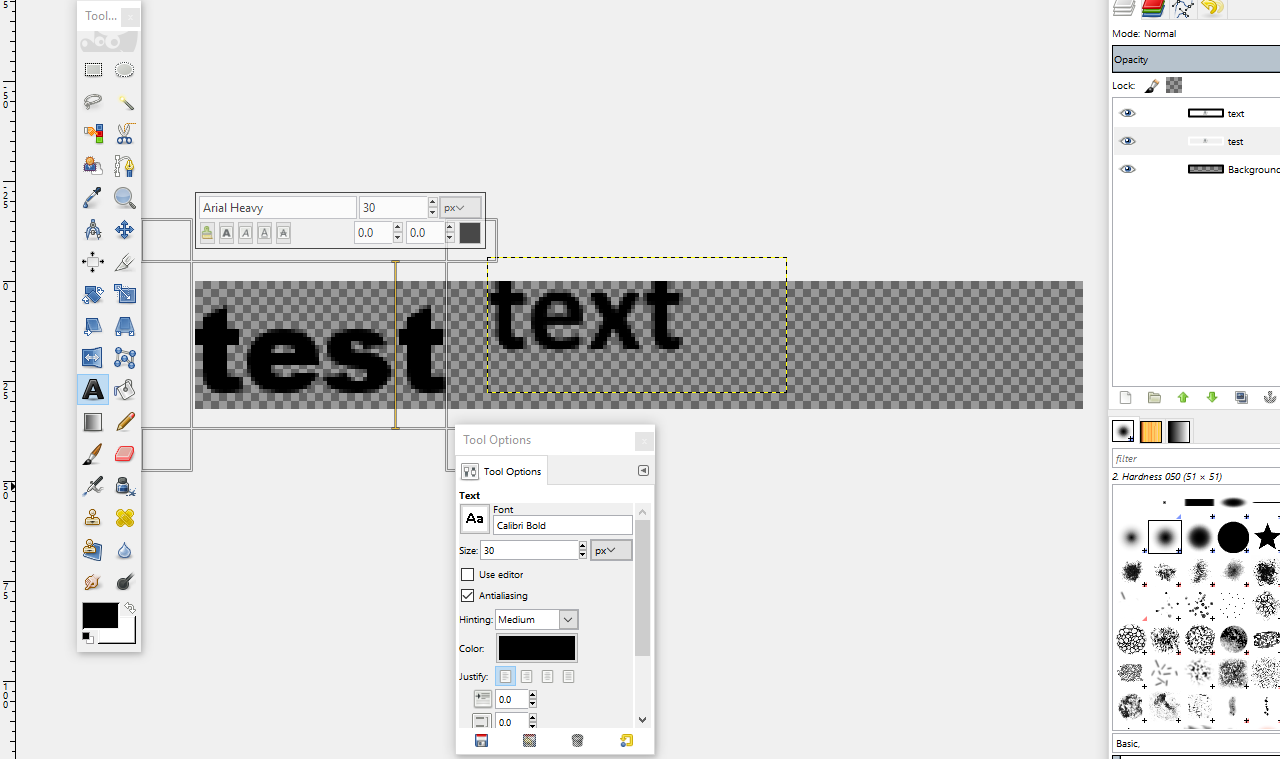
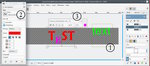
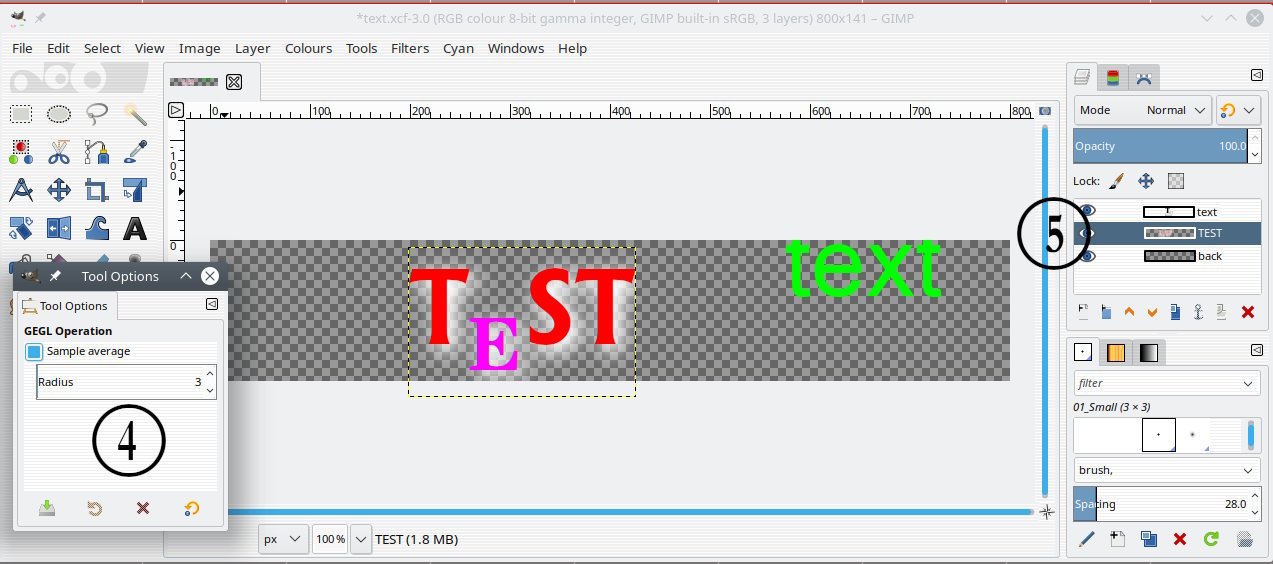
Also, there seems to be a dialog box above the canvas, and the the tool options below. The box above the canvas (with Arial Heavy) seems to be controlling the text, but the tool options box (calabri bold) below has the anti-alias checkbox, why are there two? And how can I apply anti-alias to the text, if the above one is controlling the edit? see attached image
-
 gimp
gimp
gimp.png (111 KB)
Text gets enlarged automatically upon ...
Also, there seems to be a dialog box above the canvas, and the the tool options below. The box above the canvas (with Arial Heavy) seems to be controlling the text, but the tool options box (calabri bold) below has the anti-alias checkbox, why are there two? And how can I apply anti-alias to the text, if the above one is controlling the edit? see attached image
Not 100% sure of what you have done but first a guide to those layers
First screenshot
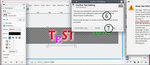
1. Get this out the way, a non-active text layer, moved partly off the canvas, dotted line shows the boundary and if you look at your screenshot you see the top of the text slightly clipped.
2. The text tool options dialogue sets the properties for the text layer Font, size, colour, anti-aliasing (does anyone turn that off?) kerning, character spacing. Change these values and all text on the text layer is affected.
3. The on-canvas text tool dialogue will initially reflect the Tool Options. Selecting characters on canvas and individual (or groups) of characters and properties can be changed. The position of the cursor does show the relevant properties.
That is the basics and you do need to understand how Gimp works.
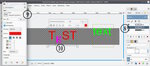
Second screenshot
4. Any graphic editing on a text layer and it then becomes a regular bitmap. This one the GEGL drop shadow.
5. The layer dialogue now shows the change from text to raster (bitmap).
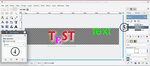
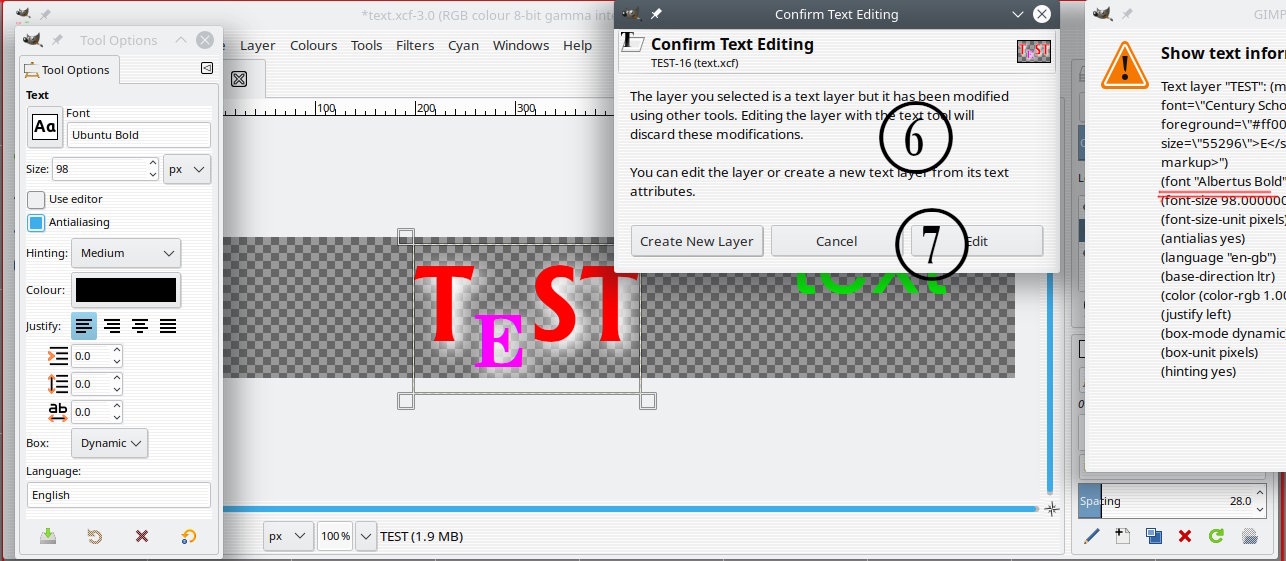
Third screenshot and a maybe this is what you did.
6. New day with a different computer or different setup. Open the image, use the text tool on the raster layer. Gimp has some text information, but has to discard any effects to get back to a text layer.
7. Selecting Edit will discard the drop shadow effect and return to original state.
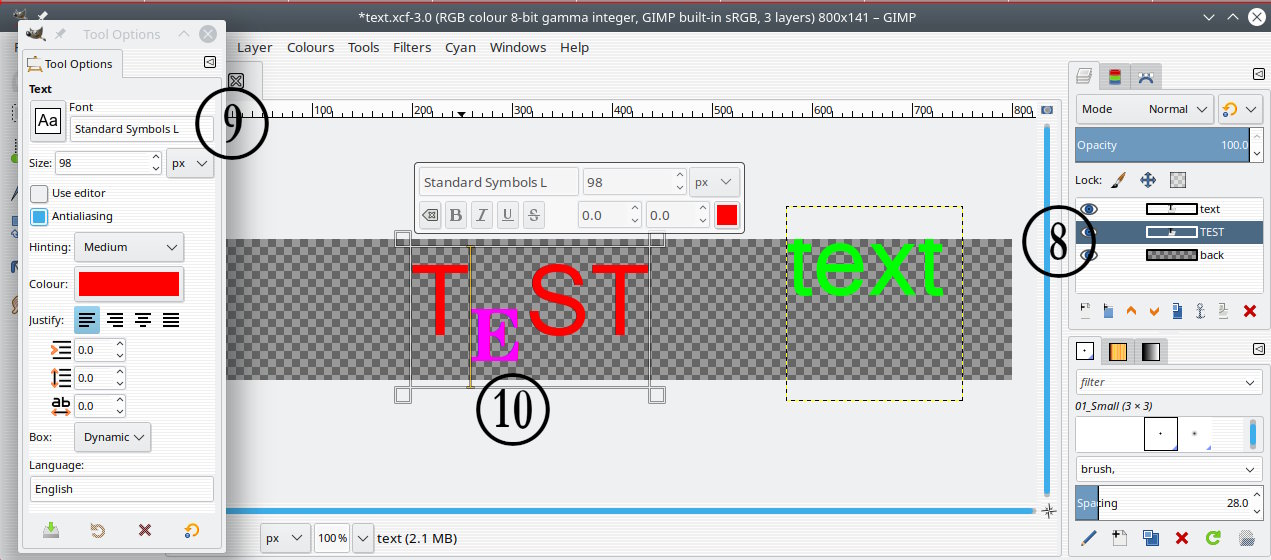
Fourth screenshot
8. Now have the text layer back, the text icon is there. --- but --- The font Albertus used initially is no longer there. (Either removed or a different computer.)
9. The now non-existent font is replaced by the system default ( in this case Standard Symbols)
10. Part of it is still there, the Century font for the magenta 'E' is there and is used.
And how can I apply anti-alias to the text, if the above one is controlling the edit
The on-canvas tool does not control antialiasing. If the text looks 'blocky' then usually it is very small with insignificant anti-aliasing and not much can be done about that, or it is the font.
Need a plugin to show text properties that might still remain on a raster layer?
http://sourceforge.net/projects/gimp-tools/files/scripts/
look for text-info-0.1.py well down the list (dated 2014-08-26)
-
 01
01
01-text.jpg (149 KB) -
 02
02
02-text.jpg (128 KB) -
 03
03
03-text.jpg (174 KB) -
 04
04
04-text.jpg (157 KB)

- postings
- 16
Text gets enlarged automatically upon ...
Not 100% sure of what you have done but first a guide to those layers
First screenshot
1. Get this out the way, a non-active text layer, moved partly off the canvas, dotted line shows the boundary and if you look at your screenshot you see the top of the text slightly clipped.
2. The text tool options dialogue sets the properties for the text layer Font, size, colour, anti-aliasing (does anyone turn that off?) kerning, character spacing. Change these values and all text on the text layer is affected.
3. The on-canvas text tool dialogue will initially reflect the Tool Options. Selecting characters on canvas and individual (or groups) of characters and properties can be changed. The position of the cursor does show the relevant properties.
That is the basics and you do need to understand how Gimp works.
Second screenshot
4. Any graphic editing on a text layer and it then becomes a regular bitmap. This one the GEGL drop shadow.
5. The layer dialogue now shows the change from text to raster (bitmap).
Third screenshot and a maybe this is what you did.
6. New day with a different computer or different setup. Open the image, use the text tool on the raster layer. Gimp has some text information, but has to discard any effects to get back to a text layer.
7. Selecting Edit will discard the drop shadow effect and return to original state.
Fourth screenshot
8. Now have the text layer back, the text icon is there. --- but --- The font Albertus used initially is no longer there. (Either removed or a different computer.)
9. The now non-existent font is replaced by the system default ( in this case Standard Symbols)
10. Part of it is still there, the Century font for the magenta 'E' is there and is used.
The on-canvas tool does not control antialiasing. If the text looks 'blocky' then usually it is very small with insignificant anti-aliasing and not much can be done about that, or it is the font.Need a plugin to show text properties that might still remain on a raster layer?
http://sourceforge.net/projects/gimp-tools/files/scripts/
look for text-info-0.1.py well down the list (dated 2014-08-26)
thanks for taking the time to explain - much appreciated
- postings
- 16
Text gets enlarged automatically upon ...
thanks for taking the time to explain - much appreciated
also, does photoshop have any advantage over the quality of an outputted file, over GIMP?
Text gets enlarged automatically upon ...
also, does photoshop have any advantage over the quality of an outputted file, over GIMP?
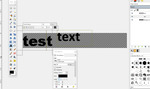
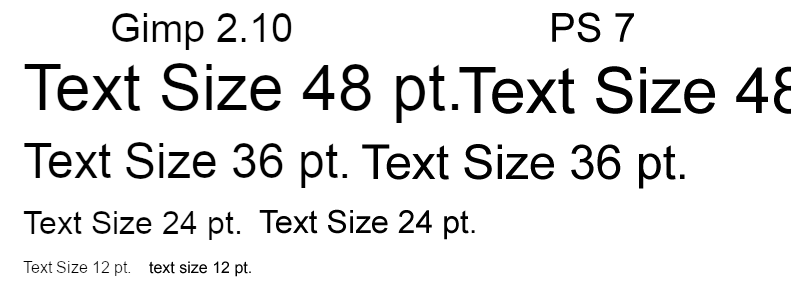
Since this is about text, it is known that Gimp 2.10 renders small text on the light side. Something to do with the current cairo library I believe. From memory Gimp 2.8 was better in this respect.
Attached a comparison with PS (very old PS). If it is faint try a very small increase in size (1 or 2 pix) , that sometimes makes a noticeable difference or duplicate the text layer and put top text layer into hard light layer mode.
More generally, PS can work in CMYK colour space. If your work is for offset printing then the whole project start to finish should be in CMYK. There is a good application+plugin for conversion, 'Cyan' but there is always that colour shift between RGB and CMYK profiles.
Other than that, for exporting finished work, a png/jpeg/tif is a png/jpeg/tif
-
 text comparison
text1.png (36.8 KB)
- postings
- 16
Text gets enlarged automatically upon ...
Since this is about text, it is known that Gimp 2.10 renders small text on the light side. Something to do with the current cairo library I believe. From memory Gimp 2.8 was better in this respect.
Attached a comparison with PS (very old PS). If it is faint try a very small increase in size (1 or 2 pix) , that sometimes makes a noticeable difference or duplicate the text layer and put top text layer into hard light layer mode.
More generally, PS can work in CMYK colour space. If your work is for offset printing then the whole project start to finish should be in CMYK. There is a good application+plugin for conversion, 'Cyan' but there is always that colour shift between RGB and CMYK profiles.
Other than that, for exporting finished work, a png/jpeg/tif is a png/jpeg/tif
thanks for your reply.
it is for web not print