RSS/Atom feed Twitter
Site is read-only, email is disabled

Tutorial: Old Parchment Paper
Written by · Created on Jun 15, 2007, last updated almost 14 years ago CC BY-NC License
Old Parchment Paper

Motivation

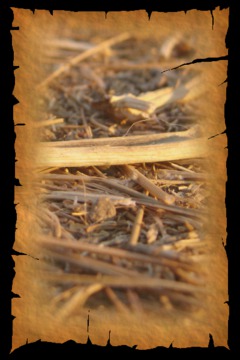
This tutorial is a bit aimed on fantasy-fans! I will show you how to generate an old parchment paper. You can than add an old map, a photo or just plain text to it!

Tutorial details

  1. 1

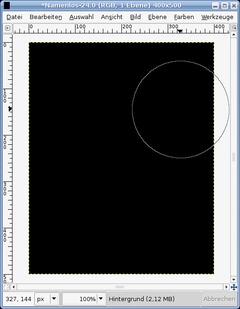
    Open a new file: 400×500 px and set the background color to black.

  2. 2

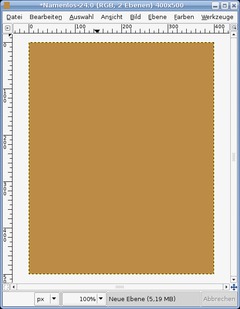
    Create a new transparent layer, fill it with #bc8b46.

  3. 3

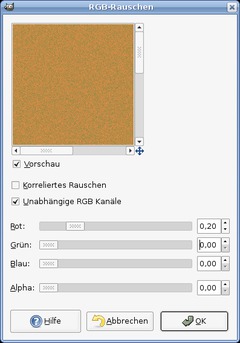
    Go to Filter / Noise / RGB Noise and use these values as input:

    Independent RGB Channels: checked
    RED: 0,20
    GREEN: 0
    BLUE: 0
    ALPHA: 0

  4. 4

    - Filter / Blur / Gaussian Blur: 10px.

    The noise-effect should be still very little visible-

  5. 5

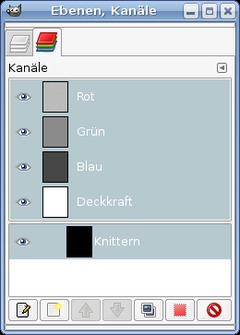
    Now, we’re going to bring some depth into play. Open the channels tab (Dialogs / Channels). Create a new channel there, name it “knittern” or “crinkle” which is the english word for this.

    Opacity to 100%.

  6. 6

    Click the just created channel to make it active.

    Apply Filter / Render / Plastic Noise. Activate “Random”.

    Values:
    -——-
    Random: on
    X: 2,3
    Y: 3,3
    Details 15.

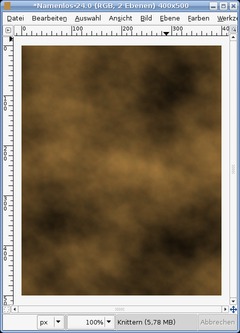
    You get this kind of picture:

  7. 7

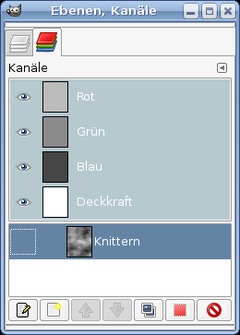
    In the channels tab deactivate the eye-symbol to make it invisible.

  8. 8

    Change to the layers-tab and click the brown layer to make it active. Now apply Filter / Light and Shadow / Lighting Effect. In the tabs of the filter enter these values

    Options:
    (optinal) Distance: 2000

    Light:
    -—-
    Light1:
    Type: Directional
    Color: White:
    Direction: X: -2,25 Y: 1,75 Z: 1

    Material:
    Glow: 0,5
    Bright: 0,75
    Shiny: 0,12
    Polished: 20

    Bumpmap:
    use the “crinkle”-Channel
    Max Height: 0,01

  9. 9

    - Filter / Enhance / Sharpen: 60.

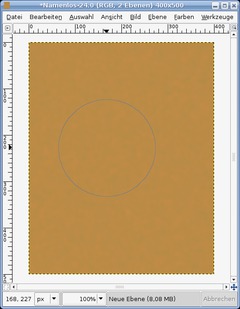
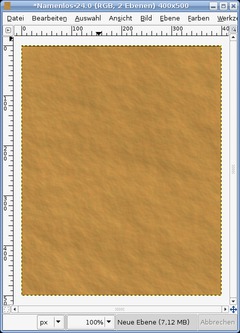
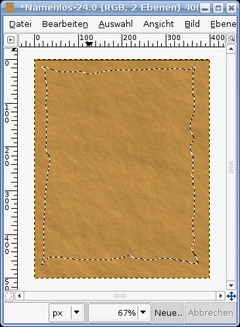
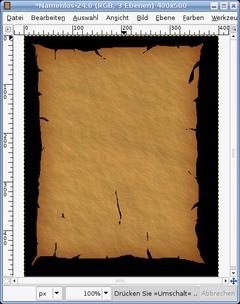
    After that choose the “Free selection”-tool. Draw a selection as seen on the picture.

  10. 10

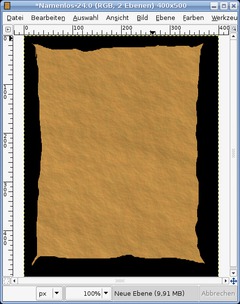
    Now choose Selection / Invert. Cut that part or just delete it using DEL (or CTRL+K in GIMP 2.2).
    Deactivate the current selection by pressing CTRL+SHIFT+A or Selection / None

  11. 11

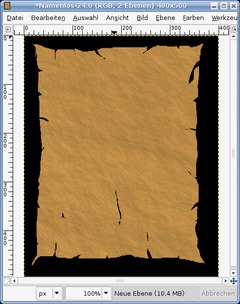
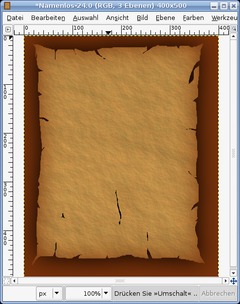
    The next step is to create some more cuts into the parchment. Use the free selection tool for this again. Cut many small cranks into the parchment. You can also do small very thin ones in the middle.

  12. 12

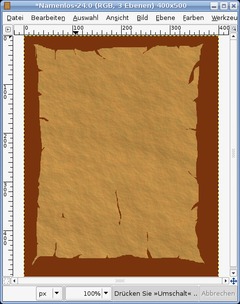
    Now we’re adding a darker border to it.

    - Right click in the layers dialog. “Alpha to selection”. This gives us a perfect selection of the layer.
    - Add a new empty layer
    - Selection / Invert
    - Fill this selection with #7a340d
    - Selection / None

  13. 13

    Apply Filter / Blur / Gaussian: 75.

  14. 14

    Activate the parchement layer. Choose “alpha to selection” from the right click context menu of the layers dialog again.

    Activate the just blurred layer. Press CTRL+I to invert the selection and the press DEL to delete the unwanted parts. The brown inner shine should be visible now.

    The hard part is done ;) Now you can finetune your parchment paper by using Brightness and Contrast. Or you can apply the depth-effect again if you want more crinkle! Feel free to play around with it.

  15. 15

    You can the add a photo to it or write some text or you can also add an old map to make your own treasure map! Have fun!

Comments

Post your own comments, questions or hints here. The author and other users will see your posting and can reply to it.

Of course, you can also ask in the chat.

Subscription management

Please log in to manage your subscriptions.

User rating

This topic (Old Parchment Paper) has been rated 5.0/5.0.

New comments are disabled because of spam.

Dain_Voxel member for about 3 years Dain_Voxel 1 comment rated this topic with 5/5
about 3 years ago

Awesome!
Minor adjustments to be made as Gimp ver is so advanced now, but still easy to follow.
Thanks!

Elise
over 11 years ago

So like most I got stuck at step 13. Well, I found a round about way to get the same effect, thought I'd share the steps. Be warned, it's much more extensive and I'm sure there is a better way, but I'm a relatively new Gimp user.

1. Right click the layer with the parchment --> alpha to selection (The outline of the parchment should highlight)
2. Click the Brown edged layer (with the parchement cutout in the middle)
3. Use the fill tool to fill in the middle. It will all be the same uniform brown but the dotted outline of the parchement will still be there)
4. Select --> invert. Now you should have a brown silhouette of the parchment and transparency around the edges (black may show through from the black layer)
5. Click the black layer. Dotted selection line should still be up and on invert) Delete the edges so that you have a black silhouette of the parchment.
6. You should have three layers all with the same shape. The parchment paper (If it is not the top layer, move it into that position now), then the brown layer and then the black.
7. Unselect (Alt+Shift+A)
8. Select the top layer (parchment layer)
9. Eraser tool: Opacity: 28
Brush: Hardness 050
Size: 402
Aspect Ratio: 0
Angle: 0
10. Click aroud the edges of the parchment. The brown will bleed through. Click multiple time in the same spot for a darker effect.
Note: If you use the edge of the eraser circle, you get a narrower edge and softer coloring (what I did), but you can play with it ;)
11. Follow the next steps if you also want a black burnt effect.
12. Right click top layer and "Merge down".
13. Use same eraser tool on same settings. The black color will now come through.
14. Eureka! It's done!

escorts St. Tropez
over 11 years ago

I do not even know how I ended up here, but I thought this post was good. I don?t know who you are but certainly you?re going to a famous blogger if you are not already Cheers!

m1e2
over 11 years ago

i blocked at step 13. i don´t know where is blur -> Gaussian

graypurpose1984
about 12 years ago

Hello! I love www.gimpusers.com and glad to be here.

u3totu
over 12 years ago

Thanks! Really great! Helped me a lot!

Jacqie
almost 14 years ago

Thanks! This is fantastic! Using it to make a birthday invite for my son's 1st pirate party.

Claire Harrison
about 14 years ago

Thank you - your instructions were very clear
and easy to follow.

R Soul
about 14 years ago

For later versions of GIMP, Plastic noise is now Render > Clouds > Solid Noise

If you can't select the noise channel in the Lighting Effects window, try copying and pasting the noise channel into any of the layers that it does allow you to select.

iekie member for over 14 years iekie 1 comment rated this topic with 5/5
over 14 years ago

I'm new at GIMP. How do I add the photo

Emiliano rated this topic with 5/5
over 14 years ago

For those blocked at step 12... I tried without Select -> None and it works with the same effect as in the tutorial.

Ciao,
Emi

Gaz rated this topic with 5/5
over 14 years ago

All you guys commenting with stuff not working, I did it with the latest GIMP version. :P. Plastic noise is found under Filters>Render>Cloud>Plastic Noise. Also, the channels tab is always there. Anyways, LOVE IT. Thanks so much. I really needed this for an English porject.

Geeze
over 14 years ago

"PLASTIC NOISE" is "SOLID NOISE" in 2.6.8...

EnK rated this topic with 5/5
over 14 years ago

I had a blast walking through this tutorial, and I thank you for your time. Yes, from the last person who left a comment - I couldn't find the "Plastic Noise", so I had a little trouble with that step-by-step. Otherwise, you shoudl be commended. That was fun and educational. I thank you for your time.

PLASTICisSOLID
almost 15 years ago

Plastic noise is actually Solid Noise.

ursaminor member for almost 15 years ursaminor 2 comments
almost 15 years ago

For Plastic Noise, try Render>Clouds>Plasma. Click Randomize. Adjust (or not-default 1.0) Turbulence.

nels
almost 15 years ago

I can't find plastic noise either. What list did you finally see it in? I'm searching manual, googling, have examined the filter menu and sub menu six times.

Secret
almost 15 years ago

Thanks! But, I am using GIMP 2.6.7

Some stuff is not there. Anyways, I did some stuff and some other stuff and made an old book cover. LOL.

Mahendran
over 15 years ago

This is awesome..! really great works well :)

Xtraspecialj
over 15 years ago

nevermind, i see it up in the list, disregard my above comment (#28)

Xtraspecialj
over 15 years ago

Umm, Step 6, I went to Filters|Render| But there is no Plastic Noise selection. I even searched in the manual and there is absolutely nothing like that. A google search for "Plastic Noise" only links to this same tutorial. What the heck is that and how do I get it. I'm stuck, Please help

Doug
over 15 years ago

Thanks a bunch for the tutorial! It was awesome, almost magic. When I got through I realized that I wanted the edges to have a smoother look. I waish I would have just checked "Feather Edges" and set it at 2 or so. Also I added one more step which I really liked. Filters > Enhance > GREYCstoration. I maight have done it 2 iterations, other than that, I didn't change any settings. I used Gimp 2.6.4 on Mac Os 10.5.6

Merissa
almost 16 years ago

All of this is great for me except step 8. In the bump map section of the lighting effect I do not have the option to choose the crinkle layer I made. I only have a drop down box with 2 of my layers as choices. I'm using version 2.6.4. I really want this to work...can anyone help me with this? Thank you!

regards
almost 16 years ago

Tuto très bien fait ! Manque un peu de détails pour les débutants, mais une fois la main faite, c'est un régal !! Thank you :o)

sandra
about 16 years ago

oops, sorry for the double comment. anyway, I can't cut/delete that part in step 10. D:

sandra
about 16 years ago

[Sazzy] Those number/letter thing as you say are colour codes sort of. Like, FFFFFF is white and 000000 is black.

sandra
about 16 years ago

[Sazzy] Those number/letter thing as you say are colour codes sort of. Like, FFFFFF is white and 000000 is black.

Sazzy
about 16 years ago

I am really new to Gimp and any graphics program.
In step #2 it says to "Create a new transparent layer, fill it with #bc8b46." Again in Step #12 "Fill this selection with #7a340d" I have no idea what the number/letter thing is. Where am I entering those values?

devvv member for about 18 years devvv 1475 comments
about 16 years ago

the channels are found through the menu WINDOWS / DOCKABLE / Channels in 2.6

sandra
about 16 years ago

I'm using version 2.6.0 so some of the options can't match. For example, there's no channels tab!

hucane2000 member for over 16 years hucane2000 1 comment
over 16 years ago

Very cool, Thanks it was fun learning
how to use the filters to manipulate the different layers.

justin
over 16 years ago

same here, after stpe 12 i couldn't get the look right, at all. greta tutorial though, and does anyone know how to work with text, it just runs off the layer, i can't seem to edit it at all.

anna
over 16 years ago

You can make that effect using coffee, can't you? Does anyone know the best way to do it?

coche
almost 17 years ago

Great tutorial thx. I've a lot of fun doing it!

elmister member for almost 17 years elmister 1 comment
almost 17 years ago

Step 6 (Gimp 2.4)
Filters / Render / Clouds / Solid Noise

rebaler
almost 17 years ago

helllo okay i was wondering... if you were to say put a desk / wood like background in a layer under the paper layer... to make it look like its on a table , how would you go about making wood / desk texture? also in stead of a wood/desk textue what if you were to make everything but the letter invisable... i dont know how to make a area invisable..

milliepat member for almost 17 years milliepat 1 comment
almost 17 years ago

This needs some editing, after step 12, I never got the look. Using Gimp 2.4.2 on Win XP.

Snugglie
almost 17 years ago

Never mind, found it. Great tutorial, thanks!

Snugglie
almost 17 years ago

I'm stuck at #6 < What exactly shall I do?

devvv member for about 18 years devvv 1475 comments
about 17 years ago

you may use the new gimp 2.4 release candidate - it is found in our downloads section.

PhotoMan
about 17 years ago

Does anyone have a GIMP 2.2 version of this tutorial? Options do not match.

yht member for about 17 years yht 1 comment
about 17 years ago

What program are you using to do this? I have windows xp2000 with word perfect. Will that work?

rwacles member for about 17 years rwacles 1 comment
about 17 years ago

Nice Tutorial! I've been looking for this. Thanks

ali
about 17 years ago

selam

cemkalyoncu
about 17 years ago

@Chelmite: you can use Ctrl + K or edit -> clear

lala
over 17 years ago

wow

Chelmite member for over 17 years Chelmite 4 comments
over 17 years ago

I'm running gimp 2.2.12. DEL doesn't do anything. What's the equivalent function from the menus?

James
over 17 years ago

Fantastic tutorial! This has given me the know-how to make the minimaps on my hl2 mod look rustic and old fashioned. Thank you!