RSS/Atom feed Twitter
Site is read-only, email is disabled

Tutorial: How to generate realistic mass waterdrops on a surface
Written by · Created on Jul 08, 2007, last updated almost 14 years ago CC BY-NC License

Motivation

Learn how you can make very cool and realistic waterdrops with GIMP.

Tutorial details

  1. 1

    a word before we start: I’m using the dialogue “Color” very often in this tutorial. If you use GIMP 2.2 the options i mean are found under Layer / Colors, since 2.3 this is only the menu “Color”.

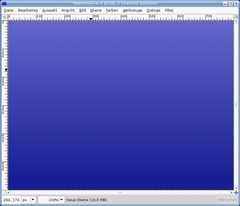
    Create a new file: 800×600px. Fill it with any background color you want. I did a soft blue gradient – that looks cool.

  2. 2

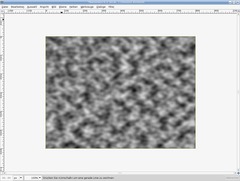
    Add a new Layer. Filter / Render / Solid noise. User max values: 16/16.

  3. 3

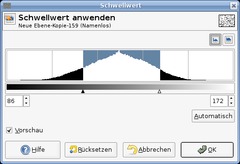
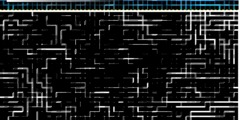
    Colors / threshold, look at the pic below to see the values )left: 86, right: 172).

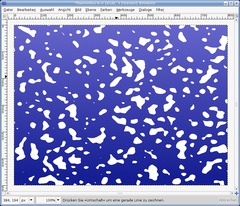
  4. 4

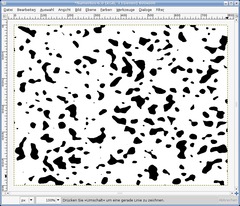
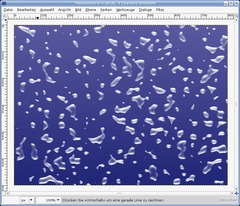
    You’ll get a picture that looks like mine below:

  5. 5

    Choose Colors / Color to Alpha and choose white to make all white transparent.

    After this invert all the pixels: Colors / Invert. After that all black should be white.

  6. 6

    Duplicate this layer, make it invisible by clicking the eye icon left to the layer in the layers dialog. Right click the layer in the layers dialog: “Selection from Alpha”.

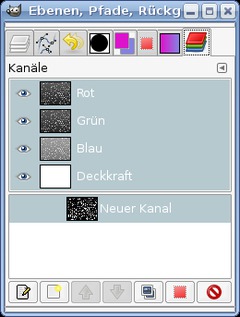
    - Dialogs / Channels. Add a new channel there while still having the selection active. Click “Initialize from selection”.

    Press CTRL+SHIFT+A to deselect all.
    - user Filter / Blur / Gaussian Blur 3 times with these values: 7 then 3 and finally 1. Click the eye symbol to make the channel invisible.

    Switch back to the layers dialog and click the layer that contains the white “drops”.

  7. 7

    Make sure the white drops layer is active. Now the heart piece of this tutorials follows:

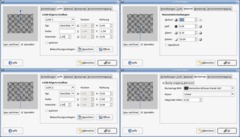
    Filter / Light & Shadow / Lighting effects…

    We will now illuminate the drops from 2 sides (from top and from bottom) so we get some pretty real hightlights for the water. We need 2 directional light sources. Use my values (see the picture below). Don’t forget to use the channel we created in step 6 as bumpmap.

  8. 8

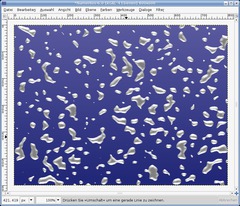
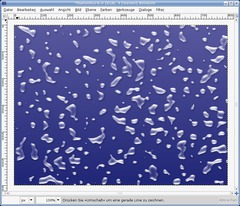
    You get something like this:

  9. 9

    Lock the alpha channel (“Lock alpha channel”) of this layer. This option is found above all layers. Then use Filters / Blur / Gaussian Blur: 4px.

    Using this option has the effect that all filters or anything else you may do on a layer is only applied to the visible pixel.

    In this step we use this to get nice little blurred grays. However we need to see clear differences between bright and dark gray as well as a clear white.

    After this you make the gray in the middle transparent by using Colors / Color to Alpha again (pick the gray in the middle).

    You get the following:

  10. 10

    As for now the result look already pretty good but we can still make some improvements: Any drop needs a soft black shadow to look more real.

    Rightclick the invisible white layer in the layers dialog and choose “Selection from alpha”.

    With this selection active use Filter / Light and Shadow / Drop Shadow: X:2,Y:3 – Transparency: 30. Deselect “Allow resize”.

    Deselect all: Selection / None.

  11. 11

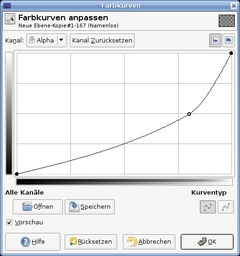
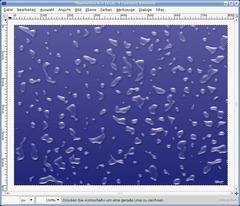
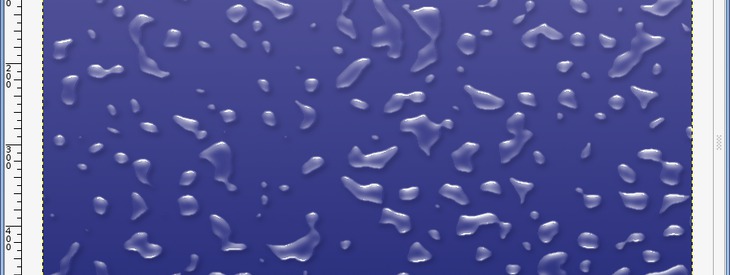
    Our drops are a bit too white and not enough transparent. Activate the visible drops layer: Colors / Curves, use the Alpha channel (top left option) and apply the curve seen on the picture. We’re then finished ;)

  12. 12

    Hope you like it!

    Tip: Smaller the size of the picture afterwards to get an even more realistic look!

Comments

Post your own comments, questions or hints here. The author and other users will see your posting and can reply to it.

Of course, you can also ask in the chat.

Subscription management

Please log in to manage your subscriptions.

User rating

This topic (How to generate realistic mass waterdrops on a surface) has been rated 5.0/5.0.

New comments are disabled because of spam.

trandoductin
over 7 years ago

I tried scripting this water droplets effect but GIMP doesn't seem so let you define 2 light sources from script so i did it anyways but with 1 light source.
Here's the script, you can apply on any background that represents flat surface.
https://www.gimplearn.net/viewtopic.php?f=3&t=690

solensdatter2 member for about 12 years solensdatter2 15 comments
about 12 years ago

Thanks devvv! I now understand the alpha channel part and locking..but why adding new channels instead of new layers is not yet too clear,, :) In this tutorial you mention "don't forget to bumpmap the channel.."

So I'm stuck how to do this? also how make the drops transparent..do you need more than 1 duplicate)? .they are still grey non-transparent in one layer and white in the other.. LOL. so i don't know what I do wrong.. Can you make a new tutorial with layers and channel use- and all those "selection to alpha" stuff that is not so obvious for noviser.. aso..stuff..and go more like step- by step for newbeginners like me? Thanks for all our tutorials anyway...I'm gonna get the grip of it eventually :)

devvv member for about 18 years devvv 1475 comments
about 12 years ago

The alpha channel is a mostly invisible "layer" that contains information about transparency of the layer you're working on. It tells the layer which pixel is transparent and which one is not. normally, every layer does have it. If you lock that "channel" you can only paint on pixels that have a certain transparency. all fully transparent pixels will be ignored then.

normally a channel is a component of a layer that will be used to view or work on a different part of the layer. to my knowledge a channel is only containing black/white/gray tones. no color. It is a helper component to work on specific information (i.e. the alpha channel is a black-white layer attached to the layer that contains where the layer should be transparent and where not. a color channel is a layer that contains black-white information where the layer should paint blue or red or green. same with a depth channel).

hope that helps ;)

solensdatter2 member for about 12 years solensdatter2 15 comments
about 12 years ago

Very nice! As I am a newbeginner I am confused about why "locking" the alfachannel? And the differences between new channel and new layer? Can someone explain it to me please..? :)

Haphaestes
over 13 years ago

Yes, there is an incredible level of " suck " involved with this review. That would be coming from the negative Reviewers! I nailed it on the first try and I am by no means GIMP proficient. I had no trouble understanding and executing all the step.

Excellent tutorial. Thank you.

Hiisi
over 13 years ago

Wow! Grate tut! A bit difficult on the edges but the ending result is pretty cool! Thank you, devvv!

AeonTown
almost 14 years ago

Can you elaborate on Steps 9-11? I can't get the drops to be transparent.

devvv member for about 18 years devvv 1475 comments
about 14 years ago

Anon: what is not understandable enough for you?

Anon
about 14 years ago

poor tutorial

you may be an excellent gimp user, but you suck in writing.

Pavel rated this topic with 5/5
over 14 years ago

In Step 5 I clicked Colors/Color to Alpha and Choose white to become transparent.Transparency part is marked with checkerboard. Then Colors/Invert all black drops become white, but cannot get blue background to show up, and it stays like that to the end. What am I doing wrong? Could anyone help?

biswajyoti
about 15 years ago

why you do not create your tutorials are in form of video, video tutorials help a lot & faster to learn. Thanks

stupido
over 15 years ago

I'm sorry after the lightning effects i'm just getting my drops gray/black what am i doing wrong?

Darlingpresley member for over 15 years Darlingpresley 9 comments
over 15 years ago

didnt quite get the curve right so the droplets are not as rounded at the tut...but all is good, i can keep playing....lol

Darlingpresley member for over 15 years Darlingpresley 9 comments
over 15 years ago

great yet again....

asdasd
over 15 years ago

DID NOT WORK! fail!

anon
over 15 years ago

You suck!

Zwopperm
over 15 years ago

The light effect can also be acheved by applying the "Xach effect", deactivating the original layer, and then play around with transparecy levels.

ZAEN
over 15 years ago

Thanks Devvv! I'll use your tutorial to teach to my students like creative example of art surfaces simulation.
CIAO!

John
over 15 years ago

Well, I struggled through, only to find in the last step that the Alpha channel selection in the Curves dialog box is greyed out. I can't select Alpha. I must have gone wrong somewhere. Would love to get this right. Any help appreciated.
Cheers!

beanie
almost 16 years ago

I'm sorry but I am lost. I get to step 7 and all of the "drops" turn black when doing the lighting effects. Can anyone tell me where I am going wrong? Am I selecting the correct layer for the drops? I tried the original layer and the duplicate layer and I get the same result. I have the "initialize to selection" check box when adding a new channel, but it also has the opacity level bar as well, should that be at 100, 0? Which layer should be invisible, the original or the duplicate?

bh351 member for about 16 years bh351 1 comment
about 16 years ago

everything seemed to be going good until lighting effects. I am sure this is my problem but i cant see the pic for lighting effects and when i click on it i cant get it to display. It says the picture has errors. could someone type in the settings for each of the pictures so i can try this PLEASE

Jeff
about 16 years ago

Definitely not a really good tutorial. Too hard to read, Some of the suggestions above helped change my results some, but not enough to be even close to the suggestions made in the tut. Try elaborating more for newbies since you seem to be taking for granted in several sections that we know how to do something.

pashanoid member for over 16 years pashanoid 2 comments
over 16 years ago

Sorry, but this one is MADE difficult, great effect, real bad tutorial though, please re-write. Awful - 4 windows with lighting effects: which one goes after which? Alpha to selection or backwords? Select what and when. This is too crypic, not a tutorial, more like a puzzle...

pashanoid member for over 16 years pashanoid 2 comments
over 16 years ago

7. Make sure the white drops layer is active.

Do you mean the copy layer or the orig layer since they're both "white drops"

Can't get past this point (

LadyTeacher member for over 16 years LadyTeacher 2 comments
over 16 years ago

Great! Thank you so much for this tutorial! Now have even I succeeded... I just had do it two more times. It works! Thanks!

LadyTeacher member for over 16 years LadyTeacher 2 comments
over 16 years ago

I like the tutorial so much that I've spend several hours trying to succeed... There is something I do not understand because in step 6 I get lost... I cant make it work! I would really love to manage this. I'm quite new to Gimp and this kind of photoediting.

BTetlow
over 16 years ago

Wow!

Excellent tutorial, all I need to understand now is what happened.

The droplets look fantastic in any colour

amy
over 16 years ago

very difficult at steps 6 & 7
and colour curves didn't make any difference!

kmkl
over 16 years ago

ya, i couldn't understand the directions, weren't accurate enuf

BLTicklemonster
over 16 years ago

Step 6 is where I stop being able to follow this tutorial. Can anyone make a new tutorial and provide concise instructions? Think not I that my language speaks the poster of original tutorial. My fault, I should speak more than one language.

BLTicklemonster
almost 17 years ago

I can't make heads or tails of this as far as what I am doing wrong. I think I bog down around the channels part. I'm using 2.2, and don't get anything remotely like what the author is getting.

Soothsayah
about 17 years ago

the gimp rain animation is marvelous,
i just joined this magnificent site,
im glad there are smart people out there using fedora (like the gimp animation creator) it rrrrocks!

NellasUnna member for about 17 years NellasUnna 1 comment
about 17 years ago

"initialize from selection" is "add to selection" in GIMP 2.2, I think. It worked for me.

TheJoe
about 17 years ago

In gimp 2.2 is very different.. there were at least 2 functions put in differents menus.

Anyway i got it, nice tut!! ;P

devvv member for about 18 years devvv 1475 comments
about 17 years ago

the option is new in gimp 2.4. if you're working with 2.2 you need to fill the selection with white after you created the channel.

anon
about 17 years ago

you suck wheres initialize from selection

GImp
about 17 years ago

couldnt find initialize from selection

Bakoi
about 17 years ago

Great tutorial.
But I think you forgot to tell us to unlock the alpha channel of the drops layer. Otherwise the "curves" changement will have no effect.

Eduard
over 17 years ago

Excellent Tutorial bookmarked, Thank you.

devvv member for about 18 years devvv 1475 comments
over 17 years ago

If you still have 2.2 you can achieve this by just clicking OK when the create-channel dialog appears to create it. after this fill the selecion with white. Then just continue. hope this helps.

mmmatus
over 17 years ago

Please...In the step 6, I don´t know where to click "Initialize from selection". In which menu.Thanks.

devvv member for about 18 years devvv 1475 comments
over 17 years ago

Where do you need help?

Nano
over 17 years ago

sorry but i cant read your program language, if you dont mind me asking why if you type perfect english and write these tutorials in english do you use/put screenshots in another language? not a big problem in the other tuts but this one i couldn't finish

st3ven
over 17 years ago

worked perfectly for me! great tutorial, great site! thank you