Tutorial: GIMP 2.8: A review of the new features!
-
1
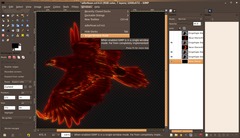
A new optional “Single Window Mode” offers awesome new usability features!
Single Window Mode is an OPTIONAL feature that can be turned on in the “Windows” menu all the time (while working).
Floating windows like the toolbox and the dialogues will appear inside a single “main” window now. No overlapping of windows or something like that anymore! Also GIMP is a single application with only one reserved task entry in the task bar.
This feature was awaited for many years from the GIMP community! It finally arrives with GIMP 2.8 and the single window mode feels just awesome and offers a new great workflow with GIMP!
-
2
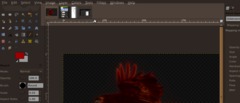
New open window navigation
A new navigation above an open image window will let you to switch and navigate through all open windows easily! No more task bar switching between images.
-
3
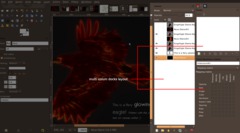
Extended docking features!
Docking your dialogues has been siginificantly enhanced and offers a very dynamic way of managing your GIMP layout now.
Multi-column-docks are available now. It is very easy to personalize your layout by just dragging the dialogs into other columns/docks etc.
-
4
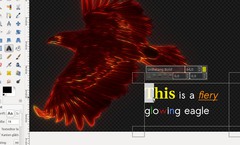
Awesome on-canvas text editing feature!
Direct on-canvas editing of text has been made available (no longer need to use a seperate dialog box to enter text)! And not just that. Now it is possible to change text inside the bounding text box and also use certain styles! For example select a word and press a “Bold” or “Italic” button. You can also change the size, line-height and font! Not just that – meanwhile it is also possible to change the color of certain words and characters.
To clear styles there is a button available that removes all given styles instantly.
This feature is absolutely great!
-
5
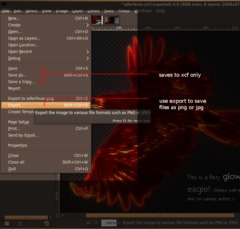
Changed file export offers a siginificantly faster workflow!
The “Save” and “Save as” function is now only used to store GIMPs own file format XCF. No save as png or jpg is available here.
If you want to make a png version of an open file you have to export it using the new “EXPORT” entry. This offers all file formats you previously know GIMP is capable of.
Also the workflow is sped up because there is a simple “OVERWRITE” entry after opening an image that is not xcf. You can then simply overwrite the image with the same properties (i.e. a JPEG quality of 98). After a XCF-file has been exported to, say, PNG you’ll be able to export it again using the same filename and properties easily.
-
6
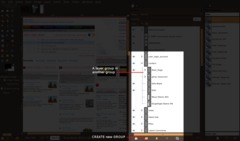
Extremely useful: Layer sets / Layer groups
You can now create groups/sets and move layers to these sets which makes the layers dialogue not so confusing when having LOTS of layers in an image.
Especially nice for web deleopers that design their websites using GIMP. You can show and hide a set, duplicate it or move all layers in a group at once!
If a Layer group is made invisible using the eye icon but still open (so that the layers inside the group are shown in the list) there is a striked through eye now shown beside the layers that are inside the group to indicate that these layers are not displayed in the final projection of the image, but theoretically visible inside the layer group.
Layer masks on layer groups will sadly not be implemented in GIMP 2.8.
-
7
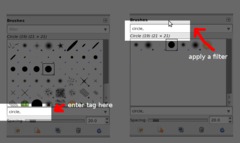
Highly enhanced resources management
GIMPs Brushes, Gradients and Pattern can be now selected and tagged using words that describe a resource. After tagging you’ll be able to filter the resources using these tags.
Very useful and an indeed worth to use feature when having lots of brushes loaded into GIMP. Also: imported brushed are auto-tagged based on the directory name – thats super sweet & easy ;)
-
8
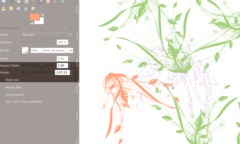
Rotatable Brushes
Brushes can now be rotated! Great for all kind of paintings!
-
9
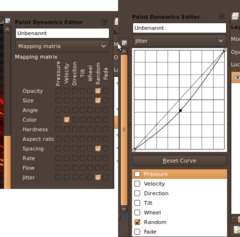
Extended Paint dynamics
The paint dynamics have been removed from the paint tools properties. They are now available as a dialogue that is dockable.
The Brush Dynamics have been heavily enhanced offering a wide range of new possibilites including opacity, size, tilting, rotating, color, hardness, distance, aspect ratio, rate flow and jitter. Either use the “Mapping Matrix” (see image: left) or click the drop down and use a single view of an option to finetune it (see image: right)
Also there are useful preset dynamics. Most of these dynamics are only useful with a tablet but some options are also available when only using a mouse (i.e. “Speed”)
Truly a heaven for painters ;)
-
10
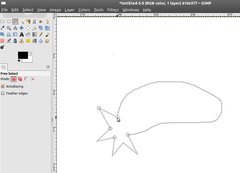
Enhanced Look&Feel
Many tools do have better look and feel now. For example Selection and Path tools now have a clearly visible verctorized line to better show the selection outline. The moving ants are however still available to view a selection of course.
-
11
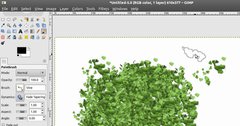
Brush outlines
Brushes now use an outline to make the area better visible which a brush affects. You can clearly see the brush outline in the picture where I use the vines brush.
-
12
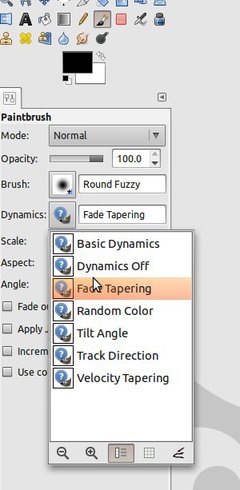
Brush dynamics presets
The presets for brush dynamics are now available as a drop down field to choose the dynamics from. This was needed because the brush dynamics get huge improvements too and are therefore more comprehensive.
-
13
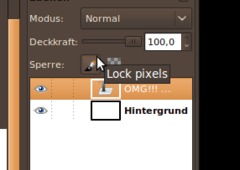
A new “Lock Pixels” feature prevents erroneous painting on a layer when switching it on in the layers dialoge.
-
14
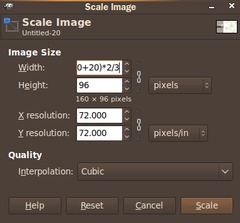
Calculation possibility in image-size-widgets
Calculate sizes in widgets that are used to do something with size. I.e. you can enter (200+20+20)*2/3 and GIMP will show up 173 as a final result. Very useful for setting guides in an image.
-
15

Layer modes sorted
The layer modes are now all sorted by a certain category such as modes that brighten/darken etc the image.
-
16
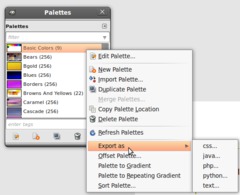
Image palette: export to CSS, PHP, Java, Python or plain text
You can now export color values in several formats. If you choose PHP, Python or Java, the colors are declared as variables. For CSS, unnamed classes will be created and plain text files will only contain a Hex code list.
-
17
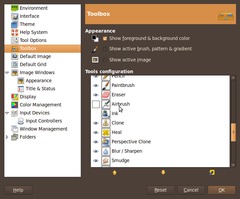
Toolbox adjustments and properties
Customization of the Tool window is now possible via the Edit / Settings dialog. Tools can be sorted by priority or removed completely.
-
18
New / changed keyboard shortcuts
New: Alt+WindowsKey+click on a layer = Alpha from layer (you can combine this with the Shift- and CTRL-key to add or subtract selections quickly.
New: Ctrl+Shift+E = File / Export
New: Ctrl+E: quick export
Modified: Ctrl+Shift+R = Resize canvas to window size
Modified: Ctrl+R = Resize window to canvas size -
19
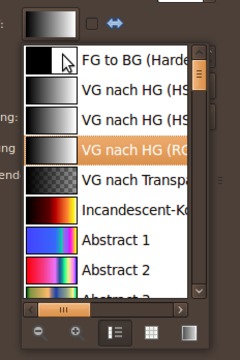
New basic gradient available
A new standard color gradient is available that seperates FG and BG-Color without smotthing the colors together.
-
20
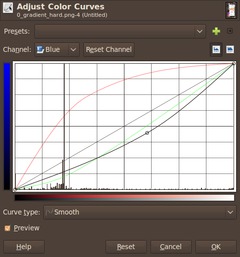
Color Curves show R,G and B channels in background for better finetuning.
-
21
Misc smaller changes
- Canvas edges are now “magnetic”
- Support for JPEG2000
- Support for 16 bit RAW import -
22
GIMP and GEGL
GEGL, the powerful node-based graphics kit that will enable features for non-destructive image-editing in the future, has been completely integrated into GIMP now and is also responsible for image projection. That means the final image composition you see is done by GEGL.
-
23
GIMP 2.8 will be licenced under the Lesser GPL v3 license.
-
24
Zoom hotkeys
In older GIMP versions a keystroke on “1” brings the zoom-factor to 100%. Now you can also use the keys 2,3,4 and 5 to get an instant zoom of the image to 200/400/800 and 1600%.
-
25
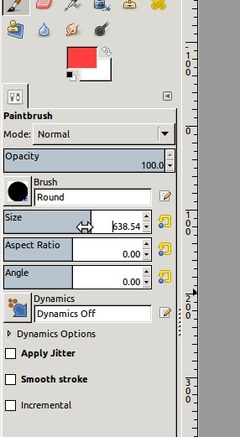
Intuitive new slider widgets
With the new slider widgets it is possible to alter values in different ways. You can enter the values directly by clicking into the value number to change it. But if you hover the slider at the top edge you’ll be able to jump to a specific value directly, without using your keyboard. If you hover the new slider widget in the middle or bottom part it is possible to move the slider to the left and right to finetune your adjustments in smaller steps.
This is a very intuitive addition, and you’ll not want to give it away after trying it out yourself ;)
-
26
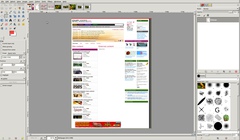
Import Screenshots of a webpage
With a new option found in File / Create / From Webpage you’ll be able to load a screenshot of the entire page into GIMP. The new option uses webkit to render the website (Webkit is the engine thats also used in Chromium / Chrome / Safari / Epiphany).
It’s a nice addition for web developers and designers, because you don’t need to use other plugins (for instance “Screengrab” for Mozilla Firefox) to shoot the entire website and not just a screenshot that is limited to the size of your monitor / screen.
-
27

PDF-Export
This new feature is still experimental. You’ll be able to export stuff as pdf file that includes text as vector graphics and embeds fonts. It also tries to convert things to vector graphics where possible.
However the feature is not completed and there is still work left to be done to include images, which did not work for me.
-
28
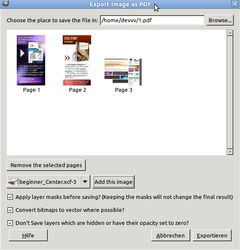
Multiple pdf pages
The above described feature also works for multi-page pdf-files. To generate multiple pdf pages you need to go to File / Create / PDF / Multipage PDF. Then add a file you want to be a page in pdf format. Do it multiple times and GIMP will create a pluti page pdf file for you.
As above – this is also experimental, because some image are not included and text is sometimes wrongly set.
-
29
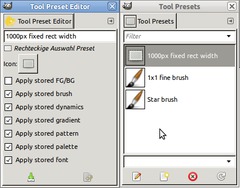
Tool presets
With this cool new improvement you’re able to save all the specific values for a tool. For instance you can create a star brush with a slight white-yellowish color and random angle (wich can be used to create sparkle on objects) and save it to the tool presets to directly access in future work.
Or you can save special sized (for example 1200px width) rectangles that are maybe commonly used for web designers or something like that. The presets store lots of things which you’re able to define – you can exclude storage of FG/BG color for instance.
-
30
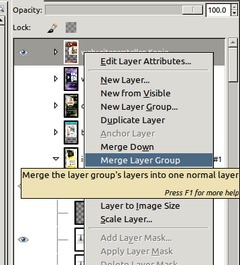
Merge layer group
Nothing more to say – you’re able to merge down a complete group of layers that are in a set to create everything on a single layer.
-
31
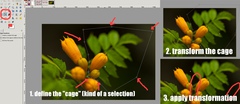
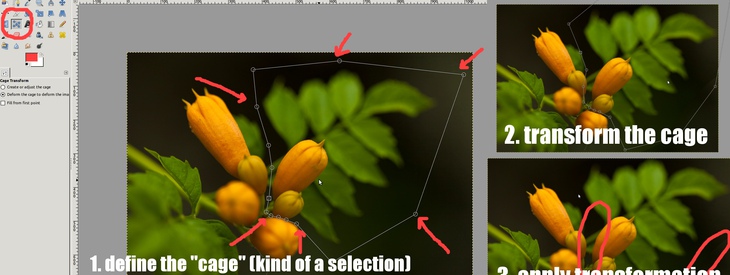
New tool: Cage transform
The tool makes it possible to create a cage (more or less some kind of a selection) around an area that you want transform seperately. After that you can move the points (like the points you set using the paths tool) you set before to transform the cage in the way you like.
The transformation works inside the cage only, so there are sometimes clearly seen edges inside the image you transform. This has to be worked seperately on (i.e. using the clone tool to overpaint or get rid of these edges).
Nevertheless the new tool is awesome and you can see it in action in our youtube video
-
32
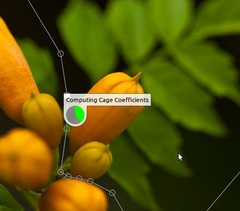
Feedback on long computations
When working on stuff that needs some more time to compute (for instance when working with the new cage transform tool) GIMP now gives you feedback with a neat new overlay that displays the time left for the action you want to perform.
-
33
GIMPs resources are being revamped – as a first step there will be new brushes that are more useful than the old ones. That gives GIMP a more modern look!
-
34
ALT+LayerClick (in Ubuntu you maybe need to click ALT+WindowsKey+LayerClick) makes a selection from alpha channel. You’re also able to make selection operations (add, intersect, subtract) with different alpha channels from certain layers!
-
35
Choosing the Language GIMP uses is now no longer only OperatingSystem dependent. Edit > Preferences > Interface > Language will do it for you now!
-
36
Wacom graphic tablets should work fine in most cases with GIMP 2.8. However if you have problems the probably only way is to downgrade to 2.6 until GIMP 3 is released with full GTK3 support


Comments
Post your own comments, questions or hints here. The author and other users will see your posting and can reply to it.
Of course, you can also ask in the chat.
Subscription management
Please log in to manage your subscriptions.
User rating
This topic (GIMP 2.8: A review of the new features!) has been rated 4.5/5.0.
New comments are disabled because of spam.