


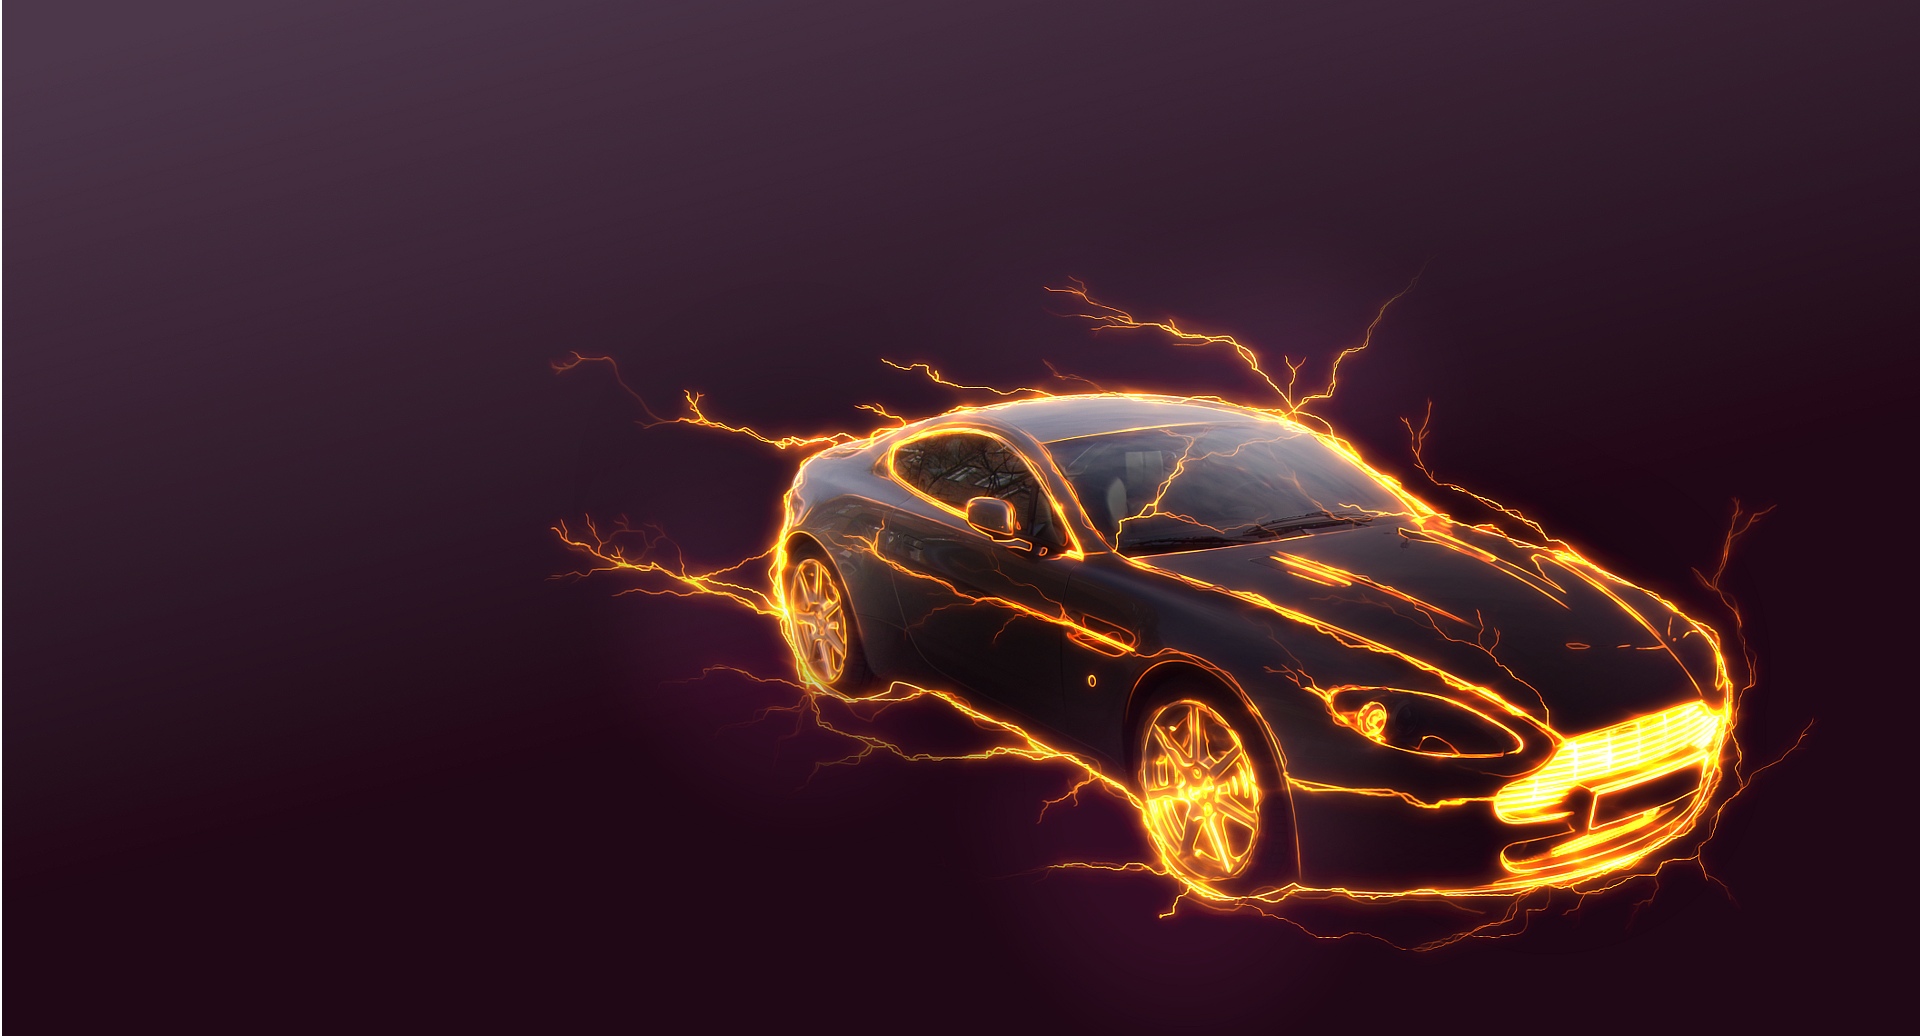
Tutorial: Create an amazing electricity effect on any object!
 is licensed under a Create Commons Attribution-Non Commercial 3.0 Unported license.")

Download GIMP workspace (.xcfbz2) (9.96 MB)
Motivation
In this tutorial I'll show you an effect that is pretty electrifying =) We're going to set an object under power and create lots of flashes on it. I'll show the effect on a car, but you can use every object.
Tutorial details
- Category: Special FX
- Time to reproduce: ≈45.0 minutes

- Tested with GIMP 2.6
-
1
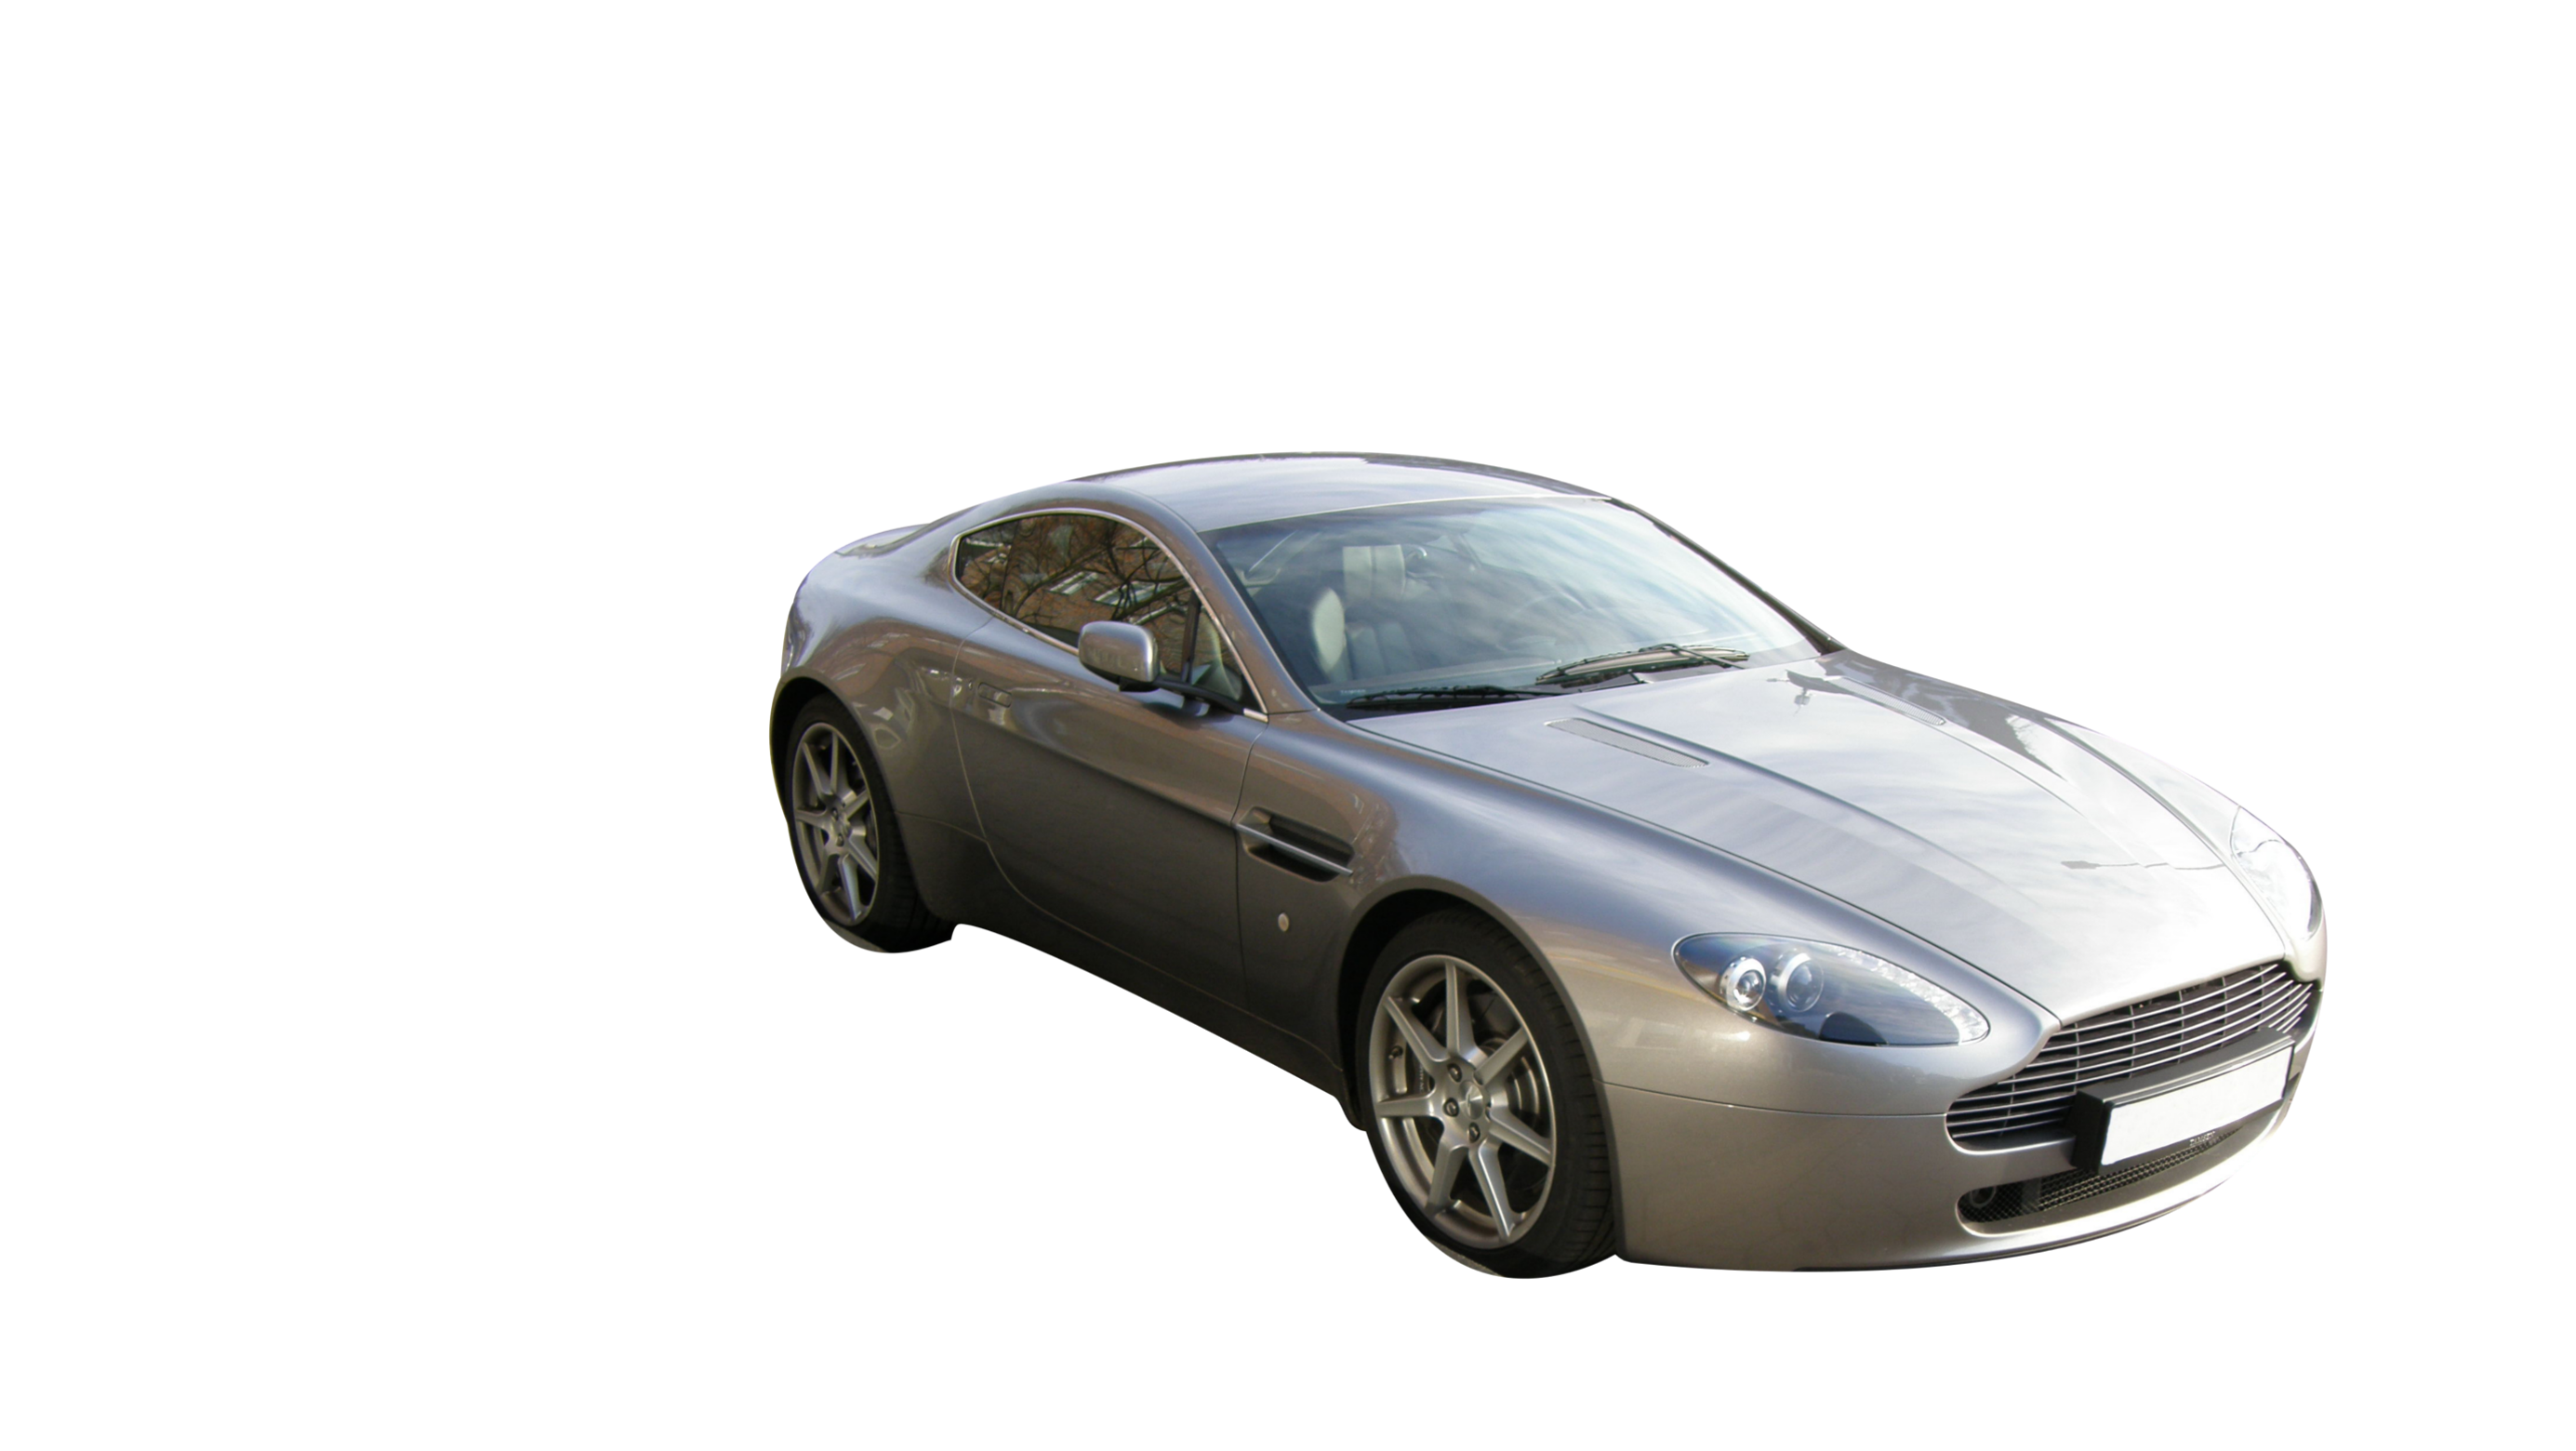
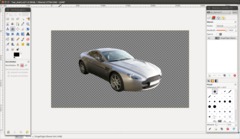 car_start.png
Please install the GMIC plugin before starting with this tutorial. We need some special filters in this awesome filter package.
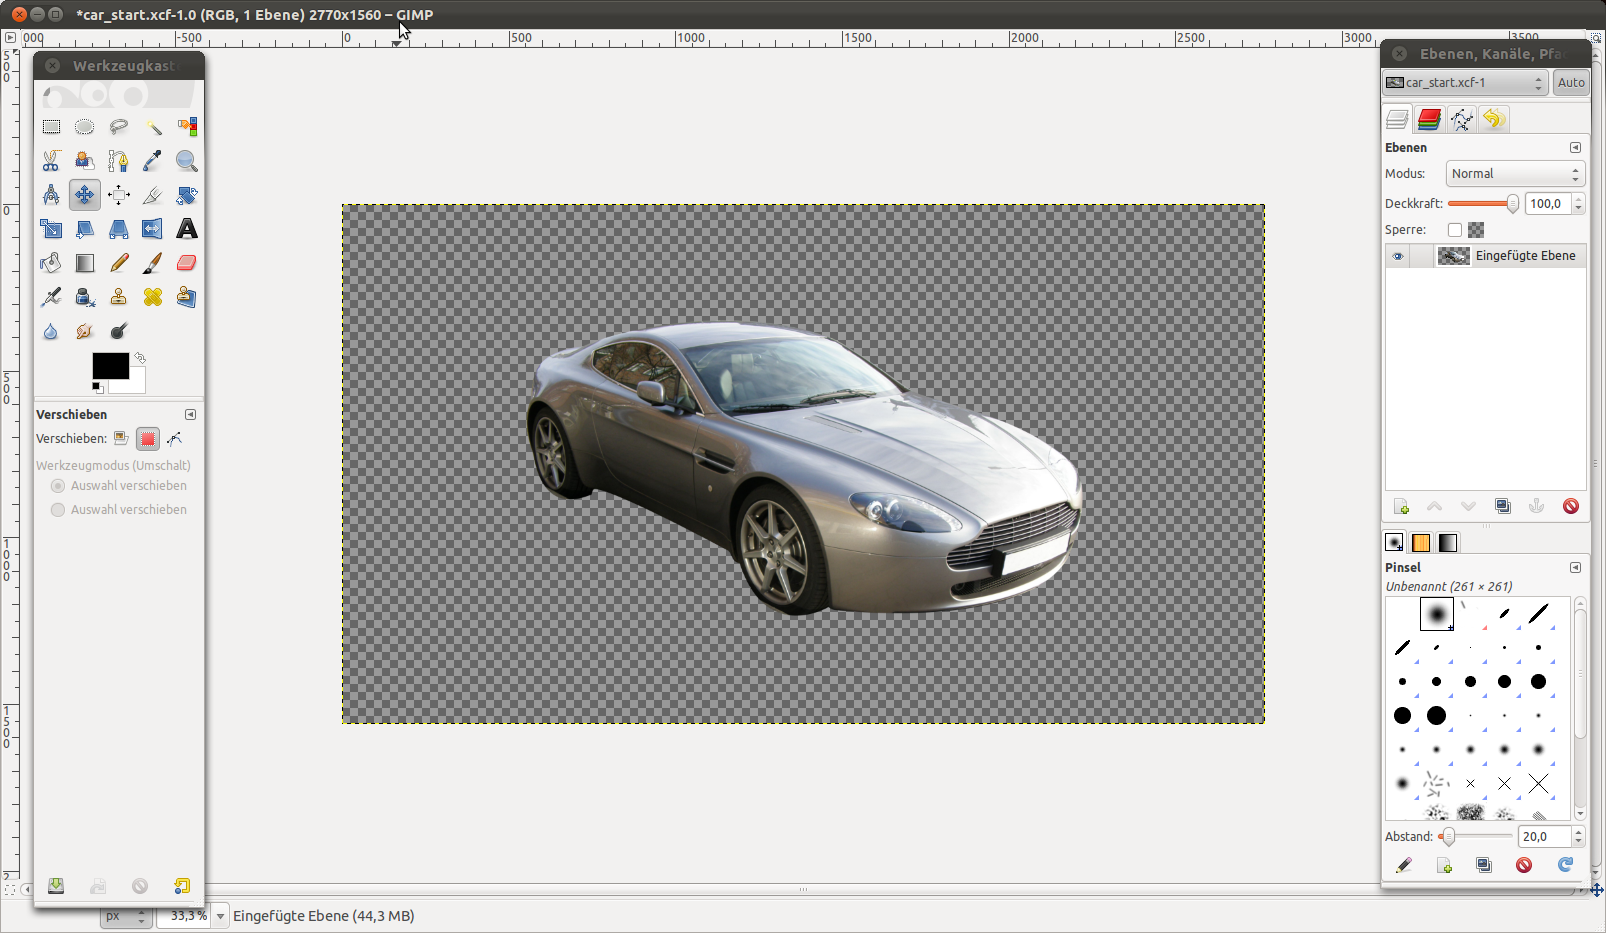
Please mask the object you want to electrify. If you just want to try the tutorial you can of course also take the masked car from me (I used the paths tool to mask it).
Important: duplicate the layer before heading to the next step. Work on the duplicate.
-
2

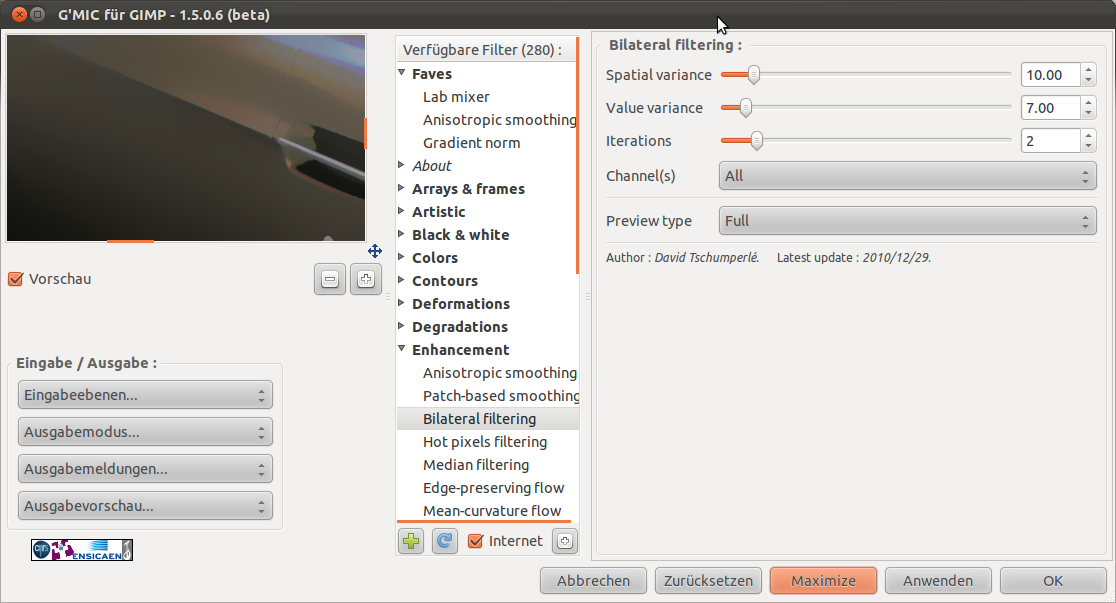
On other objects besides this car (if the objects have more details and many thin lines or details) you should apply a bilateral filtering which is found in GMIC. Bilateral filtering has the effect to homogenize areas that look similar.
For this go to Filter / GMIC (found at the very bottom) and use Enhancements / Bilateral filtering. The standard values should be good for most photos. The bilateral filter is something like the selective gaussian blur filter found in GIMP, but has much more options and is of much better quality. It recognizes similar areas much better and blurs them to create a homogenized view. You can see it very well at the door side of the car.
-
3
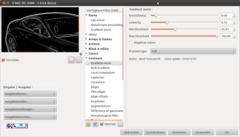
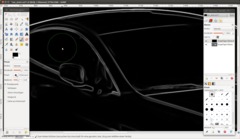
In the next step we’ve to extract the best or most visible edges from the photo. Therefore I’m using the filter “Gradient norm” also found in GMIC.
- Filter / GMIC → Contours / Gradient norm and use thse values:
- Smoothness: 0.6 (the higher the value the unsharper the edges will be)
- Linearity: 0.35 (the higher the value the less an edge will be considered as “connected”)
- Min. thresh.: 35 (Used to make not clearly visible edges drift/disappear into pure black)
- Max thresh.: 100
Due to the relativley small Smoothness-value the main edges of our car remain sharp. The Linearity remain the important edges visible whily making most of the unimportant ones disappear. And the slightly higher Threshold value makes small other unimportant details disappear.
-
4
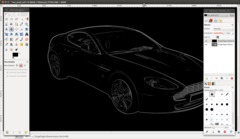
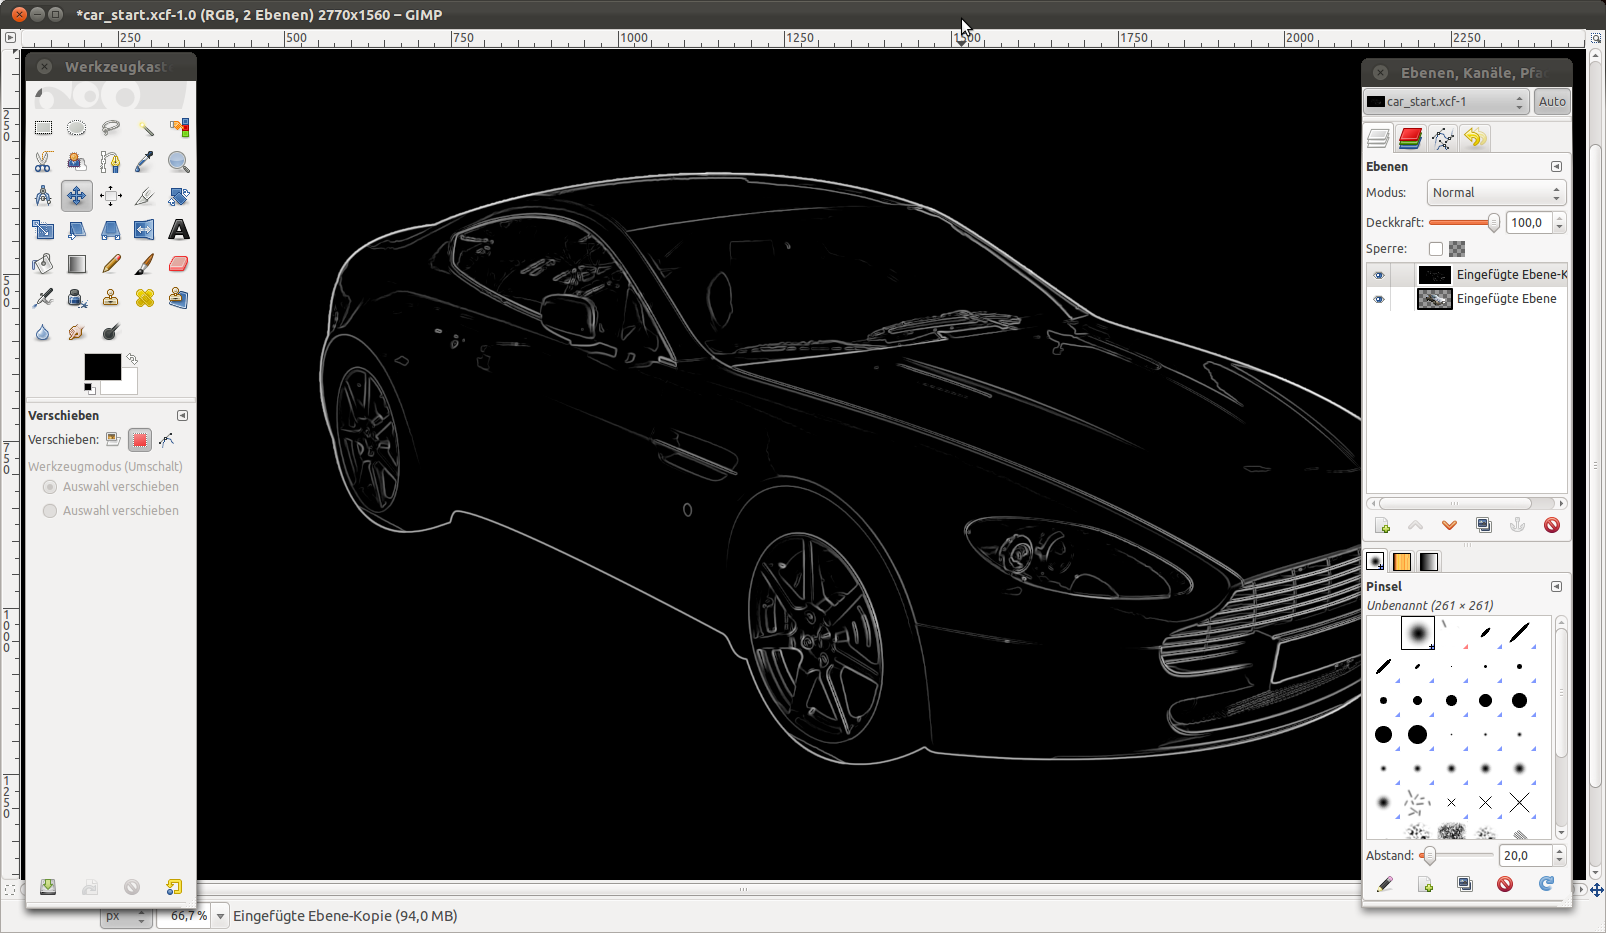
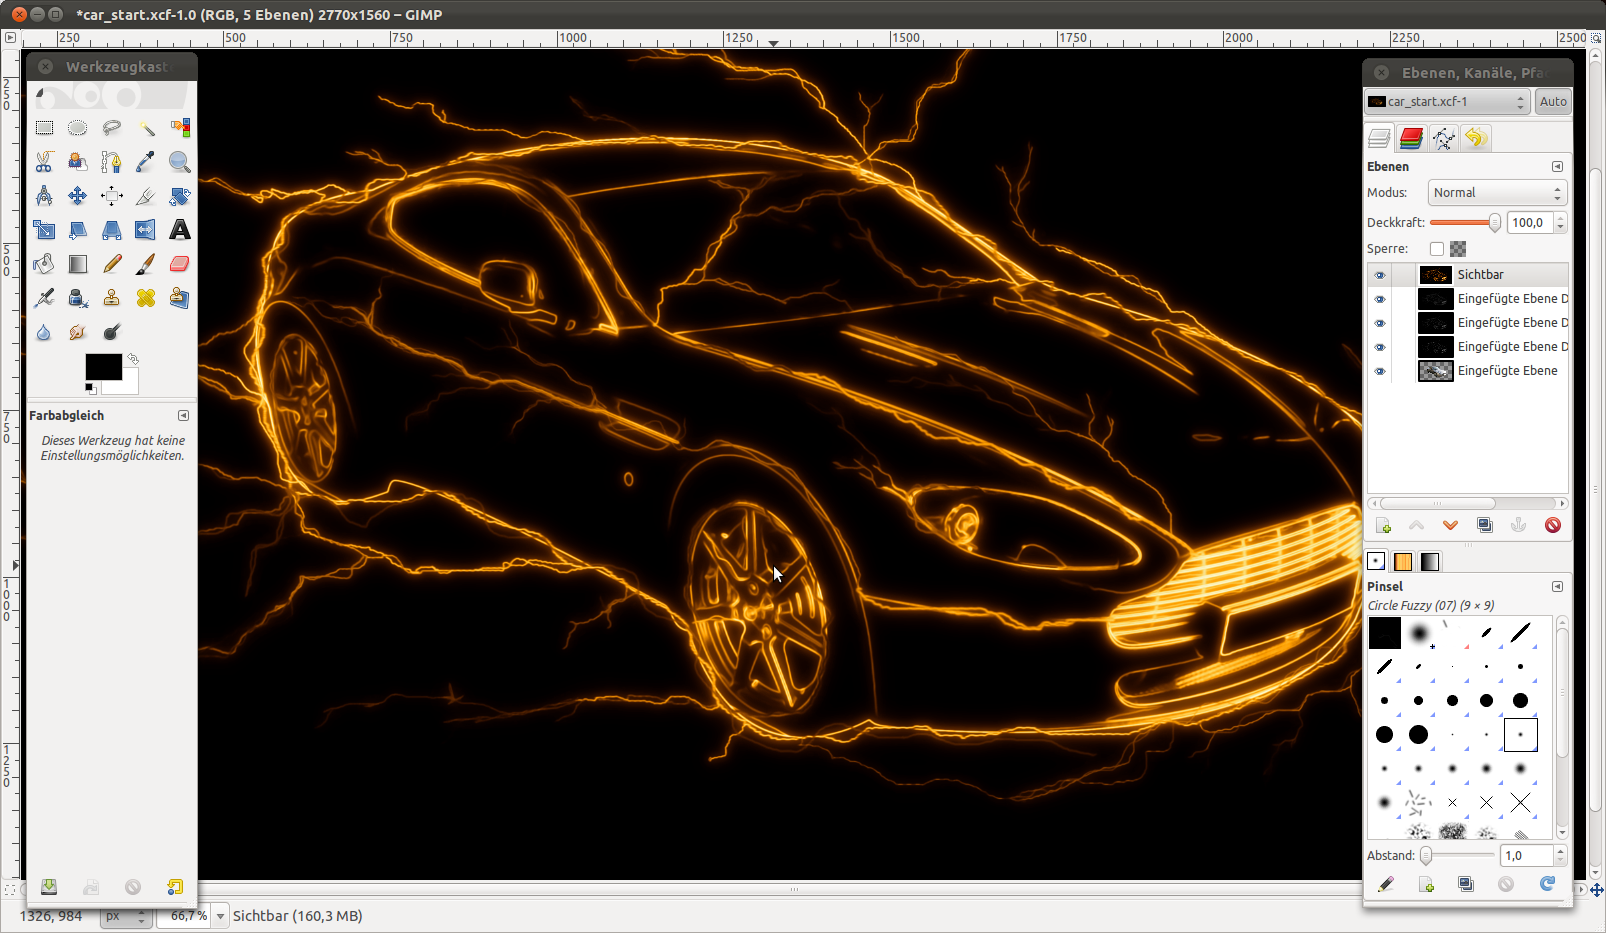
At the moment the car should look like this. Already a pretty cool effect I think – it is something like a wireframe effect.
-
5
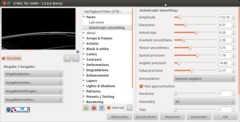
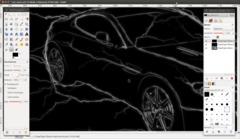
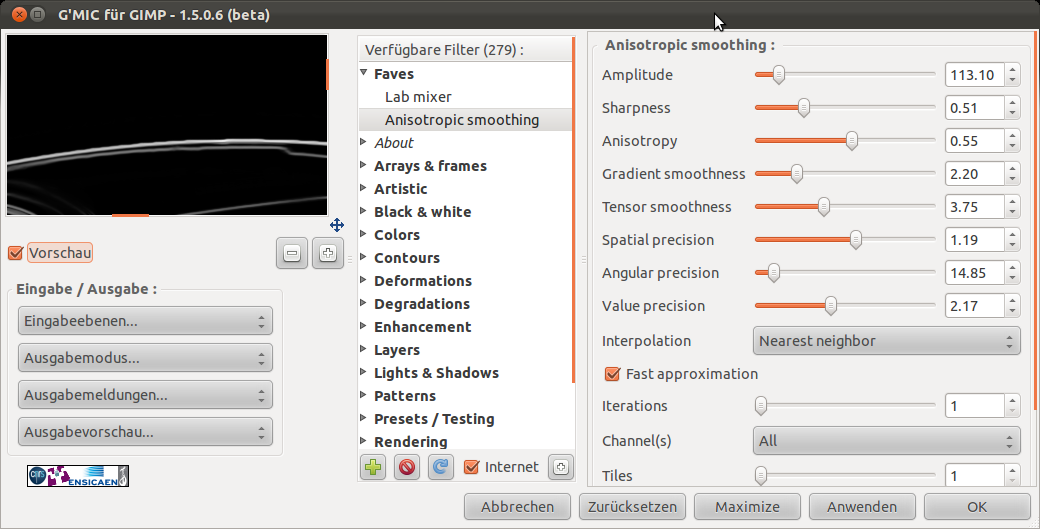
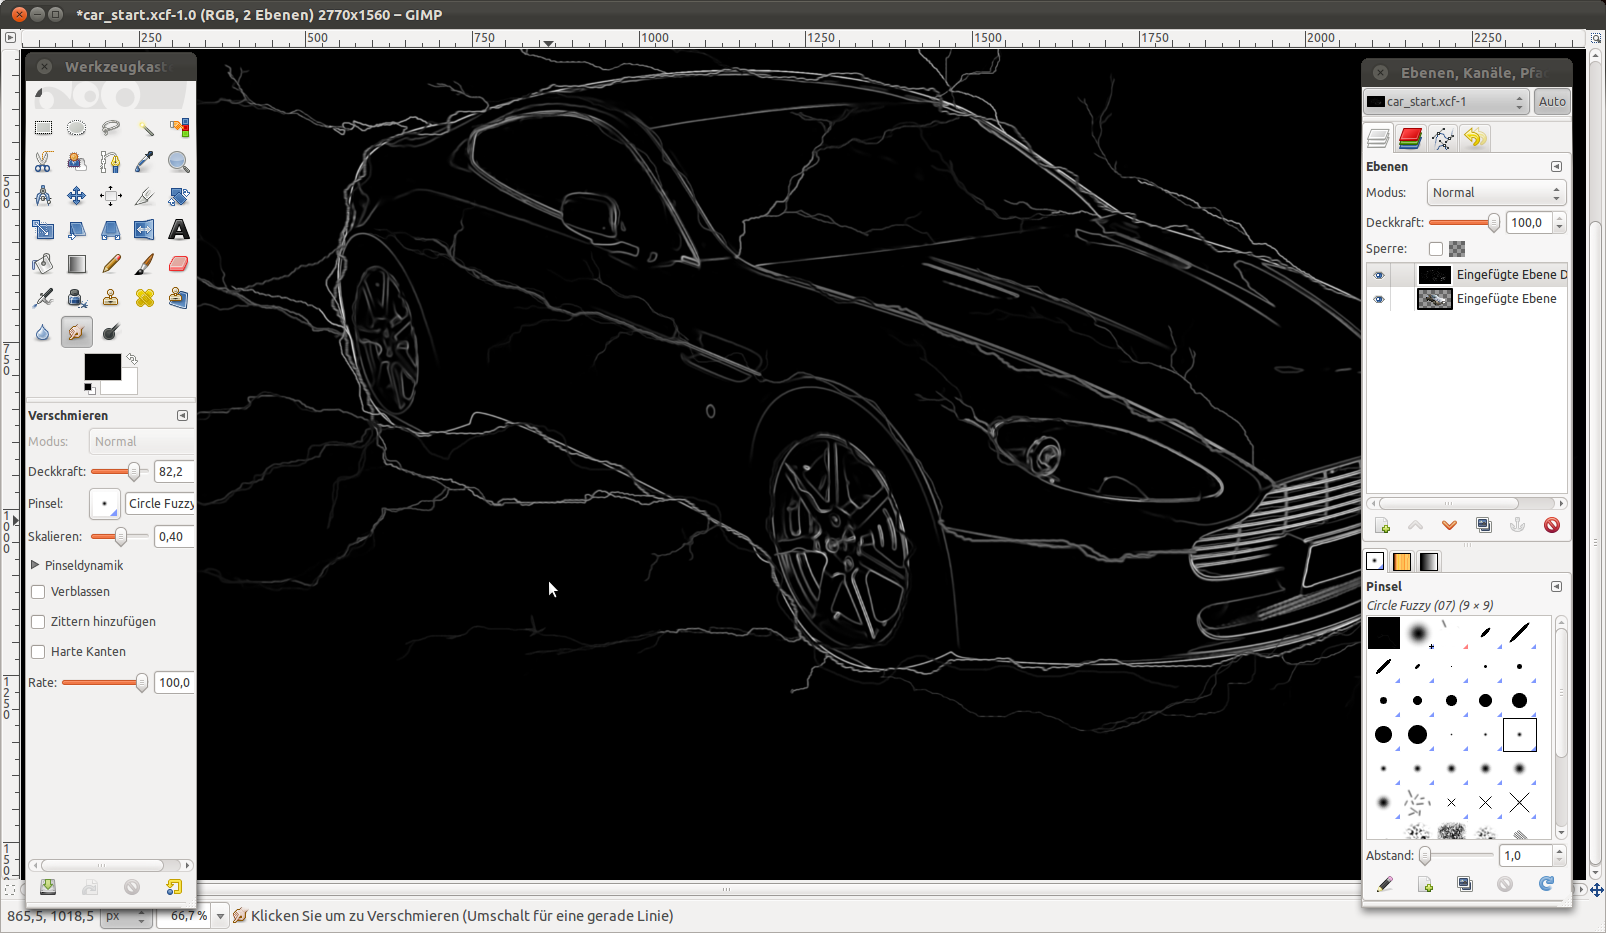
However, if you look a bit closer you can still see that some lines are not very smooth and some have the typical aliasing effect. To counter that we get anisotrope filtering into play – that will smoothen the line even more with great quality.
- Filter / GMIC → Enhancements / Anisotrope smoothing (please take values from the image).
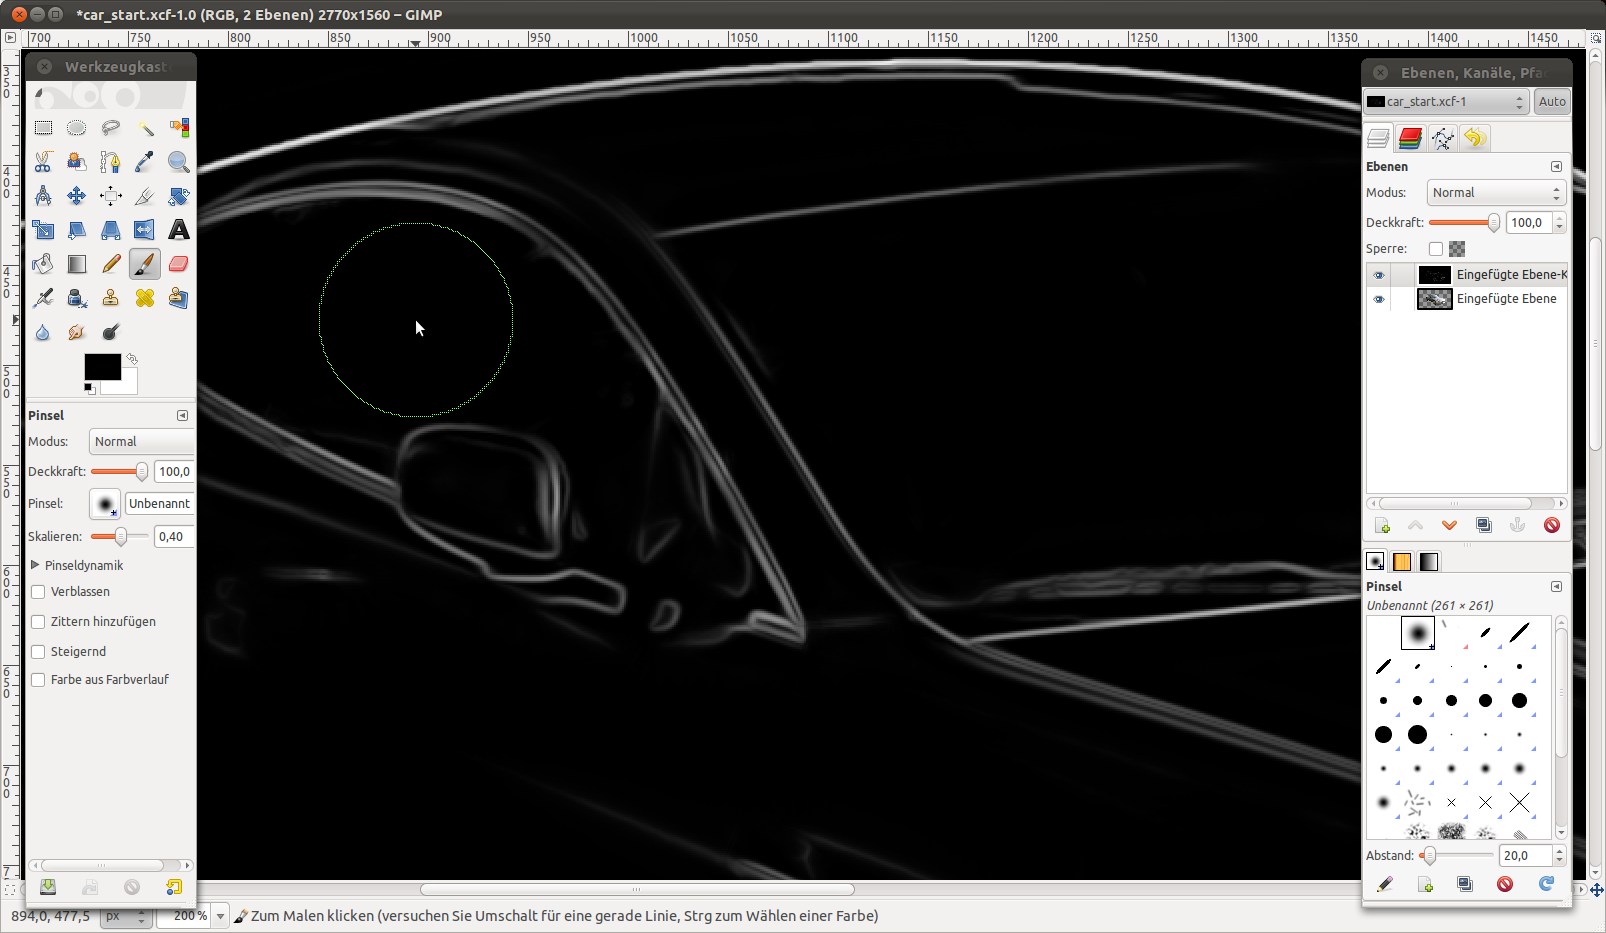
You can see the smoothing very well if you look at the upper lines of the roof.
Optional usage: If you invert the colors of the image now – you can perfectly use it as a pencil drawing ;)
-
6
In this step you can remove unwanted parts on the canvas by overpainting these parts using a black brush.
-
7

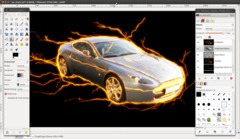
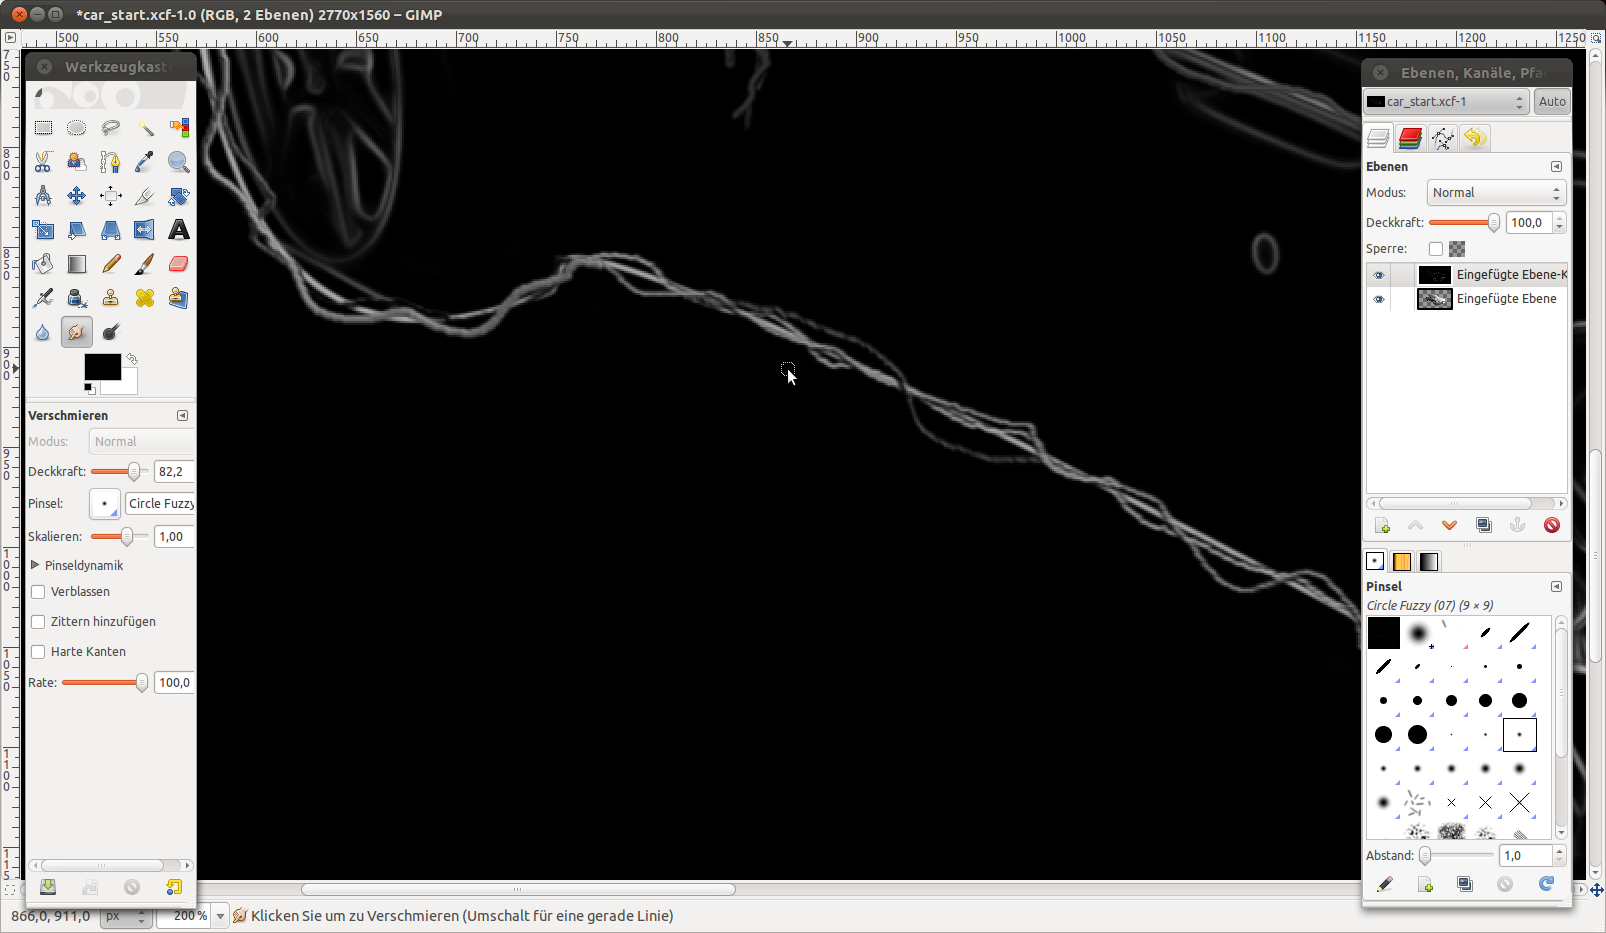
Now I used the Smudge tool to create the flashes. This is a rather long manual work but the nicer you paint the flashes the cooler the effect will be at the end.
- Use the Smudge tool. In the preferences set a very small brush. Important: Set the “rate” value to 100. Doing that will be able to smudge the picked color infinite long without loosing color. The brush size should be something like the thickness of the line your painting the flashes from. In the first case I start “smudging” the lines (the flashes) from the bigger outline of the car. Paint some uneven waves from this outline as seen in the picture.
-
8

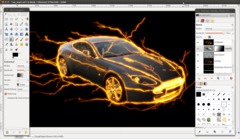
Vary the size of the brush by changing the value in the tools preferences. Make it smaller now and paint the thin and fine details of the flashes. Give th picture your own style ;) For the car i found it nice when the flashes tend to go into one direction (to the back, behind the car). That give more dynamic to the picture we’re creating.
optional: If the flashes are to aliased use the anisotrope filter again.
-
9
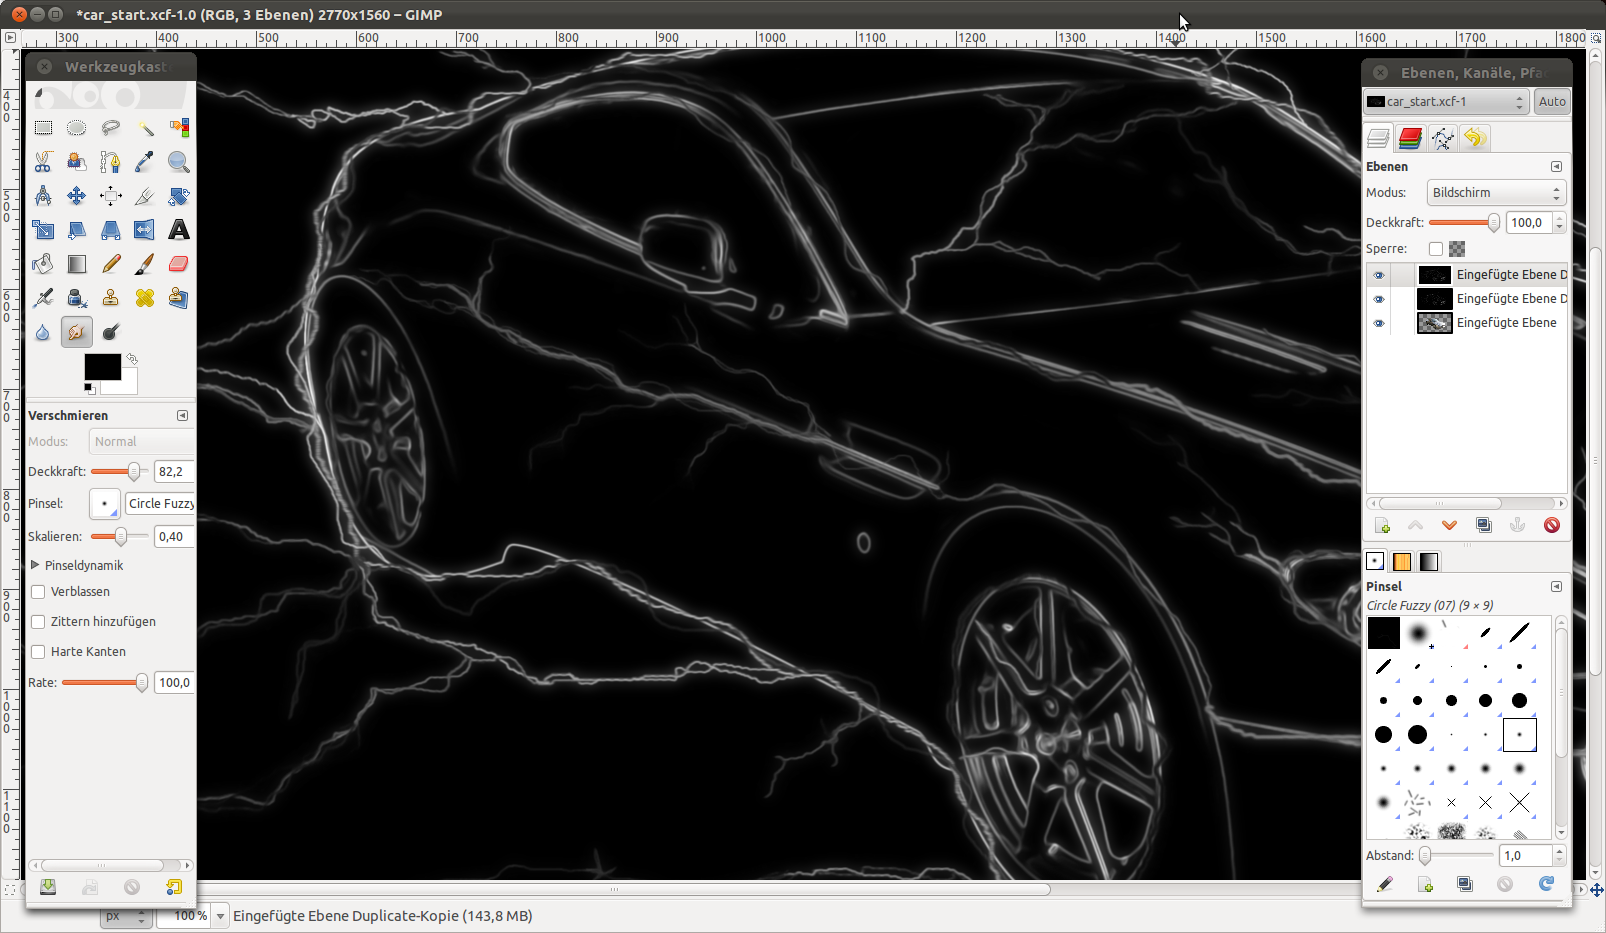
We’re done with the details. Now let’s start the glowing of the flashes to make it look more realistic.
- duplicate the layer.
- on the dupe: Filter / Gaussian Blur. 20px. Set the layer mode (found atop the opacity rule in the layers dialog dock) to Screen. -
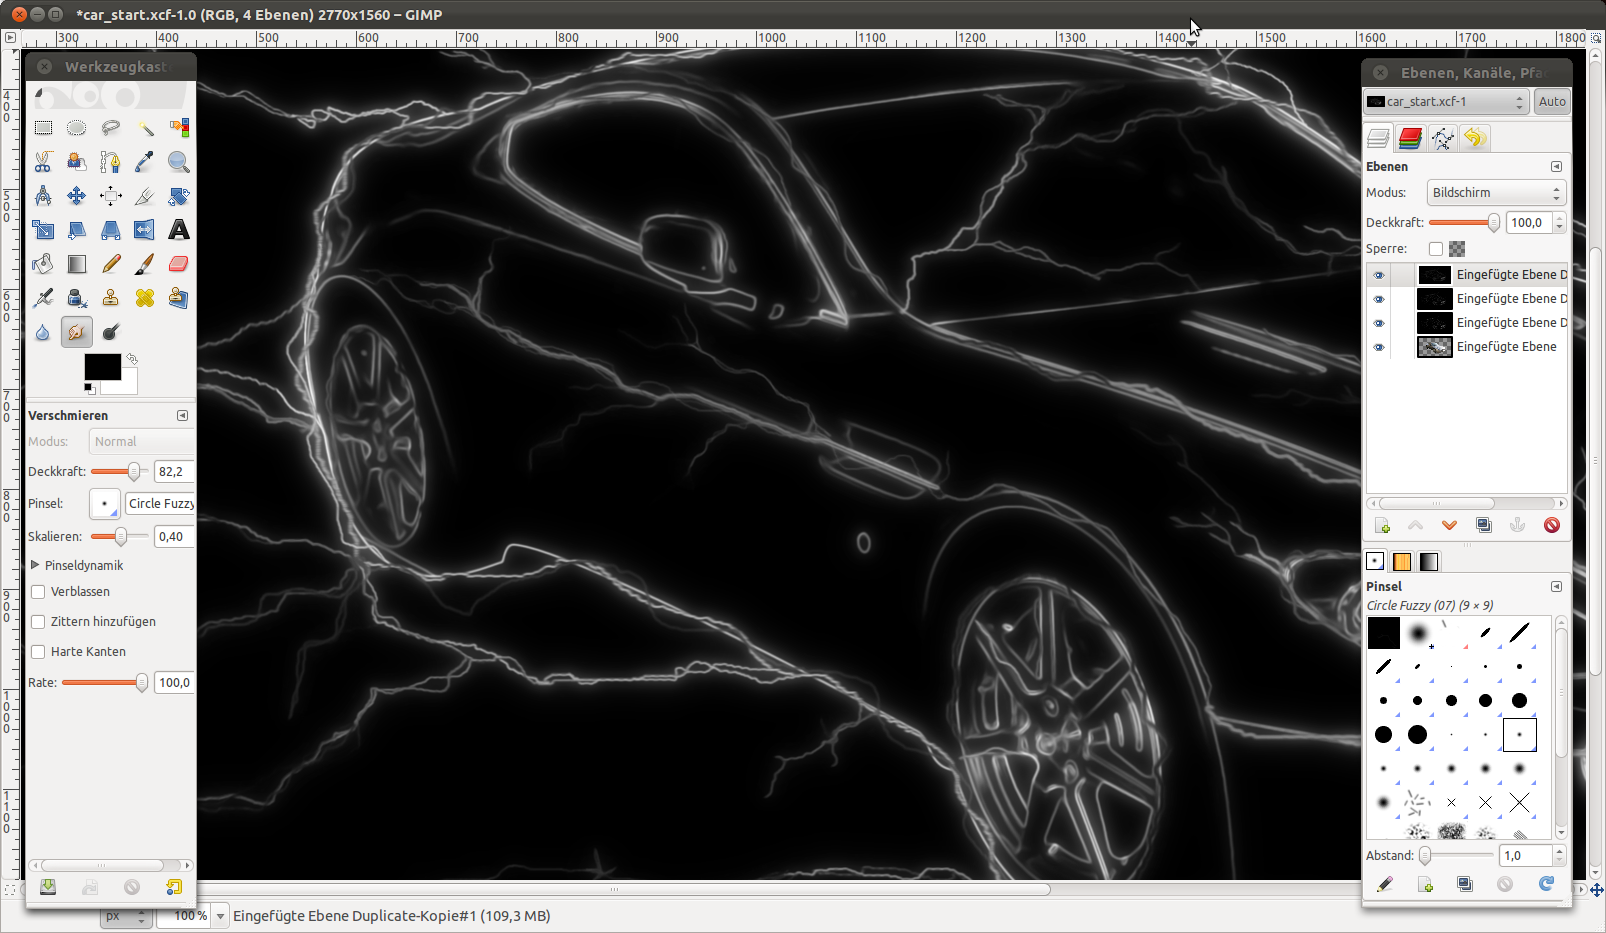
10

- Duplicate the layer again. Choose the filter again with a value of 60 or 70.
-
11
 flash-colors.devvv
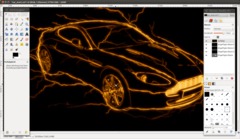
Now we need to get the colors in. Thatfor we need to get the whole scene on a single layer. The easiest way to to this is:
- rigtclick the layers dock. Click the layer that is most top and choose “New from visible”.
- Colors / Color balance. Here you can create your own colors by moving the rulers to left/right to mix the color tones.If you want to have my colors save the file attached to this step and import it in the color balance dialog. The file is named “flash-colors.devvv”. Optionally you can just view the file (it is text only) and copy/paste it to a file you created by your own.
-
12
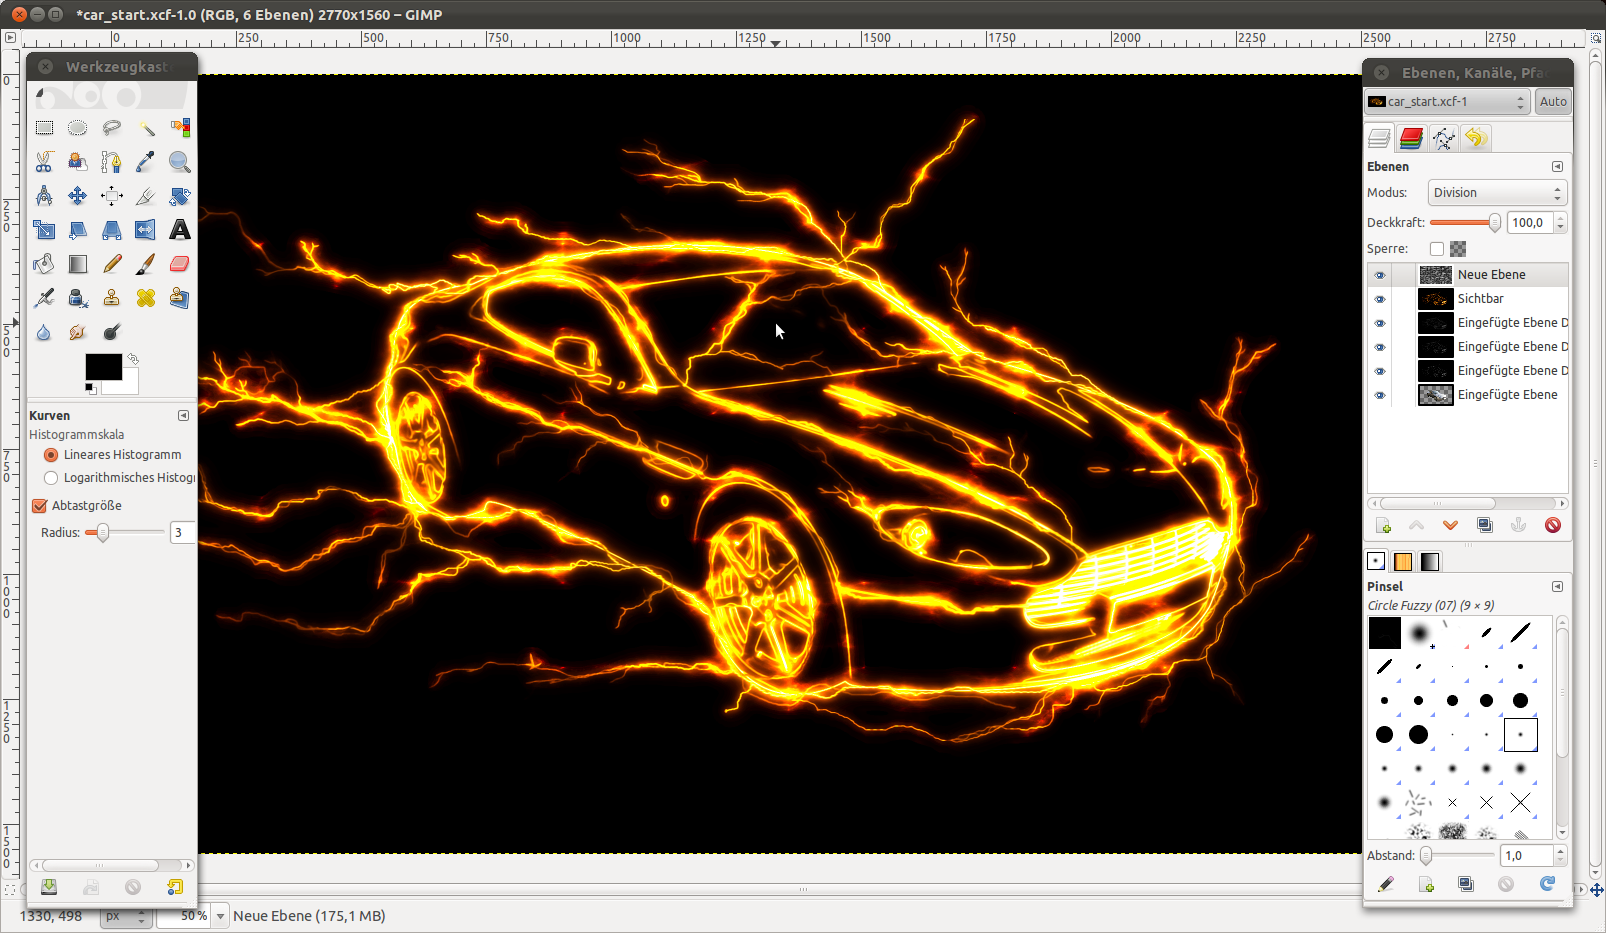
To make the flashes even more “flashy” do the following:
- new transparent layer.
- Filter / Render / Solid noise. Values: Choose any random. Activate tubulence. Details: 5. X/Y: 9.
- Set the layer mode to “divide”.ATTENTION – extremely flashy!! ;)
-
13
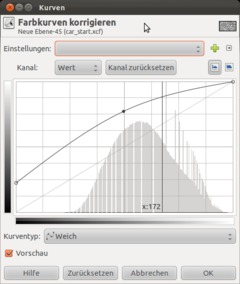
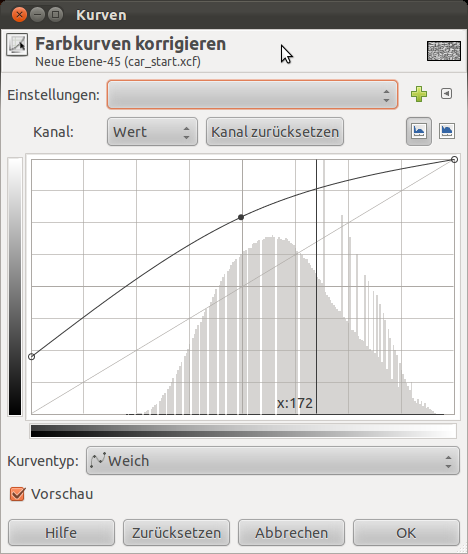
For some of you the flashes effect we just created is a little bit too heavy (as for me). If you want to soften this usw Colors / Curves and choose a cure as senn in the image.
-
14
Now choose “New from visible” again to get everything on a single layer.
- Move the car layer (the original masked photo) right below the newly created layer and set the layer mode of the layer with the flashes to “Screen”.
-
15
- Activate the real Car layer.
- Right click the layer in the layers dock and choose “Add layer mask”.
- Choose the Blend tool.
- Reset the colors to Balck/white by simply pressing D on your keyboard.
- Drag a gradient from the license/number plate to the back of the car. -
16

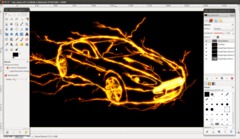
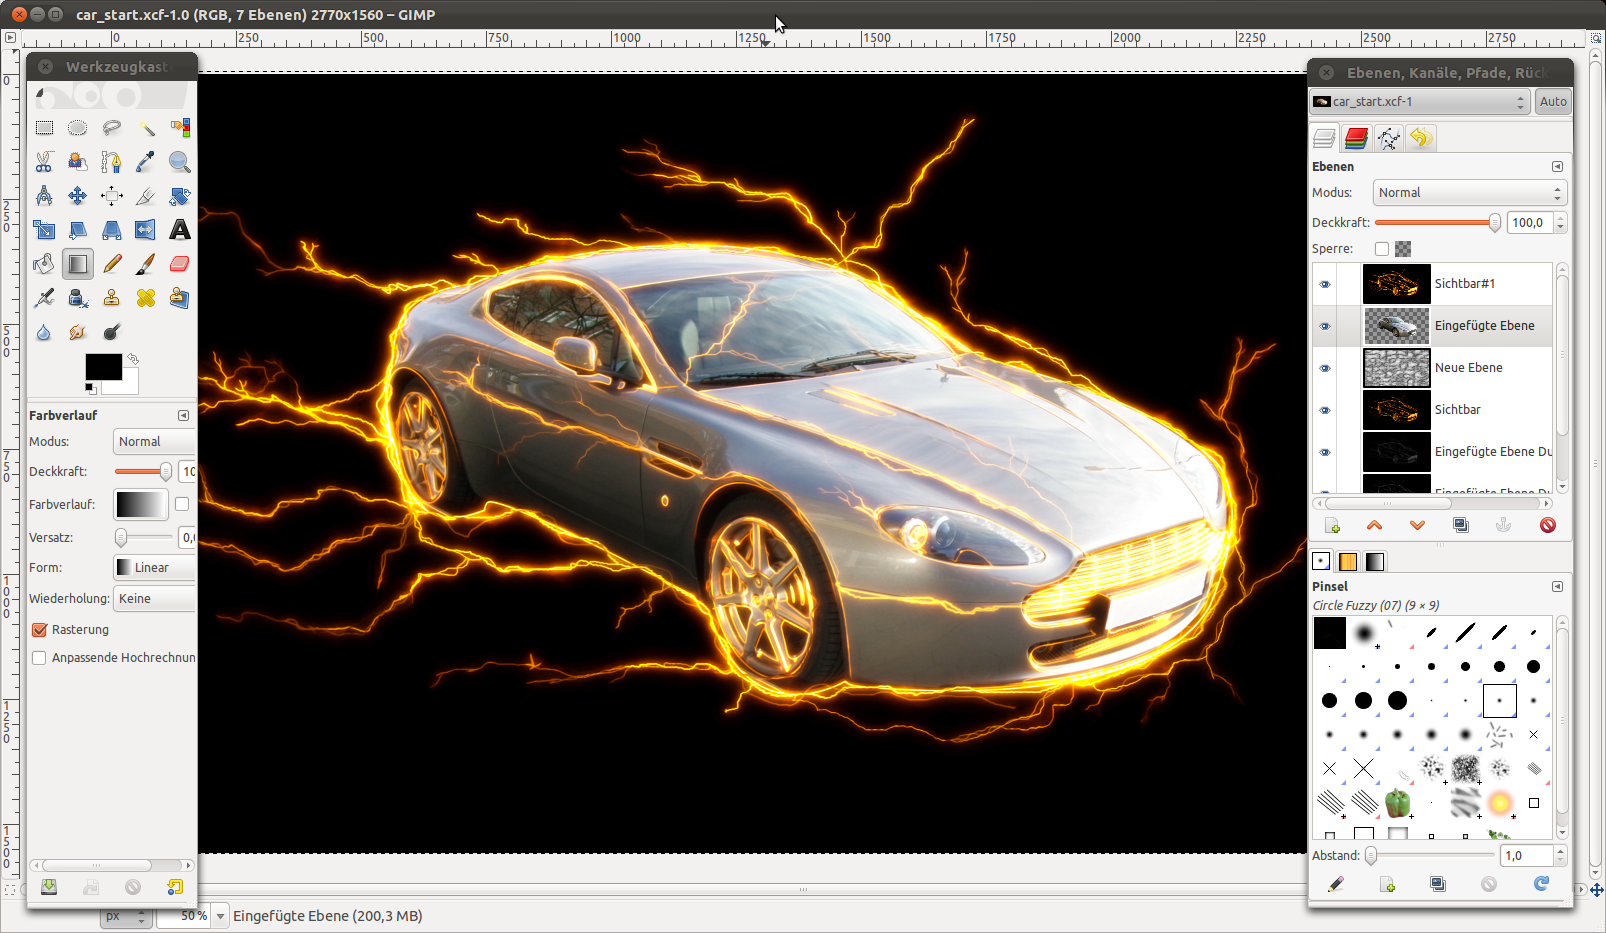
Now you can add a new layer below the car layer and fill it with a gradient of your choice. I used some kind of violet.
After all I sharpened the image a bit. I hope you like the effect and I would be happy to see your own creations with this effect :D You can attach it using the comments function.
-
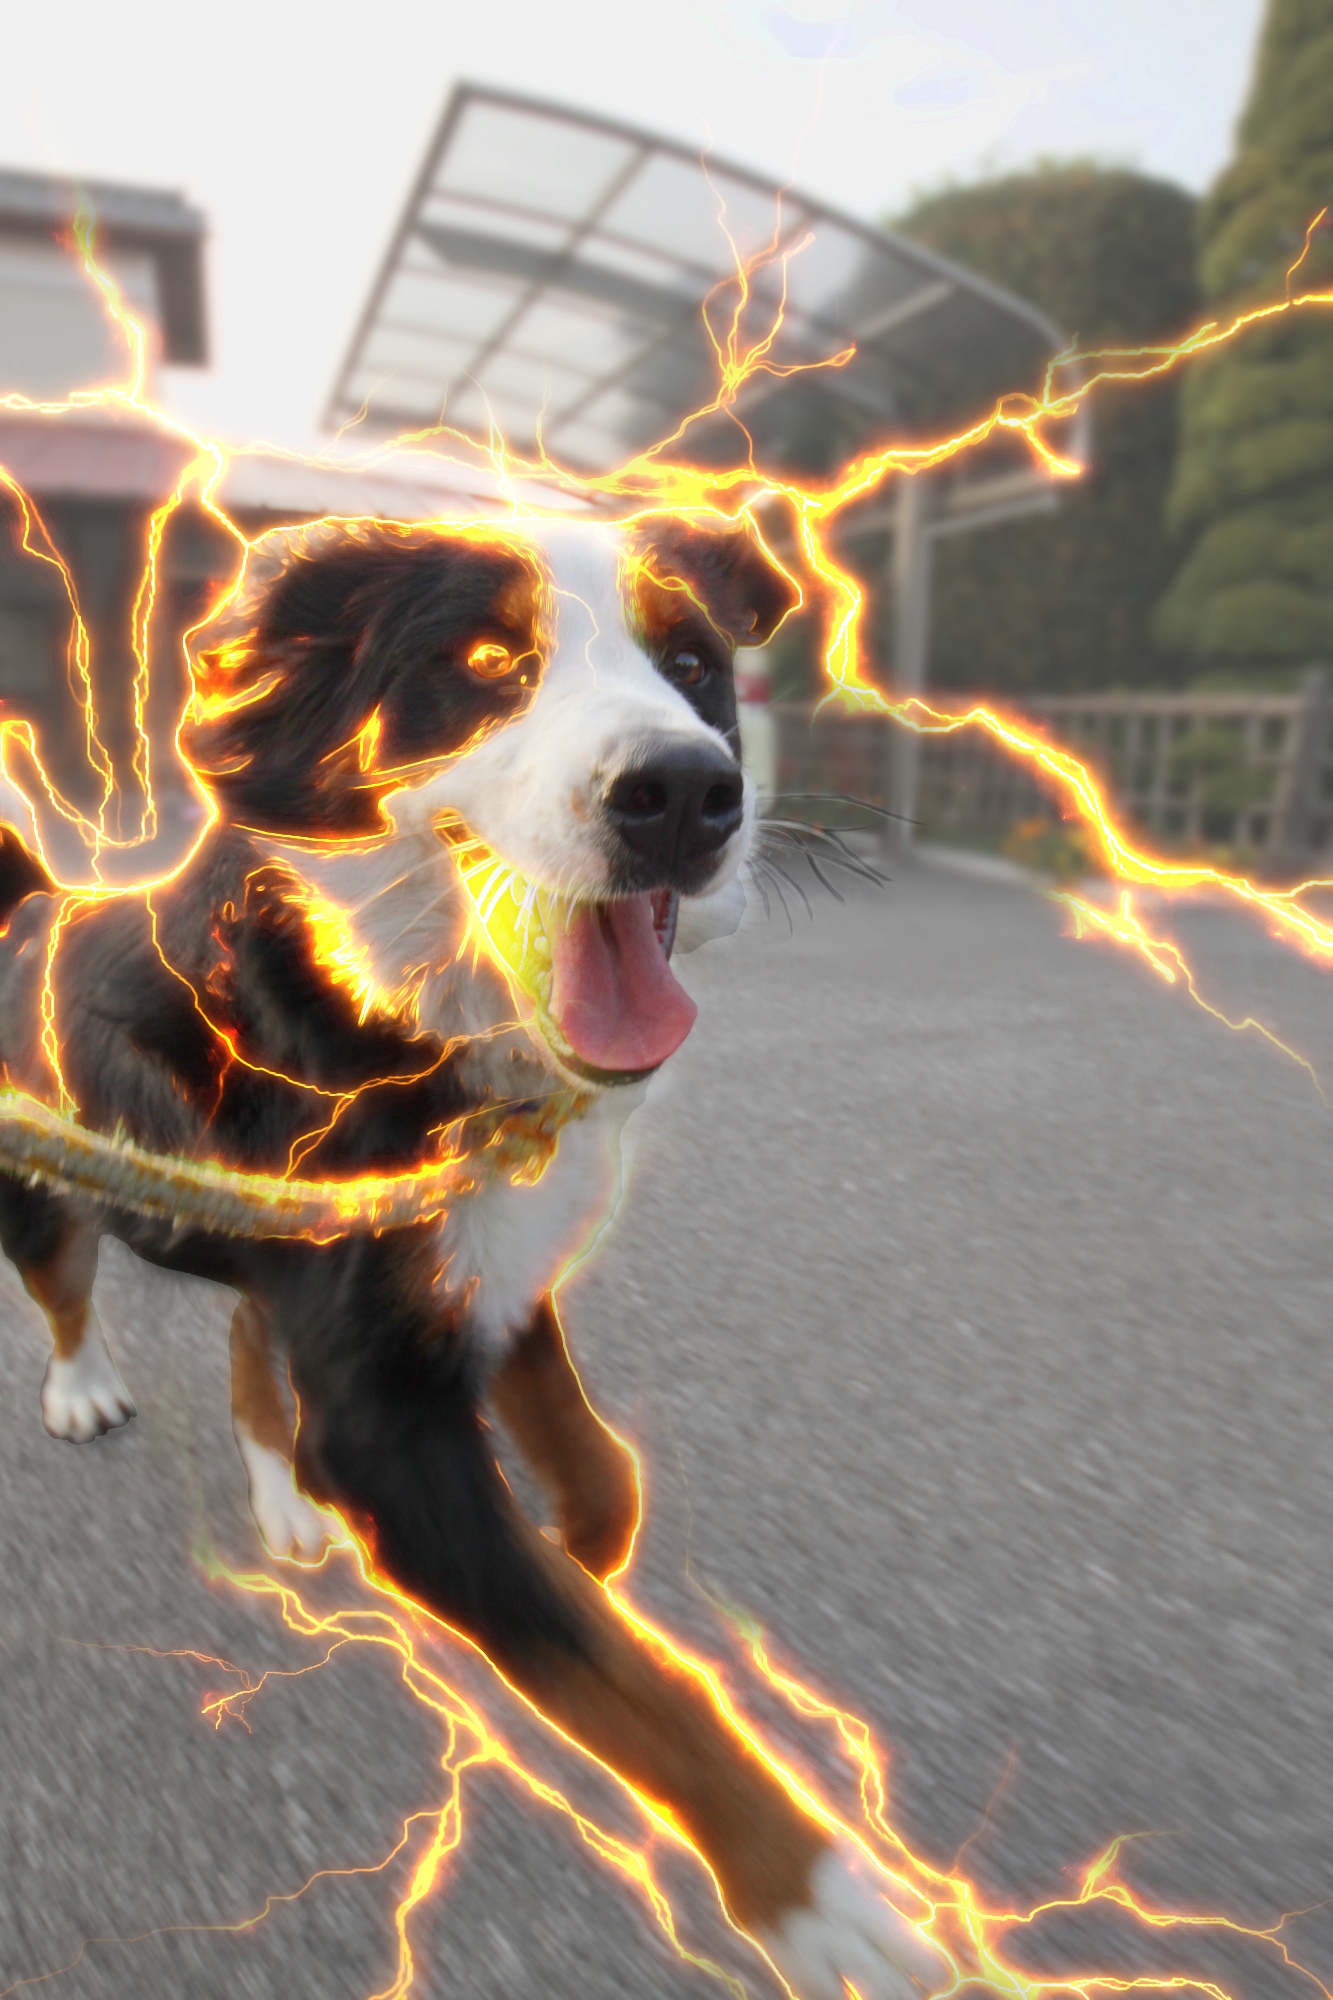
17

Here is another experiment with a dog – on of my first ones. It’s not that perfect but its at least funny having created a kind of HELLHOUND harhar xD


Comments
Post your own comments, questions or hints here. The author and other users will see your posting and can reply to it.
Of course, you can also ask in the chat.
Subscription management
Please log in to manage your subscriptions.
User rating
This topic (Create an amazing electricity effect on any object!) has been rated 4.7/5.0.
New comments are disabled because of spam.