


Tutorial: Create a sparkling Disco Ball
 is licensed under a Create Commons Attribution-Non Commercial 3.0 Unported license.")

Motivation
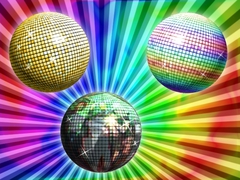
For one it might be a relic from the past, for others it is a symbol for pure party and dancing: a disco ball. It is a sparkling and glossy orb that has a glassy mosaic-like surface which is then rotating in colored disco light to spread the lights into different directions. I needed such a disco ball for a party flyer that I did for myself.
Tutorial details
- Category: Special FX
- Time to reproduce: ≈15.0 minutes

- Tested with GIMP 2.6
-
1
Create a new file using these dimensions:
Width: 800px
Height: 400pxOf course you can use any size but pay attention that it is an aspect ratio of 2:1 (we will need this later)
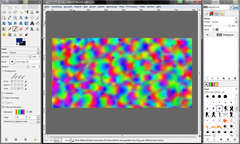
For this step: Fill the background with different colors. You can also use a variation of only one color. I used a soft brush with the “Color from Gradient” enabled in the preferences. I also used some Brush dynamics to fill the background.
-
2
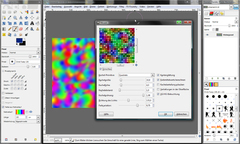
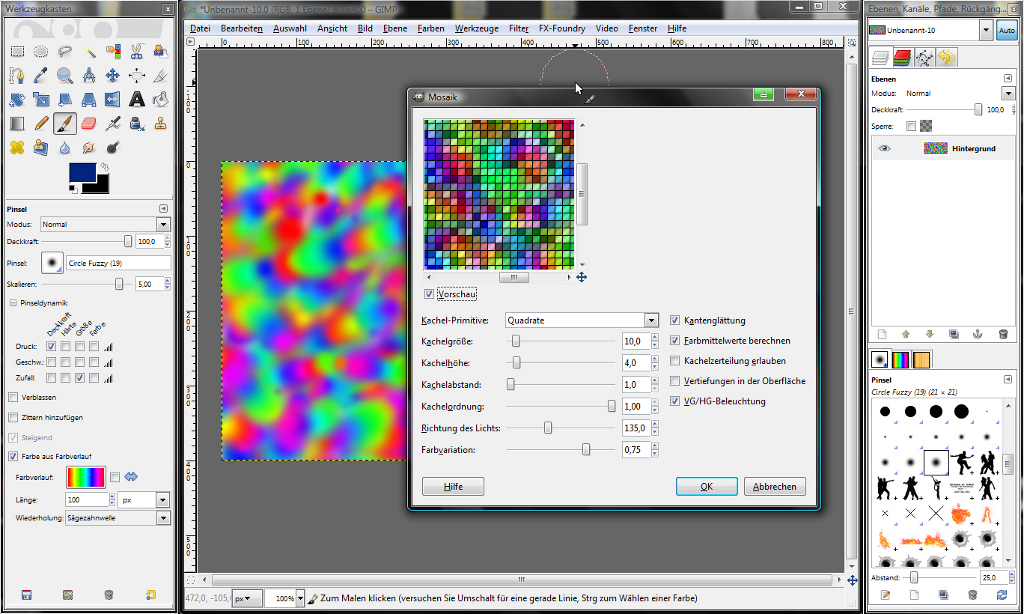
The mosaic
To create the mirrored glossy surface go to Filter / Distort / Mosaic and use the values from the picture.
Make sure that you disable the option “Allow tile splitting” on the right side of the filter dialogue. The option “FG/BG lightning” is used to fill the spaces between the mosaic with color. In my case this would be black.
-
3

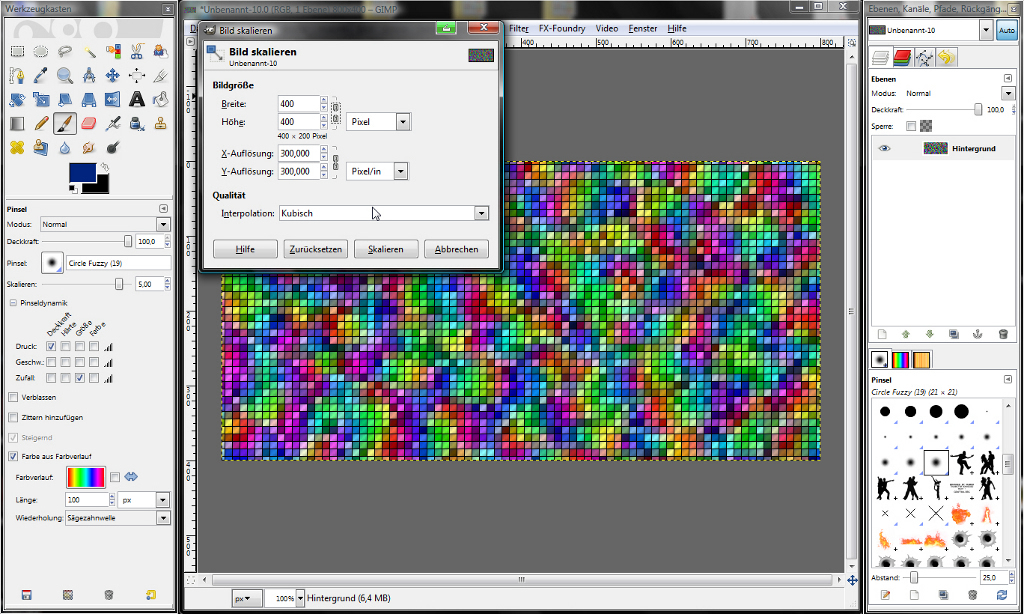
Scale the image
To avoid distortions when we later use the Map filter it is necessary to scale it on the width. To do this use Image / Scale: Enter 400px width. Disable the chain-symbol. You should then have a square image.
-
4
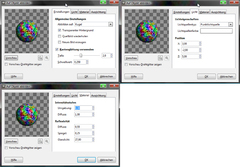
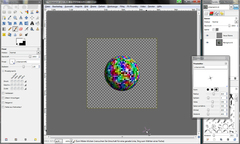
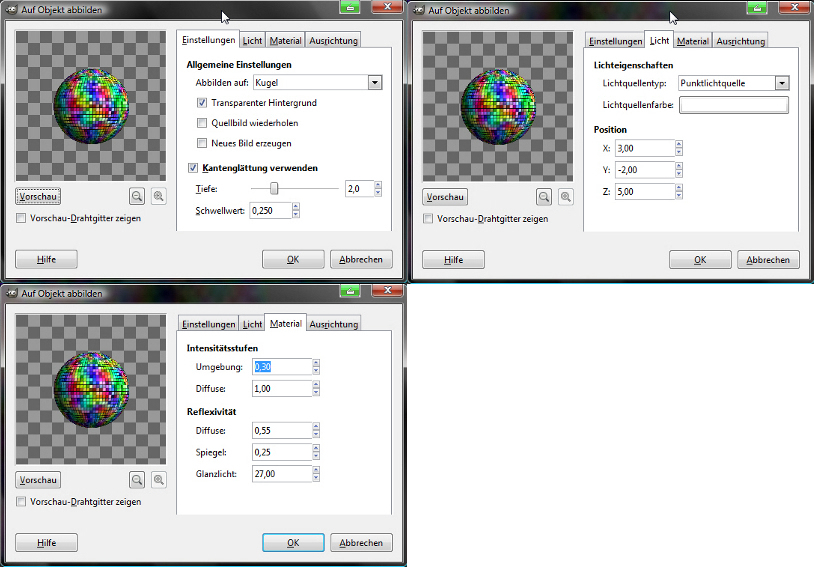
Mapping
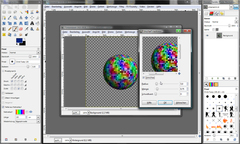
Now we get to the important step of the tutorial.
Filter / Map / Map object. Use map to a sphere in the dropdown. Use the following values from the images. You don’t need to make changes in the “orientation” tab.
-
5
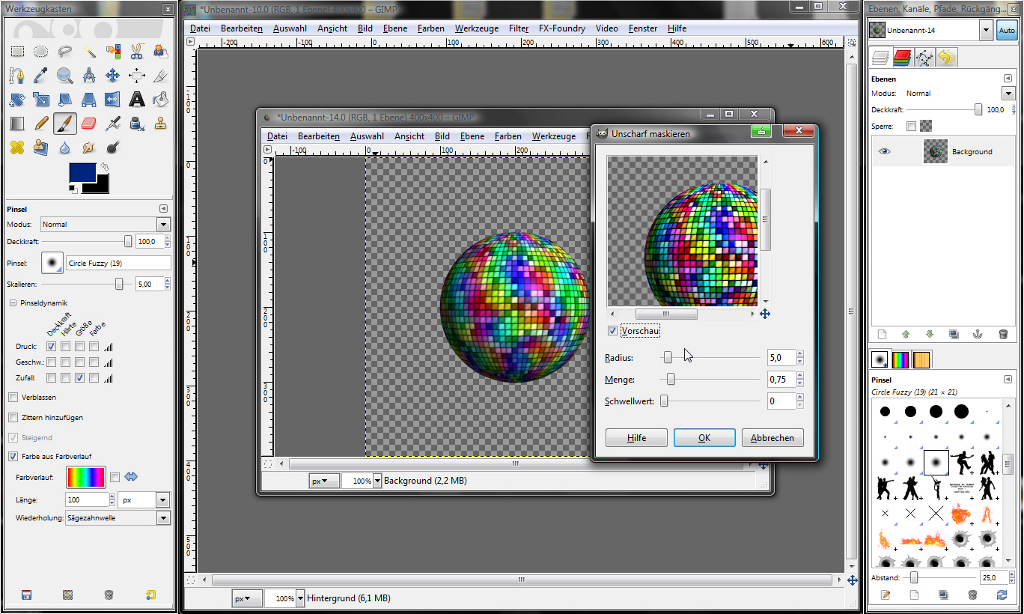
Unsharp Mask
In step 4 we already got a nice output. We need to do some more fine tuning however. For more sharpness use Filter / Enhance / Unsharp Mask with these values:
-
6
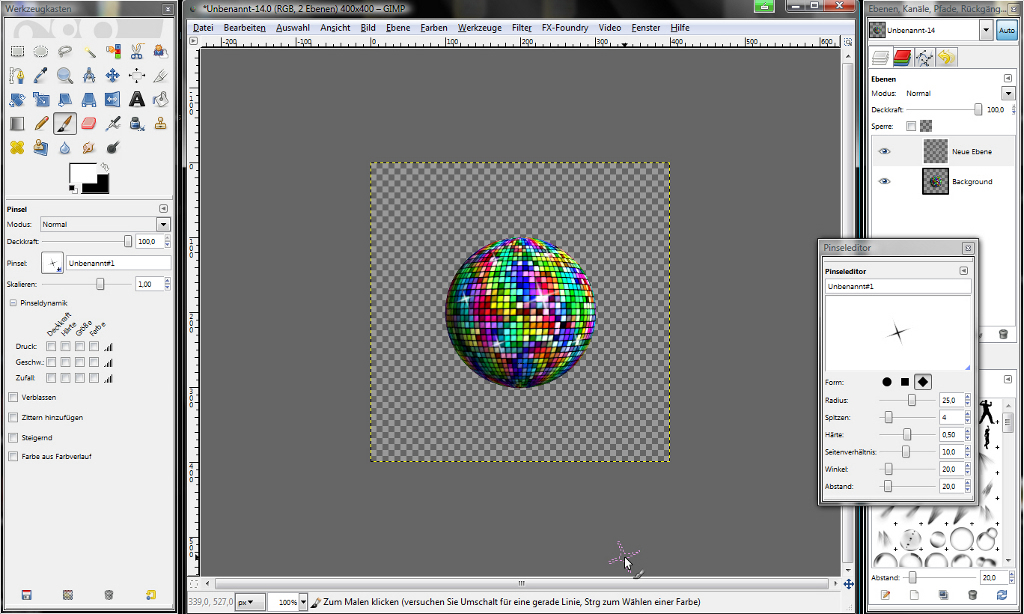
Add sparkle
Now we need some sparkle. For that create a new brush using the brushes editor (bottom right). Change the foreground color to white. Click on some places in the image. (Further details on how to create sparkle you will find in the according tutorial – http://www.gimpusers.com/tutorials/sparkle-on-objects)
Important: Reset the options of the brush dynamics before adding the sparkle. Use white as foreground color.
-
7
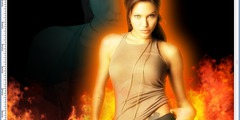
There are of course many color variations possible. The whole disco ball comes to life when using a nice background. Also some rotation of the sphere is a good ide to get more dynamic into the scene.
I hope you enjoyed the small tutorial! I’ve got the inspiration to this tutorial from http://mosquitosplace.com/2008/10/disco-ball-tutorial/ which was a motivation for a kiwi partyflyer.


Comments
Post your own comments, questions or hints here. The author and other users will see your posting and can reply to it.
Of course, you can also ask in the chat.
Subscription management
Please log in to manage your subscriptions.
New comments are disabled because of spam.