RSS/Atom feed Twitter
Site is read-only, email is disabled

Tutorial: Creating 3D icons

Written by · Created on May 25, 2007, last updated about 13 years ago CC BY-NC License
Creating 3D icons

Motivation

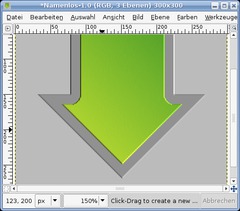
Want some cool 3d-icons? Then you're right here ;) We're going to create some 3d-icons today. We're demonstrating the 3D-effect with a simple arrow that could be used as a download-button.

Tutorial details

  1. 1

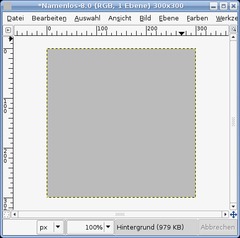
    Create a new file: 300×300px. Set the background to any color of your choice. I chose #bbbbbb as color.

  2. 2

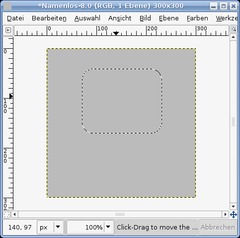
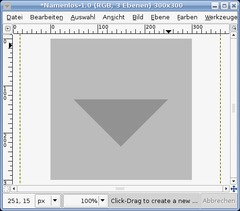
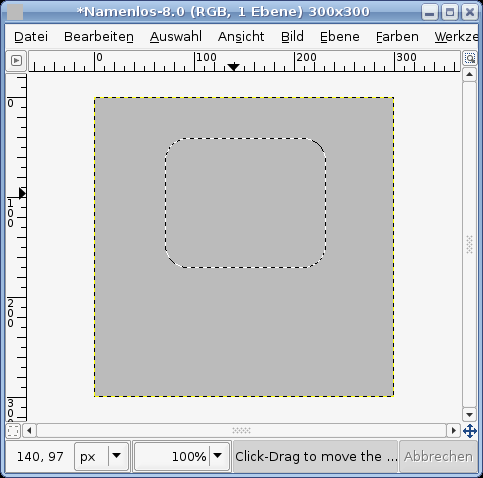
    The first step is to create the basic form of the arrow.

    - Add a new empty layer.
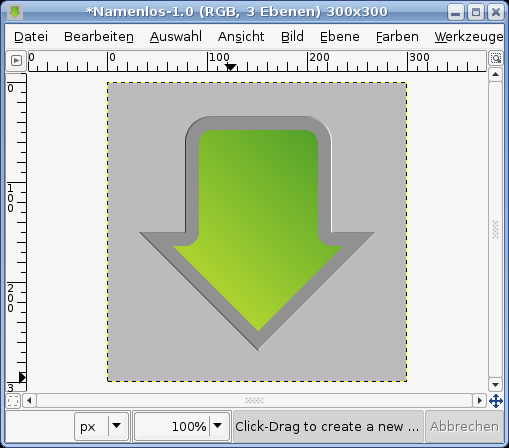
    - Rectangle Selection Tool. Draw a selection as seen on the picture. To get rounded corners go to: Selection / Rounded Rectangle: 35px
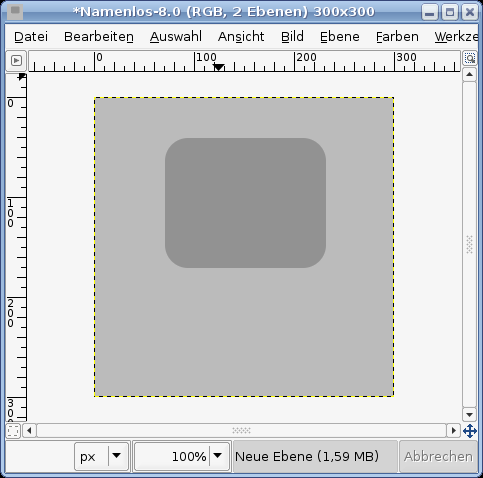
  3. 3

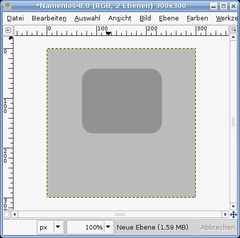
    Fill the Selection with: #929292. Deactivate the selection afterwards (CTRL+SHIFT+A)

  4. 4

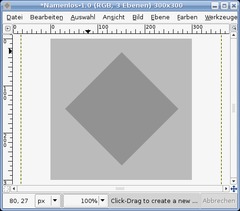
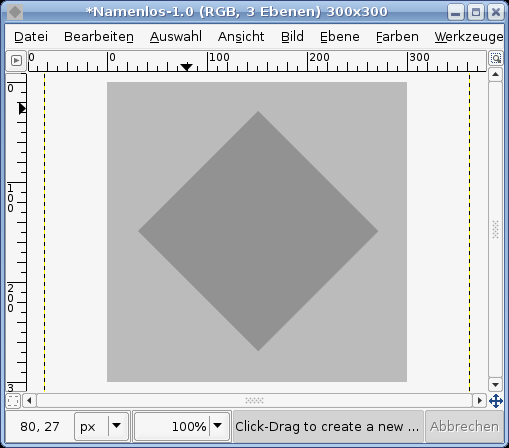
    Deactivate the visibility of this layer (click the eye icon in the layers dialog). After that create a new layer.

    Draw a quadrate. Fill the selection with the same color as before: #929292. Deactivate the selection.

    Take the Rotate-Tool. 45° and rotate it.
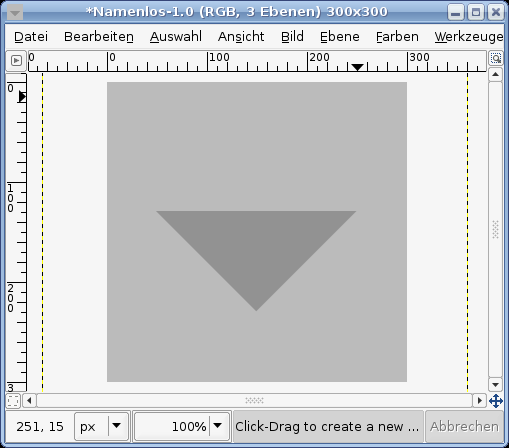
  5. 5

    Now draw a rectangle selection above more than a half of the rotated quadrate and remove that part of the object by pressing CTRL+K (if you’re using GIMP 2.3 just press DEL).

    After that go to SELECTION / None to deselect all.

  6. 6

    Make the layer that we made insvisible visible again by clicking the eye icon in the layers dialog.
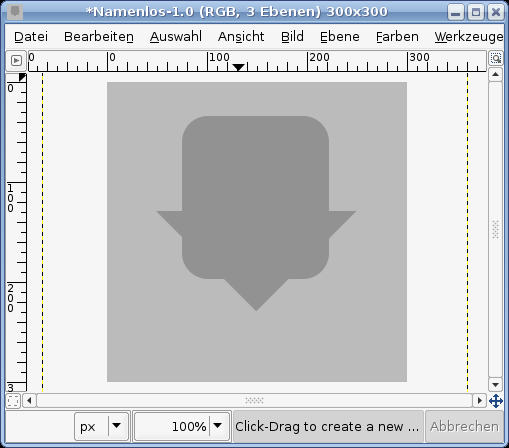
  7. 7

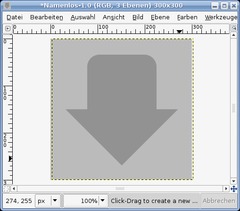
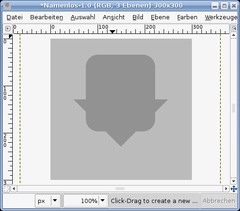
    Arrange both layers so that you get an arrow as seen below. If the rounded Rectangle is to big cut the bottom.
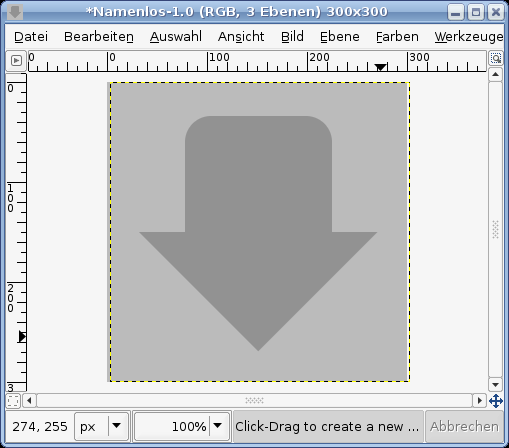
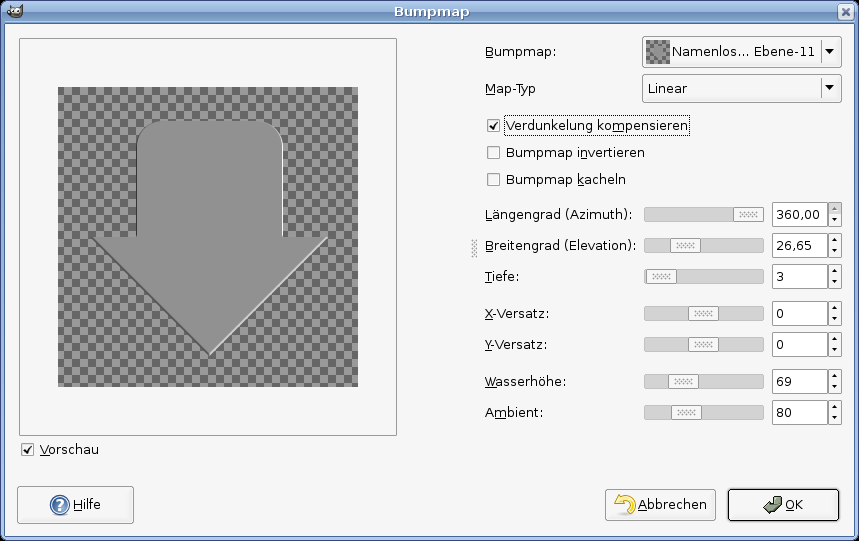
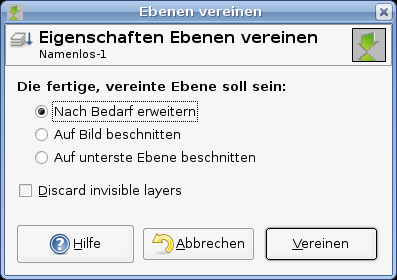
  8. 8

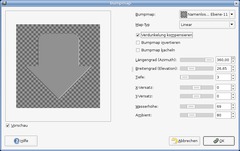
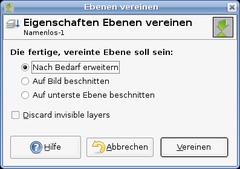
    Now merge these layers. To do this click the layer at the top, right click it in the layers dialog and choose “merge down”. We now have the whole arrow on one single layer. Now go to Filter / Map / Bumpmap. Choose values from below:

  9. 9

    In the layers dialog click right: “Selection from Alpha”.

    - Add a news layer.
    - Selection / Shrink : 15px.
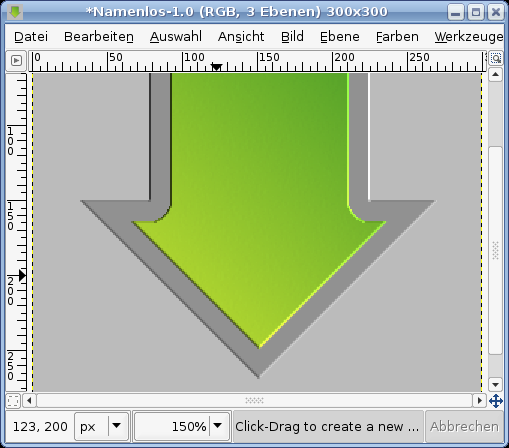
    - Choose #b1d631 as FG color and #55a32a as BG color.
    - Fill the layer susing the gradient tool. Draw the gradient from the left bottom to the top right.
    - decativate the selection.

    Now you should have this picture.

  10. 10

    Use the Bumpmap filter again, and apply the same values as before to this layer.

    - Merge down these two layers.

  11. 11

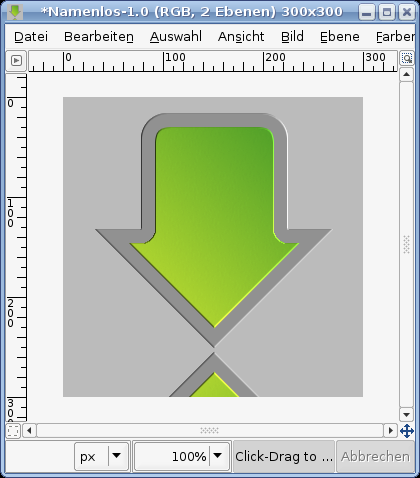
    Duplicate the layer now.

    The we’re going to flip it.

    - Layer / Transform / Flip vertically.

    Move the layer down as seen on the picture. Merge down these two layers again so that the arrow and the flipped one are on a single layer.

  12. 12

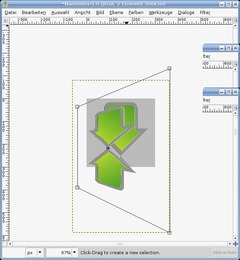
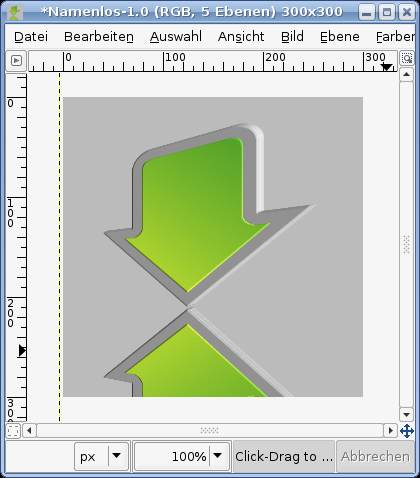
    Now use the Perspective-Tool. Zoom out a bit to get a better view.

    Then click the layer. 4 points appear. Move the points as seen below. Then click OK.
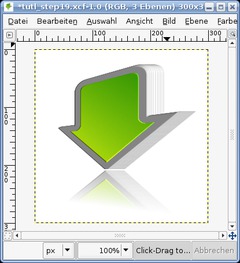
  13. 13

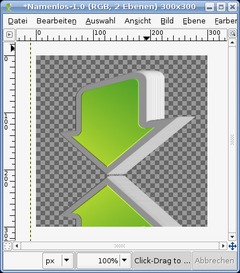
    Move the layer a bit more to the middle. It should look like this now.

  14. 14

    The 3D-Effect is done pretty easy. Duplicate this layer, activate the duplicate in the layers dialog by clicking it. That should be the layer below the original one. Click in the picture to make it active. The click the “Right arrow”-key on you keyboard to move the layer exactly 1px to the right.

    Duplicate the duplicate again, activate it and move it with you arrow key again to the right.

    Repeat this step 3 more times. You should then have 5 layers of this in total. Some depth can be already seen.

  15. 15

    To speed things up, click the eye symbol in the layers dialog of the background layer. Press CTRL+M or go to Image / Merge visible layers.

  16. 16

    Now repeat step 14. and move the layer 4 px to the right with your keyboard. Then merge the visible layers again.
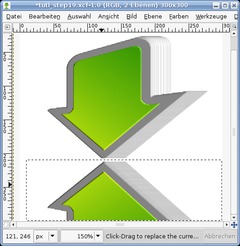
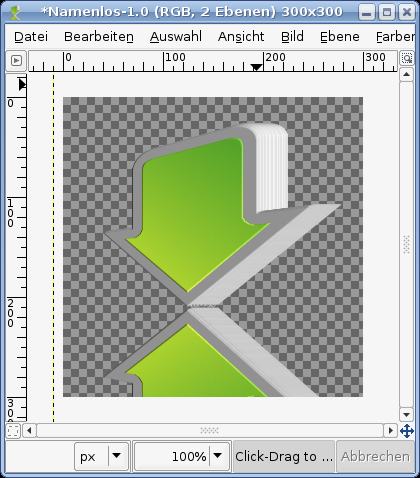
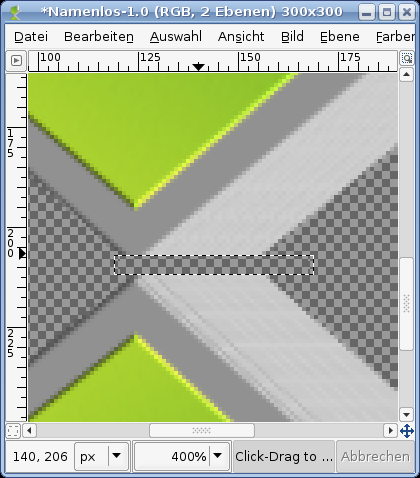
  17. 17

    Zoom into the middle of the picture. Take the selection tool and cut the arrowheads so that they have a nice horizontal edge.

  18. 18

    Go to (GIMP 2.2: Layer /) Colors / Brightness & Contrast and lower the brightness by -25, set the contrast to +25.
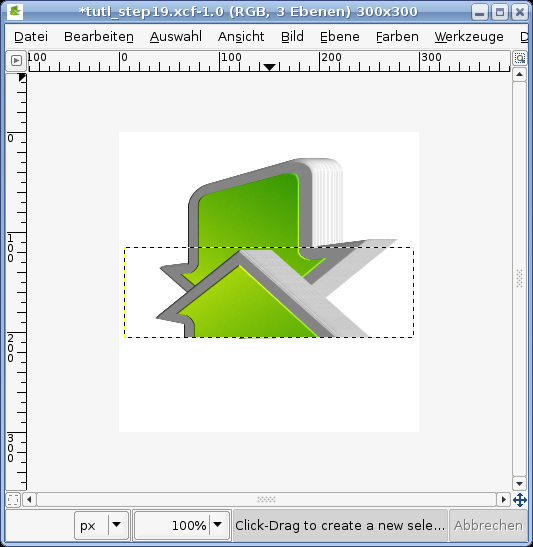
  19. 19

    Now make the background visible again and fill it white. Draw a rectangle selection over the bottom (the flipped) arrow.
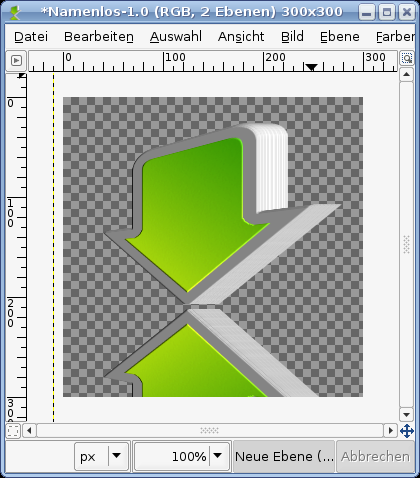
  20. 20

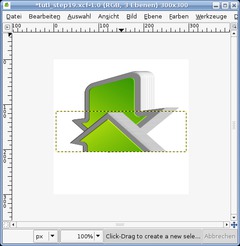
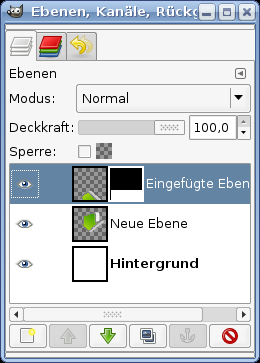
    Cut the part by using CTRL+X and paste it with CTRL+V. Click the “New layer”-Button to get this layer to a seperate one.

  21. 21

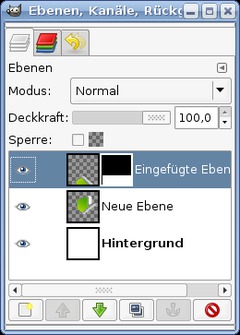
    Move the part to the same position as before. In the layers dialog right click the layer and add a layer mask.

  22. 22

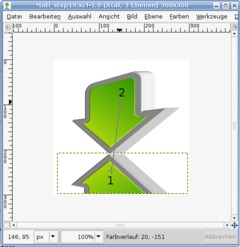
    Press D to reset the colors to black and white. Choose the gradient tool. Draw a gradient from point 1 to point 2 on the picture.

  23. 23

    You’re done ;)

Comments

Post your own comments, questions or hints here. The author and other users will see your posting and can reply to it.

Of course, you can also ask in the chat.

Subscription management

Please log in to manage your subscriptions.

New comments are disabled because of spam.

Arash
about 12 years ago

Nice one, thanks. Simple, detailed and very easy to follow.

supit
over 12 years ago

thanks you

Michail
over 12 years ago

A good tutorial.

Thanks!

Miripi
almost 15 years ago

Thanks for the tutorial!

I have made my first image manipulation using Gimp. (^_^)

wdalhaj
almost 15 years ago

good
looking for better

misstarnia member for over 15 years misstarnia 2 comments
almost 15 years ago

Wow, that was a really worthwhile process, thanks to all those who asked the questions I had as I progressed. Awesome job Devv

Pedro
almost 15 years ago

Thank you, very usefull!! exactly what i needed. :)

ShockwaveLover member for over 15 years ShockwaveLover 7 comments
about 15 years ago

I restarted GIMP, and that appeared to fix the problem; it selected fine after that. A very useful tutorial, thanks!

devvv member for over 17 years devvv 1475 comments
about 15 years ago

you have to get the alpha selection from the arrow layer - not from the newly created one. maybe that is the problem

ShockwaveLover member for over 15 years ShockwaveLover 7 comments
about 15 years ago

I'm having a problem with the Alpha to Selection part in stage 9. When I click that options, it selects, and then shrinks from, the image border. This means I can't use the gradient tool, and create the smaller arrow. What can I do to solve this?

Helper
about 15 years ago

press CTRL+L to view the layers dialog - every layer has a small eye-symbol to the left. with it you can switch visibility on or off.

Car
about 15 years ago

Im using Gimp 2.6 and I cant " the eye icon in the layers dialog"- on step 4.
Please help. Thanks.

Eloar
about 15 years ago

Reon, I think it is "deactivate", and it means to use Ctrl+Shift+A.

Reon
about 15 years ago

On step #9, what do you mean by "- decativate the selection."?

Nyne
about 15 years ago

Thanks devvv. Your tutorial is really great. I am relatively new at Gimp so I was lost when I first attempted to create this. Now that I have a much better understanding of Gimp, I've not only made the arrow but I've used the tutorial with words and phrases. Thanks.

devvv member for over 17 years devvv 1475 comments
over 15 years ago

if you right click a layer in the layers dialog (at the bottom) there should be an option in 2.6 named "alpha to selection" - thats what i mean!

Nyne
over 15 years ago

I'm getting stuck on step #9 'In the layers dialog click right: "Selection from Alpha"'. Where do I find that? What does that mean? What am I clicking on? I have the 2.6.3 version and I cannot figure out how to get to that part. My arrow is looking good until I get to that step.

TeeMO
over 15 years ago

Brilliant. Thank you for this Tute.

anon
over 15 years ago

On step 6-7, how do I move the rectangle? Doesn't make sense to me. I need that visible hand on the screen to move things around?

Prasanna
over 15 years ago

Thanks a lot. It is really an useful material i have ever found for gimp.

M.rSnow
about 16 years ago

Wow extremely nice. And pretty handy.
[Bookmarked]

donna
about 16 years ago

can you make me a picture with a small arrow pointing to the left corner saying i love her(blue writing) and Best hugs in the world with arrow pointing upwards(pink writing)..please get back to me xxx

Eloar member for about 16 years Eloar 2 comments
about 16 years ago

Of course I rerly using Gimp, not Blender. In Blender I'm making whole scens. In Gimp just sometimes parts of sites, or textures to models in 3D.

Eloar member for about 16 years Eloar 2 comments
about 16 years ago

Star is just simple and common. I made some stars in web 2.0 style, but this one in 3D is much better. And it is made in gimp not in 3D modeling soft like Blender which I'm using rarly.

devvv member for over 17 years devvv 1475 comments
about 16 years ago

very nice! especially the 3d star is very well done ;)

Eloar
about 16 years ago

Method with blur is good.

There is some my variations with this method :). All works were made quick so I didn't use blur.

http://images32.fotosik.pl/94/edf081ad0065d01c.png
http://images26.fotosik.pl/135/aa6c476949df64ea.png
http://images34.fotosik.pl/96/4a95a5bb12e92307.png

There is some more instructions in german tutorial. There is shown how to make full button with text and make it glosy.

devvv member for over 17 years devvv 1475 comments
about 16 years ago

what do you mean with block image?

Eater
about 16 years ago

I have problems with changing the perspecetive, it shows a block image around the tool

devvv member for over 17 years devvv 1475 comments
about 16 years ago

i see what you mean. you could select that part that has the vertical lines, and then blur it using the gaussian blur.

eloar
about 16 years ago

ok, my arrow: http://images27.fotosik.pl/134/e11330917b10da68.png

As you can see there is some of vertical lines on the border of my arrow.

devvv member for over 17 years devvv 1475 comments
about 16 years ago

use the bezier curves (paths)-tool, and cut a bit of the arrow so that it is solid. i hope i understand you right, otherwise put an url here wit the picture - or login and attach one to the comment

eloar
about 16 years ago

The border of that arrow is not exectly solid. How easier than by hand can I make it solid? It looks like it is dirty, or something.

randolph
about 16 years ago

y need the tutorial

devvv member for over 17 years devvv 1475 comments
almost 17 years ago

make a rectangle selection on the upper half of that rotated quadrate, then use ctrl+k (or if yopu use gimp 2.3 press del) to cut the part away. hope it works now! i wrote some additional text to that step now.

Miguel
almost 17 years ago

I get lost in the #5 line of the tutorial, for me is not clear. How can i cut to form a triangle?, thanks.