


PATCH: Oilify plug-in enhancements
This discussion is connected to the gimp-developer-list.gnome.org mailing list which is provided by the GIMP developers and not related to gimpusers.com.
This is a read-only list on gimpusers.com so this discussion thread is read-only, too.
| PATCH: Oilify plug-in enhancements | Daniel Richard G. | 23 Nov 09:45 |
| PATCH: Oilify plug-in enhancements | Sven Neumann | 23 Nov 16:08 |
| PATCH: Oilify plug-in enhancements | Daniel Richard G. | 24 Nov 07:56 |
| PATCH: Oilify plug-in enhancements | Nathan Summers | 23 Nov 16:20 |
| PATCH: Oilify plug-in enhancements | Leon Brooks | 25 Nov 03:34 |
| PATCH: Oilify plug-in enhancements | Daniel Richard G. | 25 Nov 10:25 |
PATCH: Oilify plug-in enhancements
Hello everyone,
Recently I had occasion to use Gimp's make-this-look-like-an-oil-painting plug-in. The results left me a bit disappointed; the "oilified" image had numerous artifacts, which ruined the effect. I'll show you what I mean:
Given this input image,
http://www.iskunk.org/tmp/oilify/oilify-test.jpg
at an oilification size of 24, and using the intensity algorithm, I got
http://www.iskunk.org/tmp/oilify/oilify-test.orig24.jpg
This made me sad :-(
So I had a look at gimp/plug-ins/common/oilify.c, and changed a few things around. And now, I get something a little more convincing:
http://www.iskunk.org/tmp/oilify/oilify-test.new24.jpg
I will now describe the changes I made, which are attached in a gzipped patch file against CVS-head. (The patch is a bit of a mess, I'm afraid; diff(1) wasn't too smart about it. The changes, however, are quite straightforward.)
First, I should briefly cover how the plug-in worked previously. The method is deviously simple: for each R/G/B channel in a pixel at (x,y), find the most commonly occurring R/G/B value in a (mask_size)x(mask_size) square centered on (x,y), and set that value. The "intensity algorithm" is only slightly more complicated; instead of three separate histograms (R/G/B) per pixel, it uses a single one based on color intensity.
Fine; so basically, each pixel takes on the color most prevalent in its immediate vicinity. Less prevalent colors are ignored, disregarded. If red occurs 90 times, and blue occurs 10 times---and there are no other colors---then the pixel is red. End of story.
But imagine a different set of circumstances... say that you still have only red and blue, but red occurs 51 times, and blue 49. So by the aforementioned rules, the pixel should still be red. But is that really proper? Blue made a fairly strong showing, only a hair less than red; shouldn't that count for something? Doesn't it feel wrong, in some way, to completely disregard 49% of the pixels?
Consider, also, what happens when you move on to the next pixel. Some red and blue pixels move out of the mask area, and some move in. And you may end up with a tally of red 49, blue 51; blue wins. And then in the next pixel, you have e.g. red 52, blue 48; red wins. When the colors are so evenly matched, it's very easy for normal image variegation to lead to an oscillating effect---which is exactly what the previously demonstrated image artifacts _are_.
I addressed this problem by changing the histogram-evaluating algorithm: instead of just picking the most frequently-occurring value, take a weighted average---that is heavily biased toward the most frequently-occurring values.
We give a weight of 1.0 to the most common value, and smaller weights to rarer values, equal to their occurrence-ratio with the most common one, raised to some power. Examples:
red = 90, blue = 10:
red weight = (90 / 90)^8 = 1.0 blue weight = (10 / 90)^8 = 2.32e-8
1.0 * red + 2.32e-8 * blue color = ---------------------------- = red 1.0 + 2.32e-8
red = 51, blue = 49:
red weight = (51 / 51)^8 = 1.0 blue weight = (49 / 51)^8 = 0.726
1.0 * red + 0.726 * blue color = -------------------------- = reddish magenta 1.0 + 0.726
Now you must be wondering, "Whoa, waitasecond, you said `raised to some power'... where the heck did you get that 8?" And the answer is, trial and error. Lower powers give fuzzier, less-well-defined edges; higher powers start looking a little too hard-edged. Some samples:
http://www.iskunk.org/tmp/oilify/test-orig.jpg http://www.iskunk.org/tmp/oilify/test-pow2.jpg http://www.iskunk.org/tmp/oilify/test-pow3.jpg http://www.iskunk.org/tmp/oilify/test-pow4.jpg http://www.iskunk.org/tmp/oilify/test-pow6.jpg http://www.iskunk.org/tmp/oilify/test-pow8.jpg http://www.iskunk.org/tmp/oilify/test-pow16.jpg
(Eight is a good power, too, since you can raise to it using only three floating-point multiplies. Then again, since we're dealing with values in [0,1] here, a look-up table is a possibility...)
That's the basic idea, then. The intensity algorithm, as before, is slightly more involved; when it is generating the histogram, it now averages together all the colors of a given intensity. When it takes the weighted average, the weights are based on the intensity histogram, but the colors are what get averaged together (a second time).
There are two other refinements/changes of note:
1. I added some code so that instead of sampling pixels in a square area centered at (x,y), it will do so in a circle centered at (x,y). The benefit of this is less obvious, but I think it is a more correct approach. This is implemented using what amounts to a bitmask, so the performance cost should be minimal.
2. I got rid of the separate oilify_rgb() and oilify_intensity() routines and merged them into a single oilify(). Really, they were already practically identical, save for a few critical lines. (Note: The "if" in the innermost loop has a negligible impact on performance.)
Oilification is slower now; my benchmarks show a runtime of 160% against the original plug-in. The weighted-average routines use floating-point, but bypassing that only brings things down to 140%. Hopefully this isn't a big deal, in light of the improved results.
Now, I'm idly thinking... how feasible it would be to have an option allowing a separate image to control Oilify's mask size, so that some areas could come out more detailed in the oil painting, and others less so....
--Daniel
PATCH: Oilify plug-in enhancements
Hi,
"Daniel Richard G." writes:
So I had a look at gimp/plug-ins/common/oilify.c, and changed a few things around. And now, I get something a little more convincing:
http://www.iskunk.org/tmp/oilify/oilify-test.new24.jpg
I will now describe the changes I made, which are attached in a gzipped patch file against CVS-head. (The patch is a bit of a mess, I'm afraid; diff(1) wasn't too smart about it. The changes, however, are quite straightforward.)
You would be doing us a great favor if you could open a bug report for this issue and attach your patch there. That will ensure that it isn't forgotten.
Sven
PATCH: Oilify plug-in enhancements
On 11/23/05, Daniel Richard G. wrote:
Now, I'm idly thinking... how feasible it would be to have an option allowing a separate image to control Oilify's mask size, so that some areas could come out more detailed in the oil painting, and others less so....
That would be great to have.
Rockwalrus
PATCH: Oilify plug-in enhancements
On Wed, 2005 Nov 23 16:08:05 +0100, Sven Neumann wrote:
You would be doing us a great favor if you could open a bug report for this issue and attach your patch there. That will ensure that it isn't forgotten.
Done!
Summary: Oilify plug-in enhancements http://bugzilla.gnome.org/show_bug.cgi?id=322258
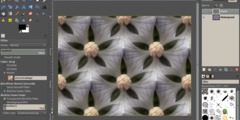
I also opened a separate bug, proposing the removal of the "Use intensity algorithm" checkbox. From the first, I never understood why anyone would want to use the plug-in without this option checked, as then you tend to get psychotic colors everywhere:
http://www.iskunk.org/tmp/oilify/oilify-trippy.jpg
And now, after having waded around the code a bit, it seems to me that the only reason that option even exists is because the original developer implemented the RGB (i.e. non-intensity) algorithm first, then the intensity algorithm, and never deprecated/removed the former---even though what it does is outside the plug-in's stated purpose.
http://bugzilla.gnome.org/show_bug.cgi?id=322296
(At the very least, I suggested making the "intensity algorithm" the default. I doubt more than a minority of users would uncheck that.)
--Daniel
PATCH: Oilify plug-in enhancements
On Wednesday 23 November 2005 16:45, Daniel Richard G. wrote:
Now you must be wondering, "Whoa, waitasecond, you said `raised to some power'... where the heck did you get that 8?" And the answer is, trial and error.
Please consider adding a "power" spinbox to the interface so that people who _want_ sloppy-looking semi-realistic oil painting or super-sharp surrealistic blobs can all have them.
Hide it (and the algorithm checkbox) behind an "Advanced" button or ruled off in a separate area if you like (in fact, please do so that both the simplicity zealots and the power-hungry can be satisfied), but please expose as much functionality as possible. Premature optimisation is the root of all kinds of evil. (-:
Cheers; Leon
PATCH: Oilify plug-in enhancements
On Fri, 2005 Nov 25 10:34:01 +0800, Leon Brooks wrote:
Please consider adding a "power" spinbox to the interface so that people who _want_ sloppy-looking semi-realistic oil painting or super-sharp surrealistic blobs can all have them.
Yes, users should ideally be able to frob that. The three FP multiplies would be replaced with a powf() call, which may or may not affect performance noticeably... if it does, then some kind of table look-up may be the answer.
Hide it (and the algorithm checkbox) behind an "Advanced" button or ruled off in a separate area if you like
It's been _way_ too long since I've written GTK+ code :] I could stuff in an extra widget, but as far as rearranging things like that, there's no way. Would anyone be willing to clean up a plug-in's newly expanded GUI?
--Daniel

