RSS/Atom feed Twitter
Site is read-only, email is disabled

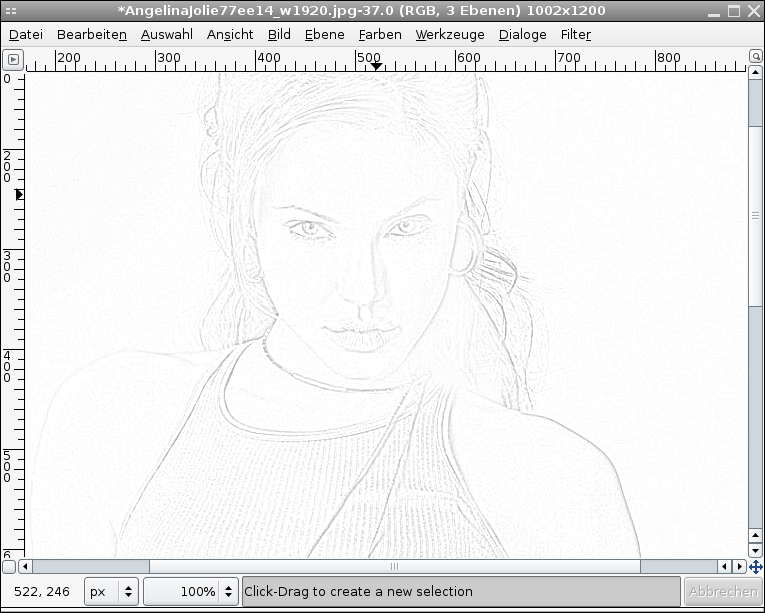
Tutorial: Making a pencil drawing from a photo

Written by , translated by redforce · Created on Jul 04, 2008, last updated about 12 years ago CC BY-NC License

Motivation

Comic artists have it easy - they can scan their pencil drawings and then edit them. But how to make a realistically looking pencil drawing from a photo? In this tutorial you will learn how to convert almost any image into a good-looking pencil drawing, and yon even won't need edge detection filters. All you need are a few different layer modes.

Tutorial details

  1. 1

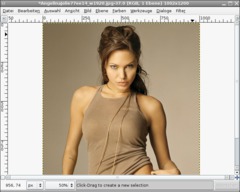
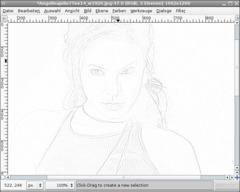
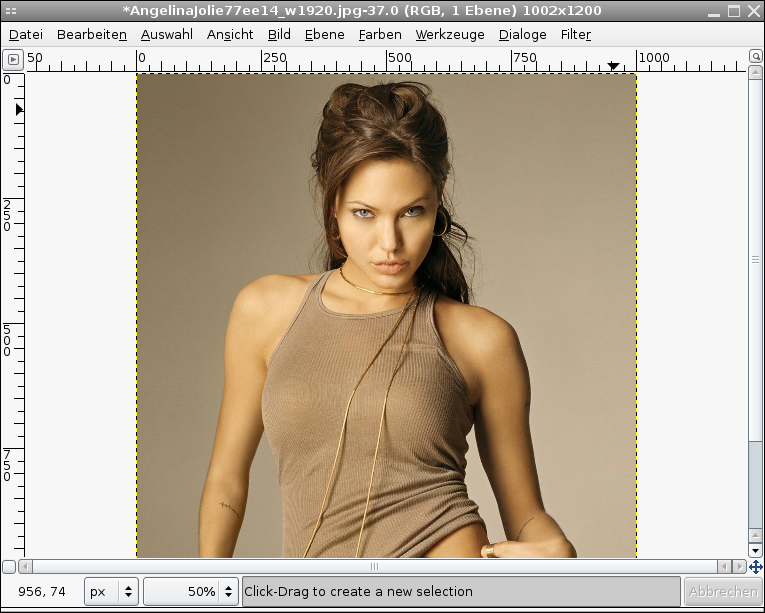
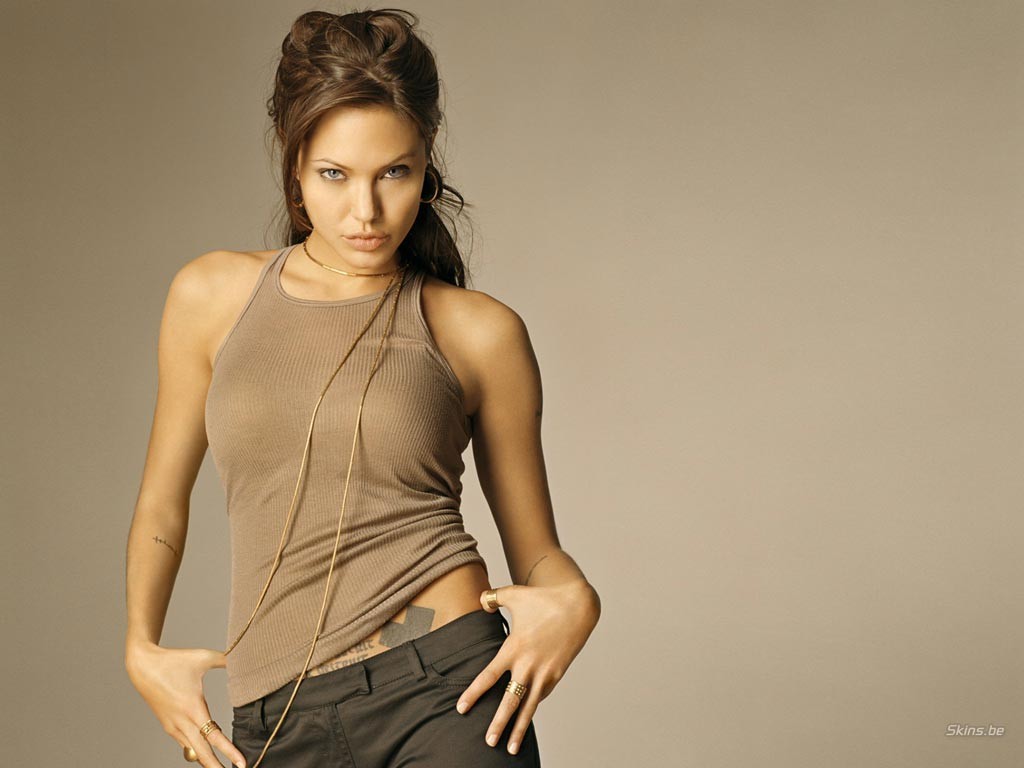
    Open any photo you like. If you want to do the tutorial exactly as shown here, feel free to use the photo of Angelina Jolie (download link on the right side below the tutorial details).

  2. 2

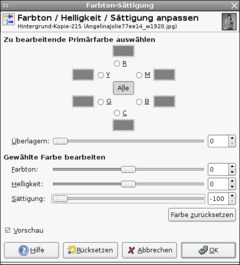
    Duplicate the background layer. On the duplicate: remove the colors by using Colors / Hue-Saturation. Set the saturation to -100:

  3. 3

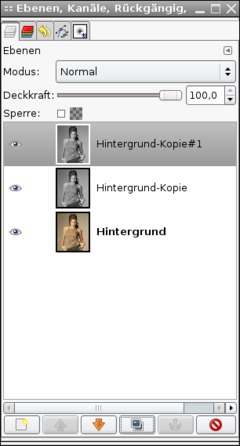
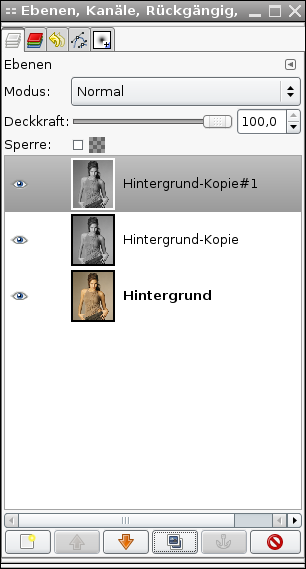
    Duplicate this color-less layer again. Now you have 3 layers.

  4. 4

    Now choose Filters / Blur / Selective Gaussian Blur, value: 4. Then use Colors / Invert. Then change the opacity of the layer to 50% to get a grey layer that shows the photo’s edges very weak.

  5. 5

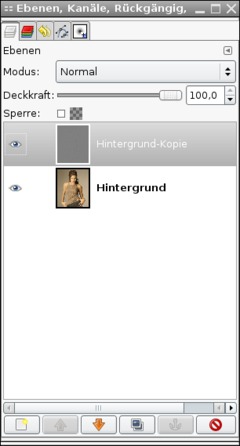
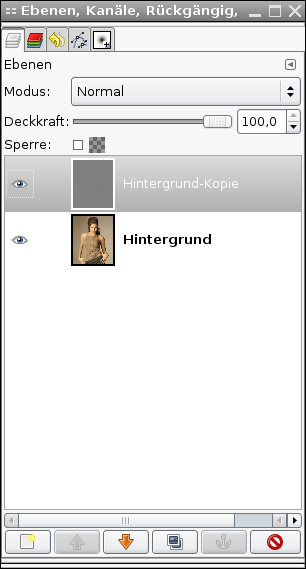
    Merge the layer with the layer down: right-click the layer in the Layers window and choose “Merge down”.

  6. 6

    Duplicate the now merged layer and change the new layer’s mode to “Dodge”.

    Now the pencil drawing is finished!

  7. 7

    If you want to point out the grey lines some more, you can do so as follows:

    Merge the two grey layers so that you can find the line drawing on a single layer. Duplicate the layer again and change its mode to “Multiply”.

    Repeat this step as often as you like (until the width of the lines is OK).

    On my image I have applied a layer mask over the line drawing so there is a transition between photo and line drawing. (To do so duplicate the original photo and move this layer to the top of your layer stack. Then right click this layer in the layers dialogue and click “Add layer mask”. There should be a white are beside the layer. Click it to make sure you work on the layer mask. On this you can paint (i.e. using the Paintbrush tool) with black and gray tones to make some parts of the layer contents disappear (paint black = make disappear, paint white = show, paint gray = make semi transparent). So you can make a cool transition between your pencil drawing and the original photo).

    Have fun!

Comments

Post your own comments, questions or hints here. The author and other users will see your posting and can reply to it.

Of course, you can also ask in the chat.

Subscription management

Please log in to manage your subscriptions.

User rating

This topic (Making a pencil drawing from a photo) has been rated 4.3/5.0.

New comments are disabled because of spam.

Russ
over 6 years ago

Under Image/Mode the only options I have are RGB, Grayscale, and Indexed....

Russ
over 6 years ago

I am on step 6 and can't figure how to change the Mode to Dodge. Please help

Toby Wilson
about 7 years ago

OK nevermind newbie mistake ...I was on the wrong layer

Toby Wilson
about 7 years ago

Did this on the Angelina file and it worked first time. The second time I could not get the opacity to come out right .. I see a transparency layer underneath.

eel member for over 7 years eel 3 comments
about 7 years ago

So sorry to be off topic but i'm a newbie here and don't know where else ask for help with this:

I tried to post in a new discussion (diagonally bordering pixel selection) but repeated received the error

"1 error prohibited this discussion from being saved

There were problems with the following fields:

Messages base Message may be spam (please try again later)"

Any advice from anyone greatly appreciated.

eel

Ekxhh66
about 7 years ago

As you can see from the blood demands diagram, only inseparable of the numbers has to be higher http://viagrawithoutadoctor.net/ viagra without a doctor prescription or discount than it should be to depend on as either costly blood difficulties or depressed blood problems:

hackerb9 member for almost 8 years hackerb9 2 comments
almost 8 years ago

Here's a better way to make a pencil drawing from a photo. Download the G'MIC plugin for the GIMP. Go to Filters -> G'MIC. In the list of filters, open up the "Black & White" section. In there, click on "Pencil portrait". Click OK. Wait a while as this can be CPU intensive, but the results are worth it. I've attached an image with the default parameters.

By the way, I shouldn't have been so harsh in my previous post. This article isn't "useless"; it actually does a good job of demonstrating how Difference of Gaussians edge detection works.

hackerb9 member for almost 8 years hackerb9 2 comments
almost 8 years ago

This tutorial is useless as the exact functionality (making a copy, blurring it, subtracting) is already builtin to the GIMP: Filters -> Edge-Detection -> Difference of Gaussians.

If you set the smoothing radii in the dialog box that comes up to 4 and 0, you get exactly the same effect. I'm attaching a picture so you can see.

The article mentions that the technique works "without edge detection", which makes me think that the author accidentally reinvented DoG edge detection not knowing that it was a standard function. Kudos to them, and it's kind of neat to see it done by hand, but it's not necessary.

unknown
almost 8 years ago

Nice!!!!!! REALLLY good tutorial!!!!!

mynamegoeshere
over 9 years ago

Awesome!

0832
over 10 years ago

Great article!

As for the final step, I tried mask. This is the result. I am not good at it. http://i.imgur.com/n1oxHhS.png

Then I tried Free Select Tool and added 2 black layers. I change the opacity of the layers. Select / Feather, value: 30, Edit / Clear created the blur area.
http://i.imgur.com/pQmog5w.png

Ashok Koparday
over 10 years ago

Hi devv,
I appreciate this style of doing line drawing.
I however haven't understood step 7.

If someone can clarify I will be glad.

Thanks for teaching your beautiful art,

Best
Dr. Ashok Koparday

Joe
over 11 years ago

Very good article. This is the way to go for a quick digital drawings. I still prefer the old-fashioned hand-drawn method... http://www.photostodrawings.com

Aparna
over 11 years ago

Can u please provide me the video for above pencil sketch conversion

vijenthan
almost 12 years ago

i like this softeares

FATj2112 member for almost 12 years FATj2112 3 comments
almost 12 years ago

Yes,this is good,it would be a bit better if the screens displayed were in English!
The text was....

Peggy
almost 12 years ago

:)

anmol.zia
almost 12 years ago

nice....!!

quincy
about 12 years ago

cool

Paul Sauve
about 12 years ago

This is the best technique I,ve seen so far for making line drawings.

Thank you

sana rani
about 12 years ago

i kile this drawing.

Daroo
about 12 years ago

Thx

devvv member for over 17 years devvv 1475 comments
about 12 years ago

Sujtih: I updated the last step. Hope that helps you in achieving the transition effect ;)

Sujtih
about 12 years ago

i had almost finished it.. I wanted to make a pencil draw effect.. this tutorial was nice.. And by viewing this article, i went to do that exactly with the same pic.. But, as i am new to GIMP, i cant get the last part.. "On my image I have applied a layer mask over the line drawing so there is a transition between photo and line drawing."

Can anyone brief with steps how that effect can be achieved???

Shannon
over 12 years ago

It's even simpler than the other commenter said now, re: Artistic->Predator filter
1) duplicate layer,
2) desaturate
3) Predator filter, no pixelize
4) Colors->invert

surya
over 12 years ago

nice work......

HearPump member for almost 13 years HearPump 1 comment rated this topic with 2/5
almost 13 years ago

there is a much more simple way to do it in 2 steps:
1- Filters->Artistic->Predeator
2-Filters->Edge detection->Sobel

Features:
1- you get the drawing on an alpha channel allowing you to put any background you want.
2- To change line opacity just use layer opacity from the layer window
And your done :) ....Hope u loved it

Nathan Yap
about 13 years ago

How do i make the line more clearer? gimp newbie here

stratus
about 13 years ago

Nice tutorial. Just to clarify the STEP 2. after duplicating the layer, you have choose the duplicated layer "Background copy" in the layers dialag. If you don't see the Layers dialog, then click ctrl-L to see the dialog; then highlight the "Background copy".

To apply the desaturation, you have to use Colors->Hue-saturation dialog. Not colors->colorize. Colors->Colorize does not show the dialog as you see in the step 2 picture.
Have a nice art!

Sarah Robbins
about 13 years ago

Worked great! The first layer barely showed up, but when I added a few multiply layers, it came out really nice.

dufus member for about 13 years dufus 2 comments rated this topic with 5/5
about 13 years ago

Great tutorial! Thanks! Short and simple with tremendous results.

Anonymous rated this topic with 5/5
over 13 years ago

That was really good. My lines turned out too light, so I increased the contrast. It turned out sort of grainy, though.

superdit rated this topic with 5/5
almost 14 years ago

hey thanks for the tut, it very easy to implement

devvv member for over 17 years devvv 1475 comments
almost 14 years ago

in the layers dialogue right click on the layer that has the line drawing: "Add layer mask" (select white in the popup dialog). there will now be a new layer right beside the layer now in the layers dialogue. it will be fully white. click it to activate it. this is the so called mask -> you can only draw black and white and gray tones. then take the gradient tool, set FG and BG color to black and white and drag a gradient from (i.e.) left to right. then the part that is black on the layer mask becomes (semi)transparent.

hope that helps ;)

Jabba rated this topic with 5/5
almost 14 years ago

"On my image I have applied a layer mask over the line drawing so there is a transition between photo and line drawing."

How did you do that? Could you explain that part step by step? The end result with the half pencil image is pretty cool.

rejith rated this topic with 3/5
almost 14 years ago

how to change image to pencil drawing in photoshop7?

Sandra rated this topic with 5/5
about 14 years ago

I am an absolute beginner but desperately need to be able to do this exact thing for an important project. I've downloaded the progam and followed each step, but each time I try, at Step 4 it all goes to pot. How do I set value 4 to the selective gaussian blur? I've tried dozens of times - I can even get all the way to setting the duplicated merged layer to 'dodge' but what I end up with looks nothing like a pencil drawing! It's getting close to 'banging head on the desk' time so can someone PLEASE tell me what I'm doing wrong?

Ibnu Zain
about 14 years ago

Great! Awesome! Thanks for the tutorial. I never guess that effect will be as easy like that :D thanks for sharing.

Raymond
over 14 years ago

I like What Ive learned so far and I have Archived a lot by using gimp please notify me when new things are out on gimp THANXX!

Anon
over 14 years ago

If you go to Wondows/dockableDialogs/Layers the second thing from the top is Opacity and you can just slide it to 50%... you can also use the box to change the mode and create a duplicate layer

Thanks for the tut

matteob8
over 14 years ago

Very nice tutorial. I'm using Gimp 2.6.3 and there's some minor differences in the dialogs, e.g. in the "Selective Gaussian Blur" there 2 parameters "Blur radius" and "Max Delta". I made some experimentation to find a good result.

Bye

Karen
over 14 years ago

How do I change the opacity to 50% on gimp2.6

Mark
almost 15 years ago

No comment. Just thanks for the great tutorial.

claudegals
almost 15 years ago

Great tutorial... Keep up the good work...

kdroxx member for almost 15 years kdroxx 2 comments
almost 15 years ago

My image turned our very good.
But can someone tell how to keep half of it in colour ??

kdroxx member for almost 15 years kdroxx 2 comments
almost 15 years ago

My image turned our very good.
But can someone tell how to keep half of it in colour ??

Moku
almost 15 years ago

I have the same problem as blackrain. Though I have experienced that following your steps sometimes results in something different (XD) and I have to alter the steps sometimes - but in the end, it would always work.

By the way, blackrain option two you will find under hue something, but not colorize in 2.6.

So, my problem is step four. I tried to trick this effect with a bumb map and some other stuff. It still wouldn't work. I feel stupid, for not getting that one right, because it's one of the easiest I've read so far. ~.~

Thanks
Moku

ShockwaveLover member for about 15 years ShockwaveLover 7 comments
almost 15 years ago

This is an awesome tutorial. For those asking, Opacity can be changed via a slider in the Layers, Channels and Paths Toolbar (the one with the gradients and colours on it)

Adrian
about 15 years ago

Excellent tutorial - thanks! And thanks to devv for pointing out where to find "dodge" - sich things not always obvious to the newbie!!

josh
about 15 years ago

I can't figure out how you change the opacity to 50% on gimp 2.6

nick
about 15 years ago

the toolbar that has the copies on it it doesnt show up! why?

nick
about 15 years ago

how to do you change the opacity to 50%?

sandyroyale
about 15 years ago

Thank you, that was exactly that i searched !

ño
about 15 years ago

excellent tutorial! thank you ^^

isthur
over 15 years ago

trim's tutorial gimp nya

Victor Ramirez
over 15 years ago

Hi, good tutorial, congratulations. I've experimented a bit and increased yellow in color balance, previous to desaturate(don't know if makes difference), and substituted selective gaussian blur by "focus blur" value of 8. The results are pretty good and the lines are more thick.
Can this proccess be automated as a script fu?

Anders
over 15 years ago

Hi. Have get the plugin pencil-drow..for gimp.How do i install it i the program?

joshuam
over 15 years ago

im new o gimp and dont know how to change the layer opacity. Can someone tell me please

GameCreator member for over 16 years GameCreator 9 comments
over 15 years ago

It would be good effect if used with some trick to flatten colours. Then it would look like coloured sketch or watercolour ;)

Guillermo Maldonado
over 15 years ago

Have you tried edge detection, I think it works a bit cleaner and the traces are better.

Good tutorial though.

Regards.

devvv member for over 17 years devvv 1475 comments
over 15 years ago

it should work definately. the technique is using only very basic things such as layer modes. i dont think 2.6 has changed something here

blackrain
over 15 years ago

can this tut work in gimp 2.6.0? cause, i've tried it and it dosen't work...

devvv member for over 17 years devvv 1475 comments
over 15 years ago

in the layers dialog look above the opacity/transparency ruler. there is a dropdown called "mode"

tyler
over 15 years ago

how so you change the layers mode..i dont know how to do that..

devvv member for over 17 years devvv 1475 comments
over 15 years ago

take a picture of yourself. use a bright / white background and apply the steps shown in the tutorial!

jonesrachael member for over 15 years jonesrachael 1 comment
over 15 years ago

how do i make this for my self?

Beaniebaby2468 member for about 16 years Beaniebaby2468 5 comments
over 15 years ago

Cool effect. :) Would you be able to make a tutorial on blending two images together?