RSS/Atom feed Twitter
Site is read-only, email is disabled

Tutorial: Splash Screen: Create a colorful stream of light with particles
Written by · Created on Feb 06, 2009, last updated about 13 years ago CC BY-NC License
Splash Screen: Create a colorful stream of light with particles

Motivation

You all probably know these images that are shown on starting up a certain program: these are so called splash screens. In this tutorial I will show you how to make a special, very beautiful splash. It will be a colorful stream of light with particles!

Tutorial details

  1. 1

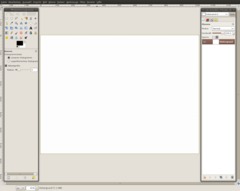
    Create a new image: 1024×1024px. Don’t be afraid – the splash screen will be cropped later

  2. 2

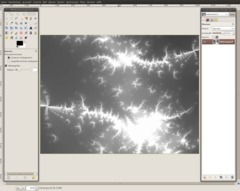
    To create really varied light and dark parts in the image we’re gonna use a combination of clouds and fractals.

    tip: Fractals are objects that are repeated in itself. If you zoom into a fractal the same part is viewed again, and again – infinite repeats.

    To create a fractal in GIMP you can use the built-in fractal explorer.

    - Filter / Render / Fractal explorer

    Leave the settings as they are. Otherwise – if you clicked something – press the reset button.

    Activate the “Fractals” tab. Select “Explosive” and press accept

  3. 3

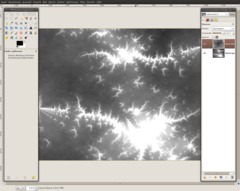
    - Create a new layer
    - Filter / Render / Clouds / Plasma – use the preset settings and press OK
    - Colors / Desaturate: Brightness. Press OK
    - Set the layers mode to “Overlay”. (The layers mode drop down is found in the layers dialog above the opacity ruler.

  4. 4

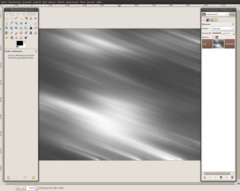
    - Press CTRL+M to merge the visible layers into one layer.

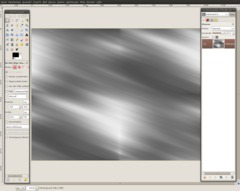
    - Filter /Blur / Motion Blur: 200 / 20. After that repeat the filter by pressing just CTRL+F

  5. 5

    - Filter / Map / Make Seamless. Doing this makes it possible to put copies of the image to the right/left/top/bottom without seeing any border. You can create seamless transitions with it. That is needed for the next step.

  6. 6

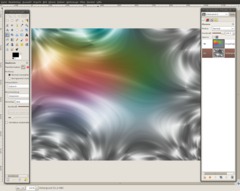
    In this step our main goal is to get nice and smooth waves into the image.

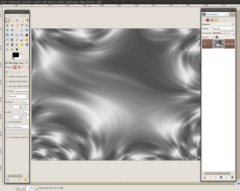
    We’re going to transform our picture into a fractal now. Doing this will make your picture look evenly distorted and nice waves will be created.

    Tip: Before I told you how you can imagine a fractal in a good way (in the graphics environment). That a part can be repeated nicely we’ve just used the seamless-filter. And that is why we can easily transform our pic into a repeated fractal now.

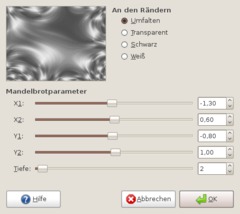
    - Filter / Map / Fractal Trace (Use the Values of the picture below)

  7. 7

    Now we got some really smooth waves. So it is now time to get some color into our image.

  8. 8

    To get smooth colors that flow together we will first paint some color on the canvas and blur these colors afterwards.

    - Create a new and transparet layer
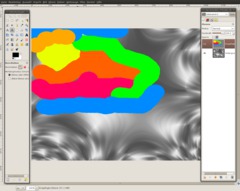
    - ue the brush tool. choose a big brush size (scale it to 10,0). Paint some big yellow-orangy dots. Then use another color like orange or red, paint close by the first yellow dots. Paint the yellow on the lighter parts of the background layer.

  9. 9

    - Filter / Blur / Gaussian Blur: 300px.

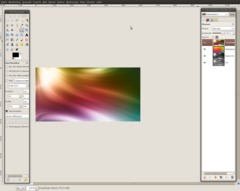
    Set the layers mode to “Overlay”. The yellow part should glare/shine a bit already. Don’t worry – this will be enhanced soon.

  10. 10

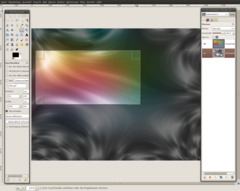
    - Press SHIFT+C to use the Crop tool.
    - Choose any part ofthe picture but the upper left part is pretty nice I think. (Tip: You can transform the background layer, or flip it, rotate it… whatever you want until you found a nice part to cut out.)

    - I draw a selection that includes also some small parts ofthe blue/green color.

  11. 11

    - Duplicate the background layer.
    - Move the copy between the colors layer and the original background (if it is not automatically there)
    - Set the layers mode to “Overlay”.
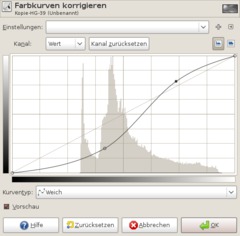
    - Colors / Curves: Apply this curve:

  12. 12

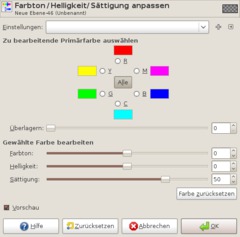
    - Activate the colors layer: Colors / Hue-Saturate: Move the saturation ruler to +50.

  13. 13

    We’re pretty finished already and we want to continue working on a copy of the current state of our image.

    To do this:
    - Edit / Copy visible
    - Edit / Paste as new layer

  14. 14

    Now we get to the particles part. We would like to create the illusion of many lightning particles on the brighter parts of the picture.

    Best used for this is the sparks brush.

    - Choose the brush tool. Select the yellow “sparks” brush. Excellent for this are the new brush dynamics (available since GIMP 2.6). Using them you can adjust size, opacity and randomness of the pained brush.

    See the image for more detail: Make a selection at “Pressure/Opacity”, Random/OPacity and Random/Size.

    Scale: 1,5
    Jitter: 4,0

  15. 15

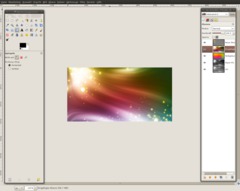
    - Create a new layer and paint the “particles” in the upper left part of the image and also on some other bright parts (as you like it)

    - Set the layers mode to “Dodge”. Doing that the Shining/Glowing will be enhanced.

  16. 16

    - In the layers dialog rightclick the particle layer and click “merge down”. the particles are then copied to the layer below.

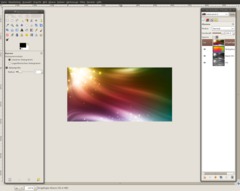
    Darken the image if you enjoy more contrast/color images, use Color / Curves for that.

  17. 17

    That the splash screen looks like a real splash screen we have to add some text now.

    Use the text tool and write

    UNLEASH YOUR
    OPEN SOURCE
    GRAPHICS
    POWER
    NOW!”

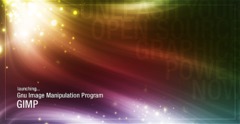
    on a new layer. Change the alignment of the text to right and set a line spacing so that the lines have only a very small space left between them. Set the transparency of the layer to 10% and move the text to the right.

    See my image below for the other text alignements. it should be easy to do this =)

  18. 18

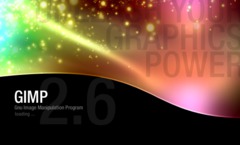
    here is another version:

  19. 19

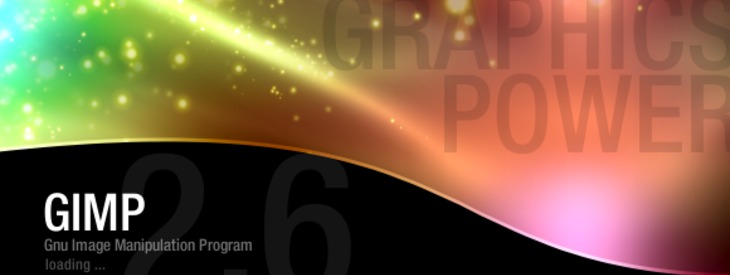
    And this one is my first version which I also created using this thechnique!

    Hope you enjoy the splash screens ;)

Comments

Post your own comments, questions or hints here. The author and other users will see your posting and can reply to it.

Of course, you can also ask in the chat.

Subscription management

Please log in to manage your subscriptions.

User rating

This topic (Splash Screen: Create a colorful stream of light with particles) has been rated 4.5/5.0.

New comments are disabled because of spam.

PuffTheMagicBelgian member for over 7 years PuffTheMagicBelgian 2 comments rated this topic with 5/5
over 7 years ago

Nice tutorial!
I'm new @ Gimp, and these Tut's are really helping me out!

This is what it look like for me when done! -->
I'm using it as my splash screen for the moment!

Thx again!

Edgardo
almost 11 years ago

I know is very Old but that tutorial is very awesome. How you do the last Splash Screen (Step 19) how 2 tones, the line between both images?

Waffledude1000
over 11 years ago

Mine did not look like it. Cool tut thought

Pam
about 12 years ago

This is by far the best tutorial I've ever come across. It encompasses so many great GIMP features that I've never used before and I have been using GIMP daily for over a year.

Thanks so much.

Shine
over 12 years ago

So awesome. thank you :)

S.Rony
about 13 years ago

Very cool tutorial!
Im also going to try with other colors too.
Thamks!
Ron from http://www.lepsoft.com

tomate
about 13 years ago

One more ... to change a little ... i do my comment in french ...

whaou trop bon... merci pour ce tutorial, les explications sont claires et le rendu au top!
Pour se rapprocher encore de la perfection, un .pdf serait bienvenue.

salutations numériques.

cg
about 13 years ago

Very good, cheers

Carlos rated this topic with 4/5
over 13 years ago

Me encanta!!
Thanks!!!
http://zlooksv.blogspot.com

jr22
almost 14 years ago

fantastic tutorial. thank you very much. opened my eyes to several new techniques and some general gimp stuff I didn't know!

Michael
over 14 years ago

Great work! Just a question to your first version (the last image): Could you briefly explain how you did the bottom part, espeacially the line which separates both parts of the image?

Louna
over 14 years ago

wow! this is very good. i will do the same thing for our thesis. thanks.

sadia
over 14 years ago

That tutorial is amazing! You did a great job! Finally someone who can explain good while doing a tutorial! LOL seriously i always get confused or mess up in some part of a tutorial when i try to do them, i got a little confused on some parts, than i figured them out so it's all good =D this tutorial is nice, thanks for posting it! =D

Alzhaid
almost 15 years ago

Wonderful, thanks. I always find GIMP difficult to use as I'm a newbie, but your tutorial was easy to follow! I needed more time to do something like the 18th step than to do the rest of the tutorial ;)

Oriental
almost 15 years ago

I am having trouble with the curve since I can't understand German so I am trying to decode it at the moment.

asdfgdh
almost 15 years ago

woa... i guess it'll take some practice to get it like the pics but awesome tutorial..

Kayla
almost 15 years ago

is it possible to add a picture of yourself into it.

numb3r_5ev3n
almost 15 years ago

Hello new desktop wallpaper! I might also use this along with a css large background site tutorial and see what I come up with. Thanks!

devvv member for over 17 years devvv 1475 comments
almost 15 years ago

it is a simple curved path using the paths tool ;)

Nyne
almost 15 years ago

Great tutorial. I made a few of mine with a different fractal explorer and a few different settings and I love the end result. Your examples are great but I'd like to know how to get the effect of the last example. That's really nice. What did you do to get the curved line that separates the black area from the colored area?

Gus
almost 15 years ago

Many thanks for this. Dodge in step 15 didn't do anything for me, but it can also be made with the color tools of course.

BrianneB
about 15 years ago

this is a wonderful tutorial, i loved it, but i have one question...when i try to use the paint brush for the sparks...i dont have the random option...where can i find that at?

xXx
about 15 years ago

this is awsome devv i never thought i would be able to do this!

ChrisM
about 15 years ago

damn awesome results! i've been looking for this for months!!! you are my hero!

ggdancer member for almost 16 years ggdancer 3 comments
about 15 years ago

Lasia the fractals tab is part of the fractal explorer dialog.

Miller
about 15 years ago

Great tutorial! Pretty useful. Figured out a way to brush a perfect spectrum which I guess is pretty useful for this technique...

Lasia
about 15 years ago

I like this effect, but I'm having a hard time finding ther Fractals tab so I can set the mode to Explosion. I've tried going to Add Tabs, but can't find it on my menu. :( I use 2.4.6, surely it's not that I have an old version?

Hartroc
about 15 years ago

Amazing! Thanks alot

Pranav
about 15 years ago

Excellent tutorial! Today I found the best use of Fractals and Motion blur with this tutorial. The splash screens of Gimp you created are amazing too. Thank you so much for everything.

Lamoot
about 15 years ago

Very nice tutorial and final result. I wouldn't mind if the official gimp website was more like http://www.gimpusers.com/images/tutorials/135/19.png than the calm grey/orange it is now.

Shashwat
about 15 years ago

Awesome tutorial..

Can you please tell me how to create splash of the second type ...

Regards

bafman
about 15 years ago

book! thanks! exactly I was looking for!

devvv member for over 17 years devvv 1475 comments
about 15 years ago

thanks for the comments! i appreciate you all like it ;)

andrew: it's some kind of vista effect, yes. however it is also pretty different to the original vista thing

andrew
about 15 years ago

Impressive. I like it very much. Is this like a part to of the Vista-ish effect?

Thanks for this tutorial. Keep up your good work.

spotty
about 15 years ago

Cool! Thank you - and it is for 2.6... ;)

interhuss
about 15 years ago

Awesome! I gotta try this soon. I have done similar things but not this way. Thx!

Vlasta member for about 15 years Vlasta 1 comment
about 15 years ago

Very nice. I'll need to take a closer look at the fractal render filters :-).

ggdancer member for almost 16 years ggdancer 3 comments
about 15 years ago

Nice tutorial. found it very easy to follow.

Robert
about 15 years ago

Wow really impressive devvv, thanks for sharing!