


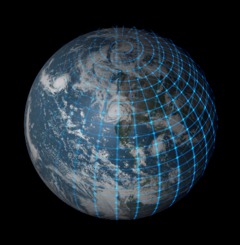
Tutorial: Planet in a wireframe model
 is licensed under a Create Commons Attribution-Non Commercial 3.0 Unported license.")

Links
Motivation
You'll see these so-called wireframe models mostly in the 3d-sector of computer graphics. They just look pretty cool when they're faded into the real looking object. The problem is that you cannot use any 3d coordinates in image manipulation programs such as GIMP. In this How To I will show you how to make such an effect by using a planet that is being faded into a wireframe-globe.
Tutorial details
- Category: Special FX
- Time to reproduce: ≈15.0 minutes

- Tested with GIMP 2.4 rc2
-
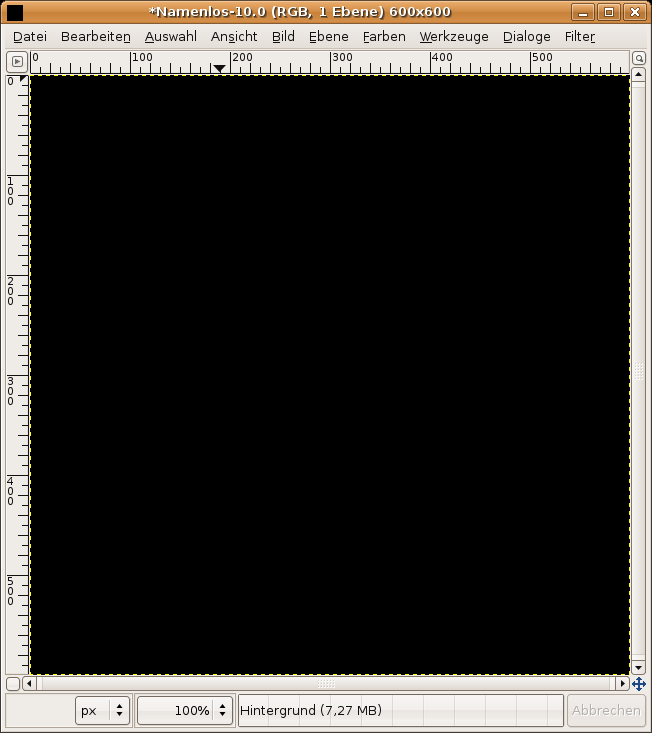
1
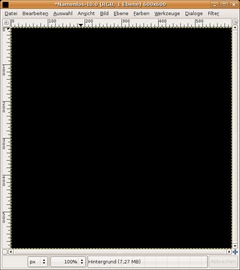
Create a new File: 600×600px. Background shall be black.
- Layer / Transparency / Add alpha channel -
2
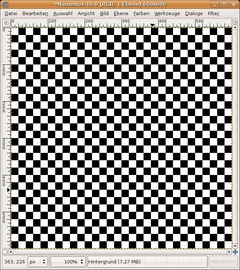
Filter / Render / Pattern / Checkerboard: 20px.
-
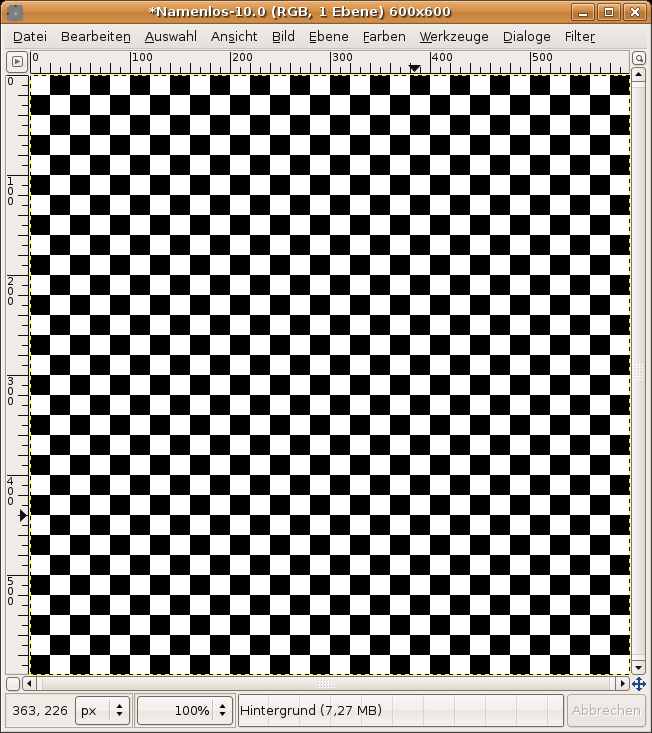
3
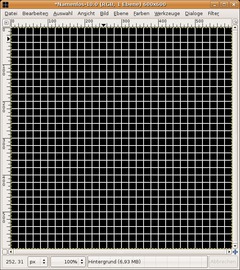
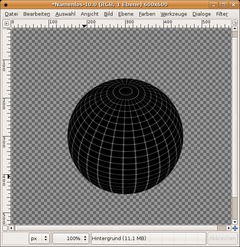
We’re making a nice grid from the chessboard now: Filter / Edge-Detect / Edge. Use the Sobel-Algorithm, Amount: 2, and Smear. (that yould be all on by default).
Optional you could have used Render / Pattern / Grid. But for this tutorial we don’t need a pattern that is such detailed.
-
4
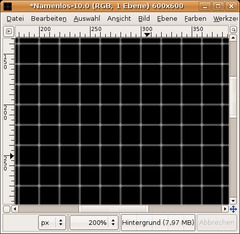
Now choose Filter / Map / Bumpmap. As bumpmap choose the same layer you’re just working on.
Map-Type: linear
Compensate for darkening: checked!
Azimuth: 0
Elevation: 90
Depth: 6The remaining options set to 0.
-
5
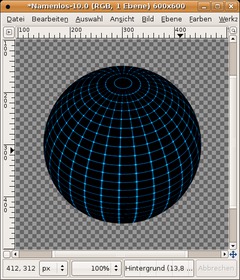
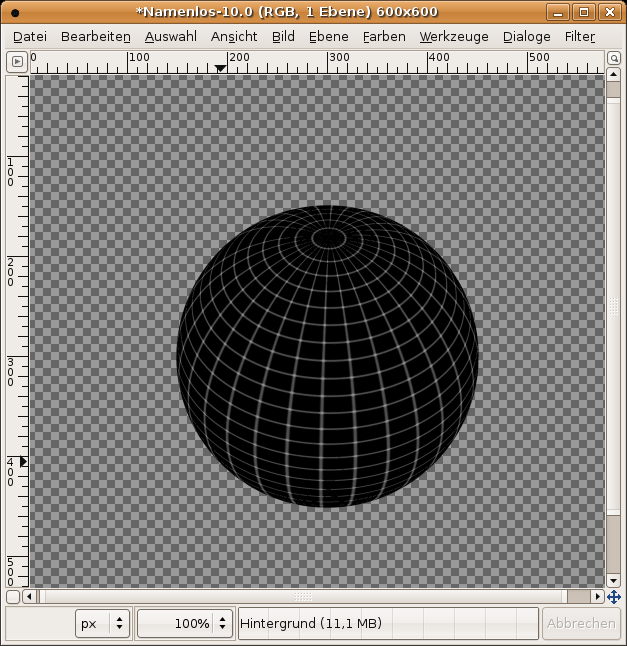
Now choose Filter / Map / Map Object:
SETTINGS:
Map to: Sphere
Transparent background: checked.
Enable antialiasingLIGHT:
No lightMATERIAL:
Intensity
-———-
Ambient: 0.3
Diffuse: 1Reflectivity
-———-
Diffuse: 0.5
Specular: 0
Highlight: 27In the orientation tab use these values:
Position: 0,5 | 0,5 | 0
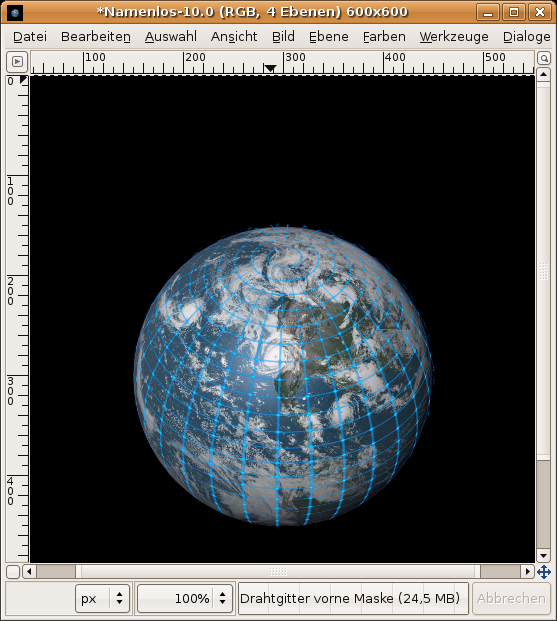
Rotation: -1,5 | 70 | 45After applying you should get this result:
-
6
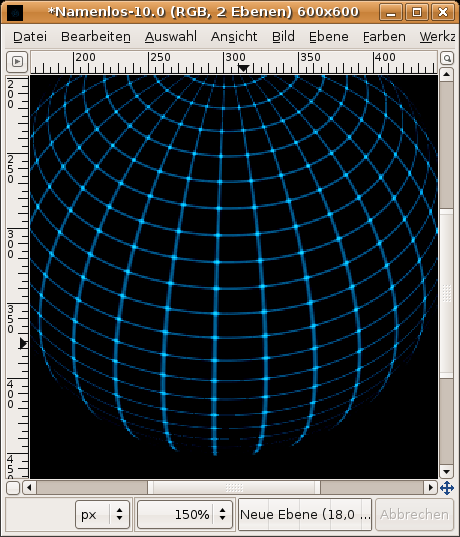
The wireframe cannot be seen so clearly, so we’re enhancing the contrast now.
Colors / Colorize: 195 / 100 / 20
After that go to Colors / Brightness & Contrast: 60 / 70
-
7
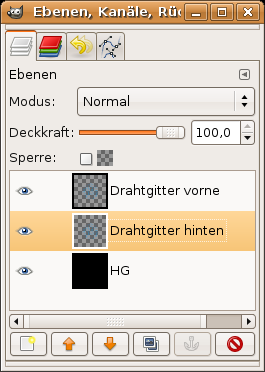
Goto Colors / Color to transparency and choose black as color.
Create a new layer, move it to the total bottom in the layers dialog and fill it black. Name that layer: “BG”.
-
8
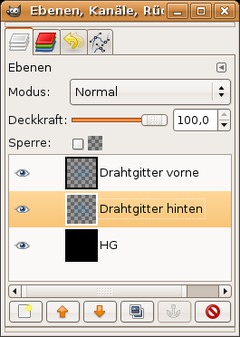
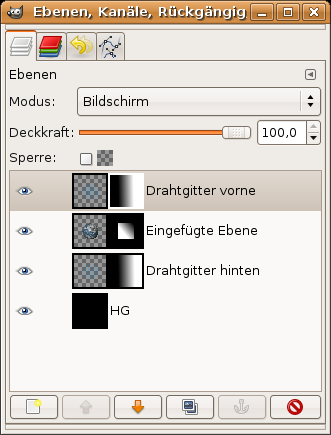
Choose the wireframe layer. Goto Layer / Duplicate.
Name the top layer “Wireframe front”. The one below name “Wireframe back”. The layers should look like this now:
-
9
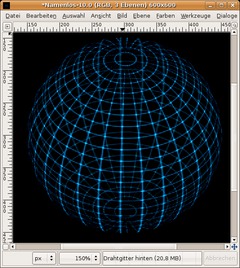
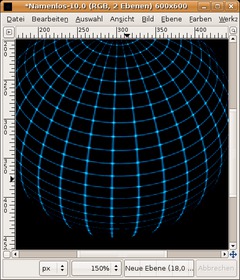
Activate the “Wireframe back” layer and set the transparency to 50%.
Activate the Flip-Tool now (SHIFT+F). Hold down CTRL and click in the image to flip the layer vertically.
Now you should get the impression of a transparent 3d-wireframe-sphere.
-
10
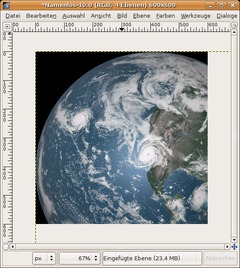
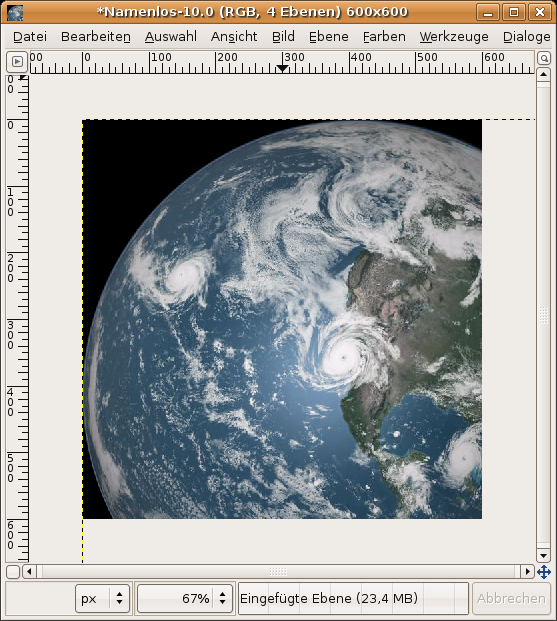
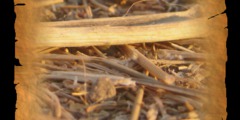
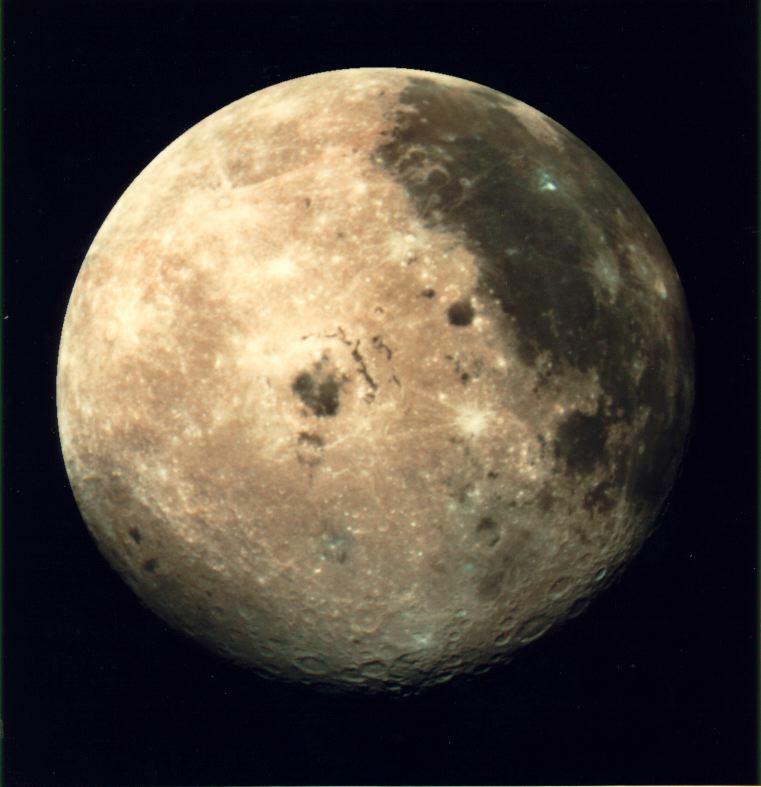
Now we’re doing the earth-part. Save the image of your choice (top right) – Earth or Moon.
Choose File / Open as layer and use the file you downloaded to open it as a seperate layer.
-
11
- Layer / Scale Layer: 301×301. Move the earth / moon exactly above the the wireframe.
After that change the layer order so that the earth is between the two wireframes.
-
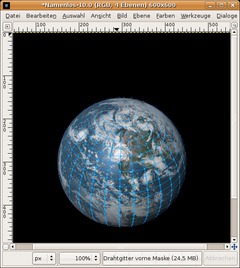
12
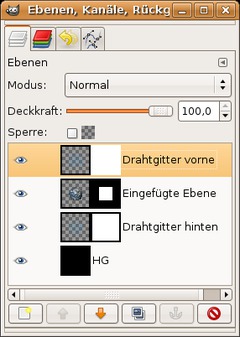
We’re almost done. Set the layer mode of the “Wireframe front”-layer to Screen.
We’re applying a layer mask now for all layers to get a nice gradient. Right click each layer in the layers dialog (except the background-layer) and choose “add layer mask”.
-
13

Select the standard preset colors by pressing D (Black and White). Choose the gradient tool (L) and be sure to make the gradient in the mask from left to right.
For the earth-layer-mask drag the gradient from top right to the bottom left third of the image.
-
14
We’re done! Voila ;)


Comments
Post your own comments, questions or hints here. The author and other users will see your posting and can reply to it.
Of course, you can also ask in the chat.
Subscription management
Please log in to manage your subscriptions.
User rating
This topic (Planet in a wireframe model) has been rated 4.2/5.0.
New comments are disabled because of spam.