RSS/Atom feed Twitter
Site is read-only, email is disabled

Tutorial: Planet in a wireframe model
Written by · Created on Sep 07, 2007, last updated about 13 years ago CC BY-NC License

Motivation

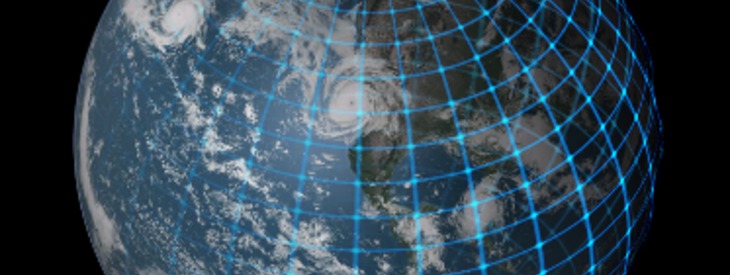
You'll see these so-called wireframe models mostly in the 3d-sector of computer graphics. They just look pretty cool when they're faded into the real looking object. The problem is that you cannot use any 3d coordinates in image manipulation programs such as GIMP. In this How To I will show you how to make such an effect by using a planet that is being faded into a wireframe-globe.

Tutorial details

  1. 1

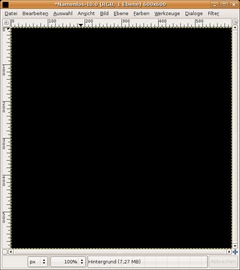
    Create a new File: 600×600px. Background shall be black.
    - Layer / Transparency / Add alpha channel

  2. 2

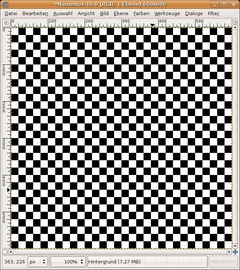
    Filter / Render / Pattern / Checkerboard: 20px.

  3. 3

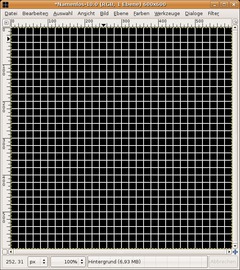
    We’re making a nice grid from the chessboard now: Filter / Edge-Detect / Edge. Use the Sobel-Algorithm, Amount: 2, and Smear. (that yould be all on by default).

    Optional you could have used Render / Pattern / Grid. But for this tutorial we don’t need a pattern that is such detailed.

  4. 4

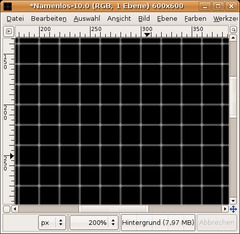
    Now choose Filter / Map / Bumpmap. As bumpmap choose the same layer you’re just working on.

    Map-Type: linear
    Compensate for darkening: checked!
    Azimuth: 0
    Elevation: 90
    Depth: 6

    The remaining options set to 0.

  5. 5

    Now choose Filter / Map / Map Object:

    SETTINGS:
    Map to: Sphere
    Transparent background: checked.
    Enable antialiasing

    LIGHT:
    No light

    MATERIAL:
    Intensity
    -———-
    Ambient: 0.3
    Diffuse: 1

    Reflectivity
    -———-
    Diffuse: 0.5
    Specular: 0
    Highlight: 27

    In the orientation tab use these values:

    Position: 0,5 | 0,5 | 0
    Rotation: -1,5 | 70 | 45

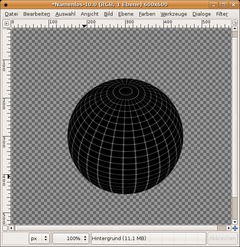
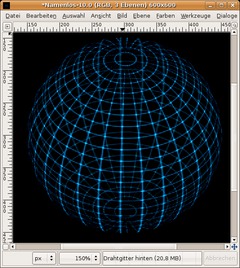
    After applying you should get this result:

  6. 6

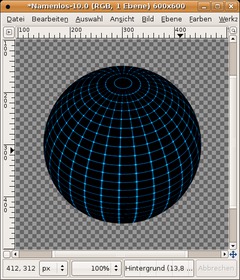
    The wireframe cannot be seen so clearly, so we’re enhancing the contrast now.

    Colors / Colorize: 195 / 100 / 20

    After that go to Colors / Brightness & Contrast: 60 / 70

  7. 7

    Goto Colors / Color to transparency and choose black as color.

    Create a new layer, move it to the total bottom in the layers dialog and fill it black. Name that layer: “BG”.

  8. 8

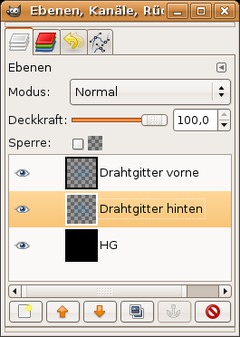
    Choose the wireframe layer. Goto Layer / Duplicate.

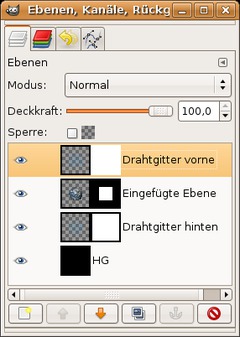
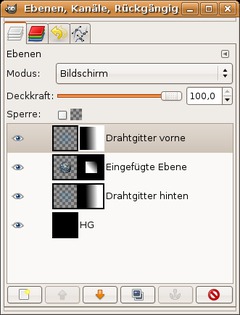
    Name the top layer “Wireframe front”. The one below name “Wireframe back”. The layers should look like this now:

  9. 9

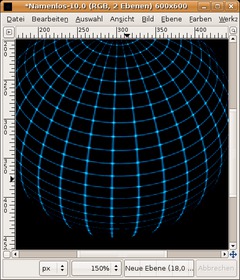
    Activate the “Wireframe back” layer and set the transparency to 50%.

    Activate the Flip-Tool now (SHIFT+F). Hold down CTRL and click in the image to flip the layer vertically.

    Now you should get the impression of a transparent 3d-wireframe-sphere.

  10. 10

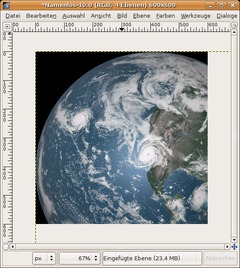
    Now we’re doing the earth-part. Save the image of your choice (top right) – Earth or Moon.

    Choose File / Open as layer and use the file you downloaded to open it as a seperate layer.

  11. 11

    - Layer / Scale Layer: 301×301. Move the earth / moon exactly above the the wireframe.

    After that change the layer order so that the earth is between the two wireframes.

  12. 12

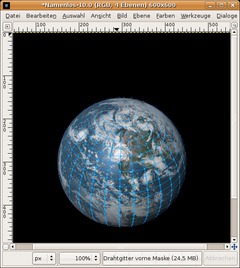
    We’re almost done. Set the layer mode of the “Wireframe front”-layer to Screen.

    We’re applying a layer mask now for all layers to get a nice gradient. Right click each layer in the layers dialog (except the background-layer) and choose “add layer mask”.

  13. 13

    Select the standard preset colors by pressing D (Black and White). Choose the gradient tool (L) and be sure to make the gradient in the mask from left to right.

    For the earth-layer-mask drag the gradient from top right to the bottom left third of the image.

  14. 14

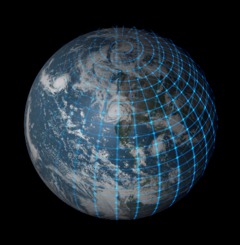
    We’re done! Voila ;)

Comments

Post your own comments, questions or hints here. The author and other users will see your posting and can reply to it.

Of course, you can also ask in the chat.

Subscription management

Please log in to manage your subscriptions.

User rating

This topic (Planet in a wireframe model) has been rated 4.2/5.0.

New comments are disabled because of spam.

minima member for almost 10 years minima 2 comments rated this topic with 5/5
over 8 years ago

Awesome result!

Thanks for this great tutorial.

josephbupe member for almost 13 years josephbupe 20 comments
about 9 years ago

Is this possible creating in Gimp 2.9.1? I mean I do not see the Filter / Map / Map Object.

tonysteele_ebw member for almost 11 years tonysteele_ebw 4 comments
over 10 years ago

Even though this is an old tutorial it's still a good one.

PsiJet
about 12 years ago

Awesome tutorial (even if it is probably way outdated). Either way, it still works!

Carmen rated this topic with 4/5
over 13 years ago

Ok so I am using the new Gimp version 2.6.7 and I use Windows XP I can not figure out how to change the transparency on the Background layer to 50% at beginning of step 9, this is very frustrating. Any suggestions on how to do that?

I love gimp have been using it for some time and now trying to learn how to building 3D images this tutorial is great just missing that one key step I can't find anything else about it anywhere.

narendra kumar rated this topic with 3/5
over 13 years ago

great

Navya Narang rated this topic with 5/5
about 14 years ago

I haw no comment.ButI cant see photo.

dfuiosi
about 14 years ago

in newer versions of GIMP, colour to transparency is called "colour to alpha".

sweet honesty
over 14 years ago

i wish aliens will come to be a paranormal experience to the eart!!!!!!!!!!!!!!!!!!!!!!!!!!!!!!!!!!!!!!!!!!!!!!!!!!!!!!!!!!!!....................................................yeah coolllllllllllllllllllllllllllllllllllllll

sabrina gonzaga
over 14 years ago

i wish 5 planets will come i love planets

patrick k
over 14 years ago

i love de earth

asantechristopher
over 14 years ago

I want to be a scientist

ilkut member for over 14 years ilkut 1 comment
over 14 years ago

woaw it's amazing

Darlingpresley member for over 14 years Darlingpresley 9 comments
over 14 years ago

colors-> colors to transperancy, I can't find it either.....

Dazza
almost 15 years ago

Thx for nice tute. Well written and a lot of fun. I do have to agree with Corinne though - I couldn't locate this menu either so just used seelct color and del ;)

corinne
over 15 years ago

good tutorial, but one thing.
when it says colors-> colors to transperancy, I can't find it...

devvv member for over 17 years devvv 1475 comments
almost 16 years ago

if you use the moon you have to adjust the values - the tutorial is focused on the earth ;)

DemonicBlaze member for almost 16 years DemonicBlaze 1 comment
almost 16 years ago

For the moon--on step 11, when you scale the layer to 301x301..it makes the moon too small for the wireframe. Did I miss something there?

devvv member for over 17 years devvv 1475 comments
almost 16 years ago

only administrators (like me and redforce) can put up tutorials into our database. if you want to submit one please email me the result picture to team@gimpusers.com. our quality standards are pretty high though =)

Beaniebaby2468 member for about 16 years Beaniebaby2468 5 comments
almost 16 years ago

Thanks, bu I meant, How do you actually put one up?

devvv member for over 17 years devvv 1475 comments
almost 16 years ago

first i try something by myself - play around. when i like the result ill try to reproduce it in form of a tutorial ;)

Beaniebaby2468 member for about 16 years Beaniebaby2468 5 comments
almost 16 years ago

Awesome! Thanks! I REALLY loved this tutorial... Just curious, how do you make a tutorial?

Jason
about 16 years ago

I have a problem.
After the Bumpmap, I try to do the Map to object, but the result is just a transparent layer.
I have re-read the tutorial twice to check every passage, and I've done everything right. What's the problem?

redforce member for over 17 years redforce 230 comments
over 16 years ago

Sir/Mam, here it is, Sir/Mam!

Traveosa member for over 16 years Traveosa 4 comments
over 16 years ago

No planet to download. Atleast i can't find one. Anyone have any ideas?

PhotoMan
over 16 years ago

Where do I find Color to transparency with GIMP 2.2?

Black Jack
over 16 years ago

And switching to the GIMP was the best choice you ever made ;-)

Nano
over 16 years ago

1 point, if after you flip Wireframe back vertically you also flip it horizontally it'll make the lines line up for a better effect. Great tutorial.

Photoshop Tutorials
over 16 years ago

Awesome tutorial, whenever I saw such useful GIMP tutorials on net, they force me to use GIMP instead of PS.