


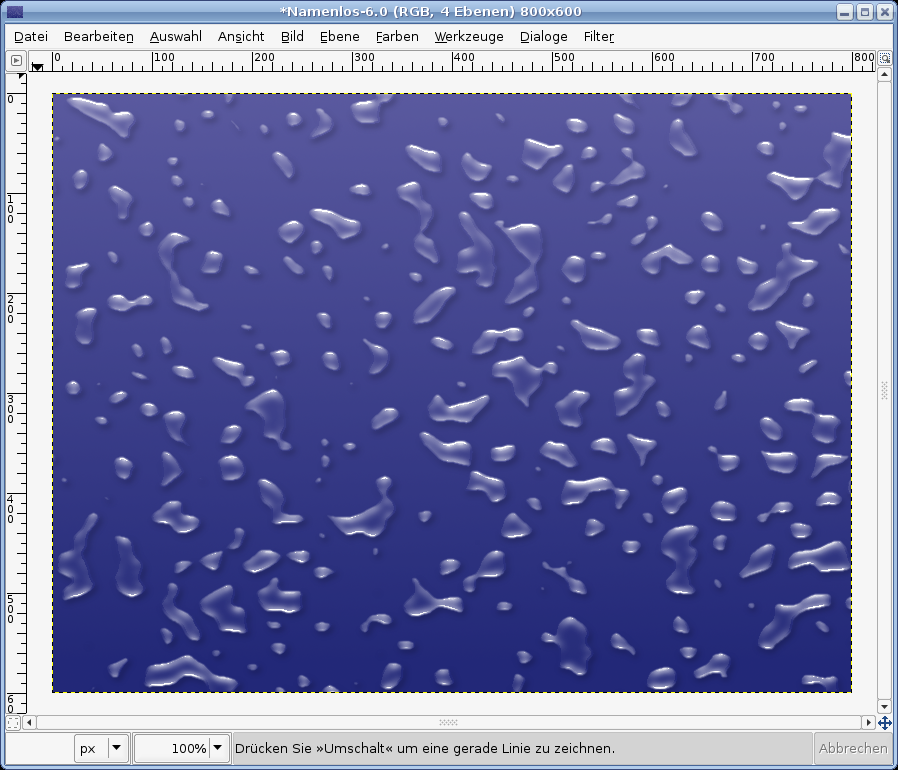
Tutorial: How to generate realistic mass waterdrops on a surface
 is licensed under a Create Commons Attribution-Non Commercial 3.0 Unported license.")

Links
Motivation
Learn how you can make very cool and realistic waterdrops with GIMP.
Tutorial details
- Category: Special FX
- Time to reproduce: ≈30.0 minutes

- Tested with GIMP 2.3.10
-
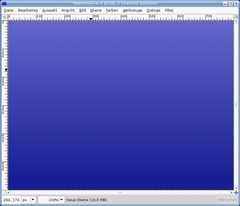
1
a word before we start: I’m using the dialogue “Color” very often in this tutorial. If you use GIMP 2.2 the options i mean are found under Layer / Colors, since 2.3 this is only the menu “Color”.
Create a new file: 800×600px. Fill it with any background color you want. I did a soft blue gradient – that looks cool.
-
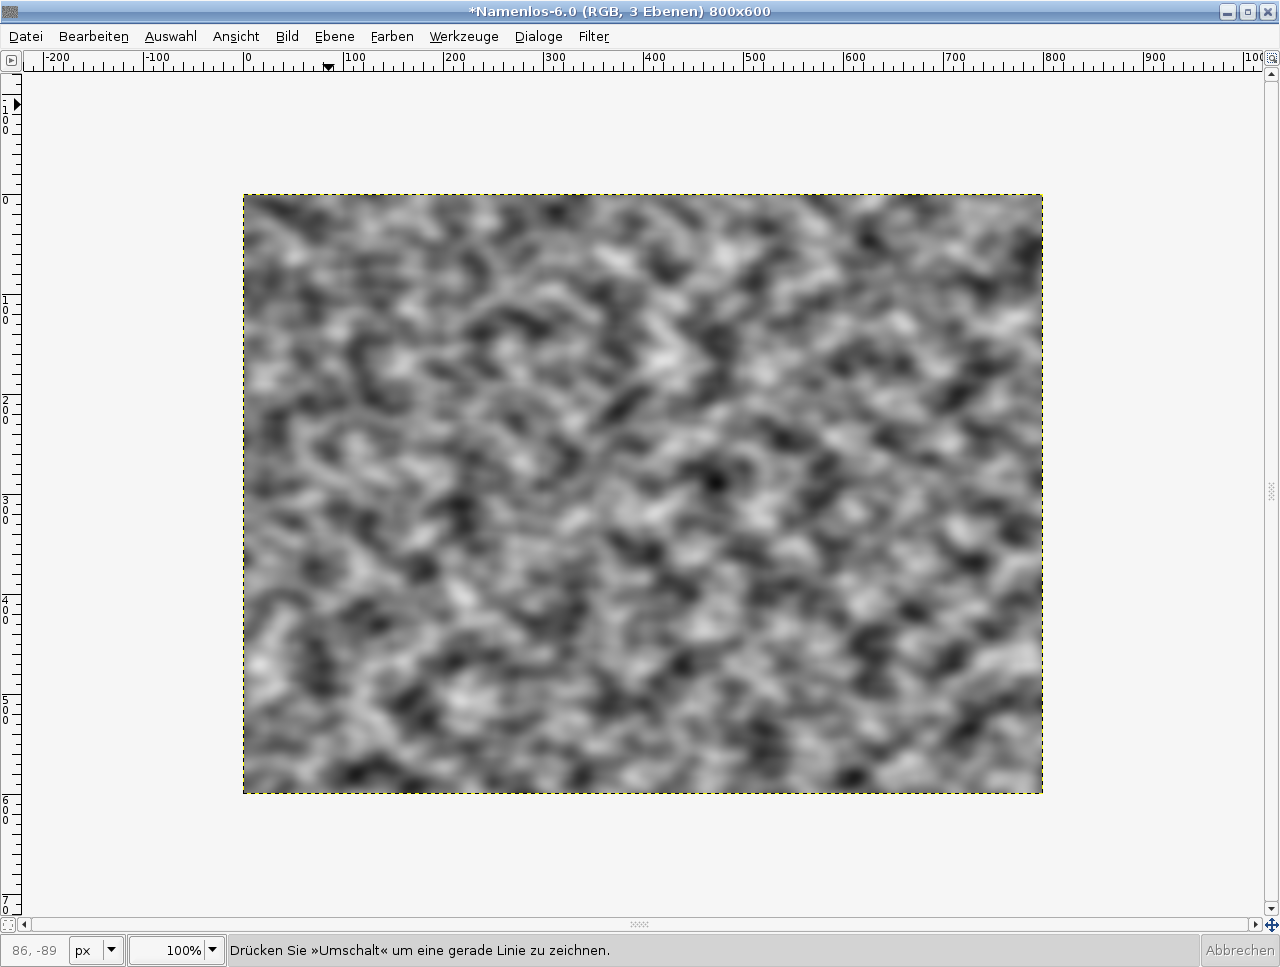
2
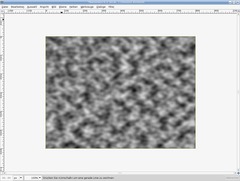
Add a new Layer. Filter / Render / Solid noise. User max values: 16/16.
-
3
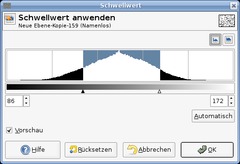
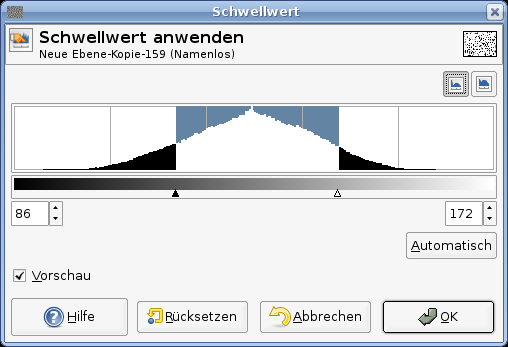
Colors / threshold, look at the pic below to see the values )left: 86, right: 172).
-
4
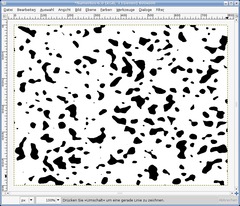
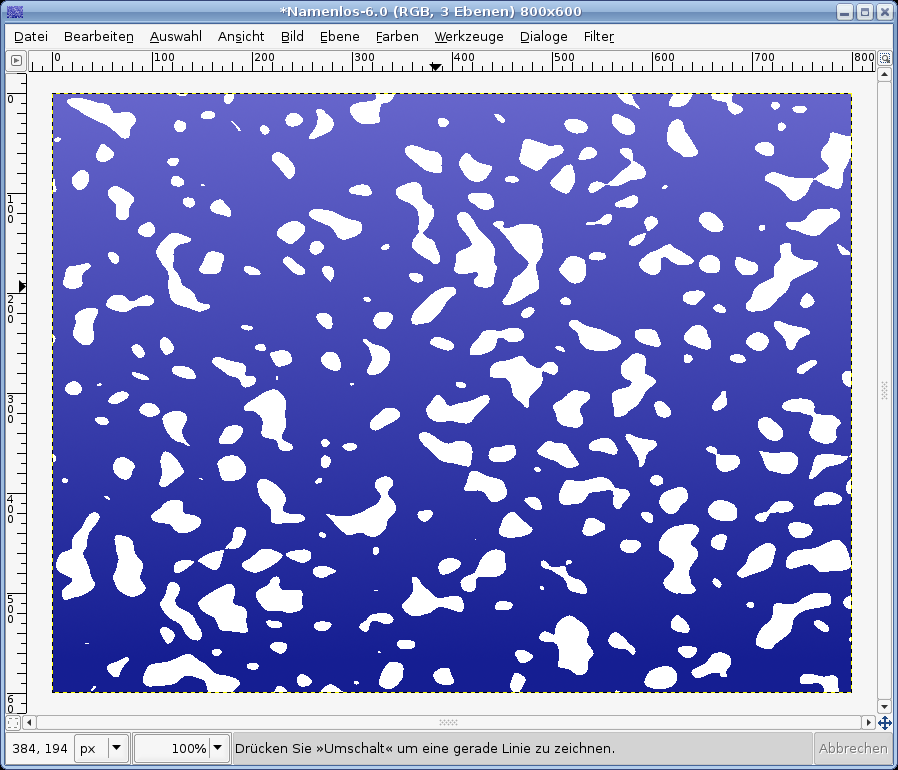
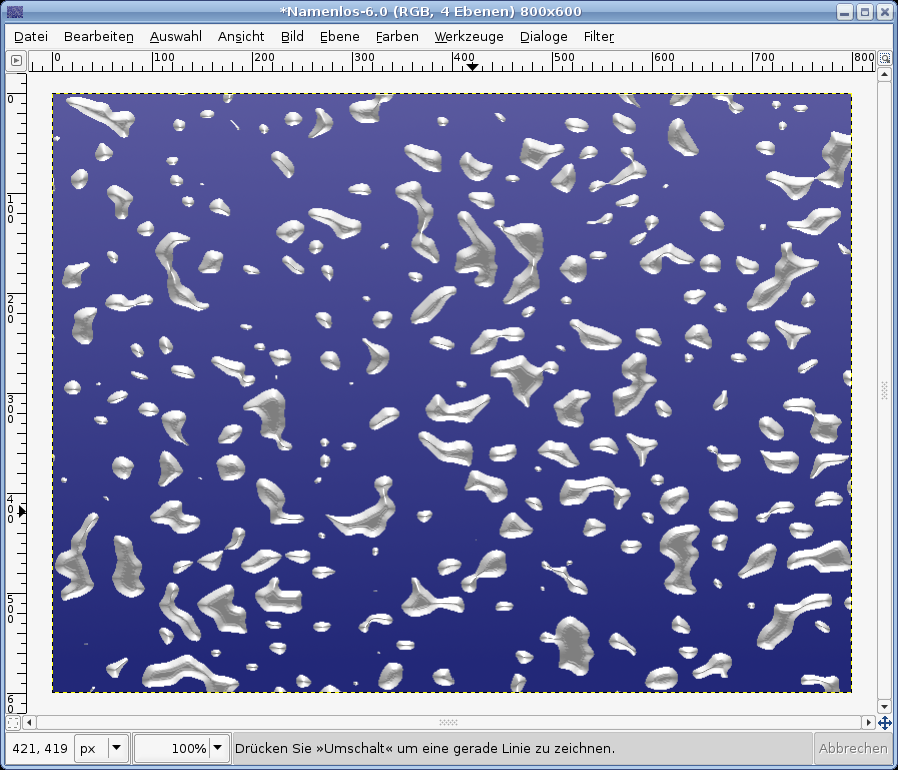
You’ll get a picture that looks like mine below:
-
5
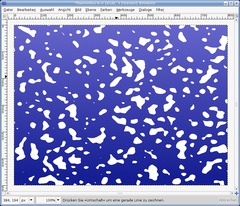
Choose Colors / Color to Alpha and choose white to make all white transparent.
After this invert all the pixels: Colors / Invert. After that all black should be white.
-
6
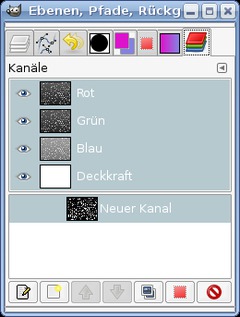
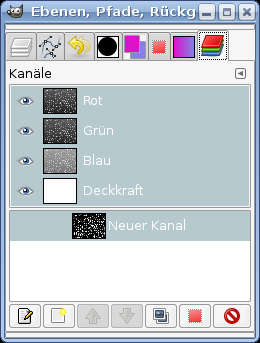
Duplicate this layer, make it invisible by clicking the eye icon left to the layer in the layers dialog. Right click the layer in the layers dialog: “Selection from Alpha”.
- Dialogs / Channels. Add a new channel there while still having the selection active. Click “Initialize from selection”.
Press CTRL+SHIFT+A to deselect all.
- user Filter / Blur / Gaussian Blur 3 times with these values: 7 then 3 and finally 1. Click the eye symbol to make the channel invisible.Switch back to the layers dialog and click the layer that contains the white “drops”.
-
7
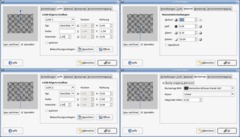
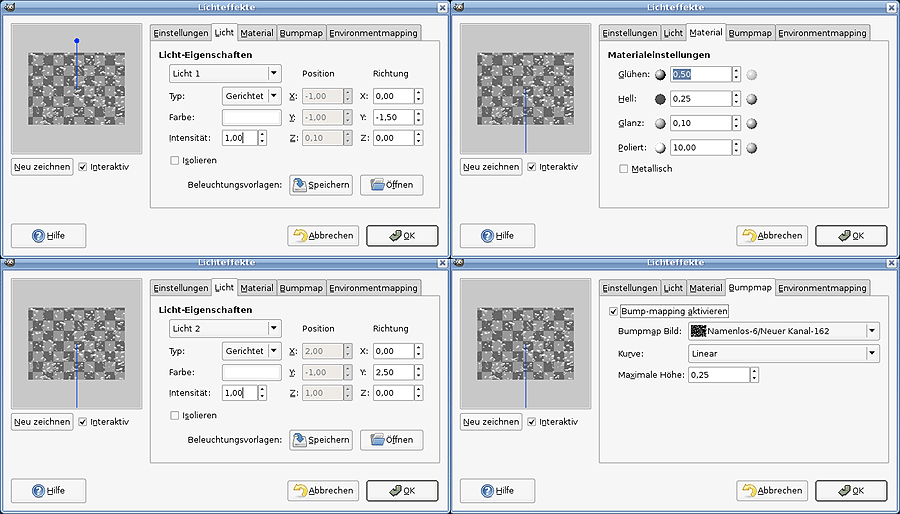
Make sure the white drops layer is active. Now the heart piece of this tutorials follows:
Filter / Light & Shadow / Lighting effects…
We will now illuminate the drops from 2 sides (from top and from bottom) so we get some pretty real hightlights for the water. We need 2 directional light sources. Use my values (see the picture below). Don’t forget to use the channel we created in step 6 as bumpmap.
-
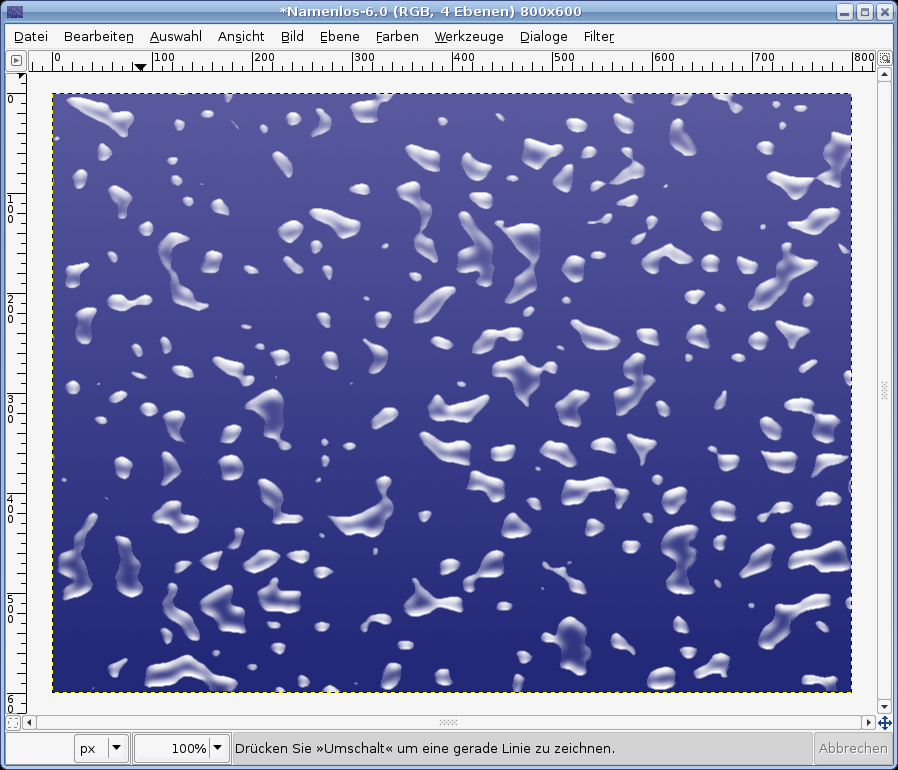
8
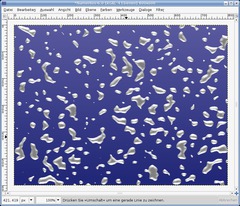
You get something like this:
-
9

Lock the alpha channel (“Lock alpha channel”) of this layer. This option is found above all layers. Then use Filters / Blur / Gaussian Blur: 4px.
Using this option has the effect that all filters or anything else you may do on a layer is only applied to the visible pixel.
In this step we use this to get nice little blurred grays. However we need to see clear differences between bright and dark gray as well as a clear white.
After this you make the gray in the middle transparent by using Colors / Color to Alpha again (pick the gray in the middle).
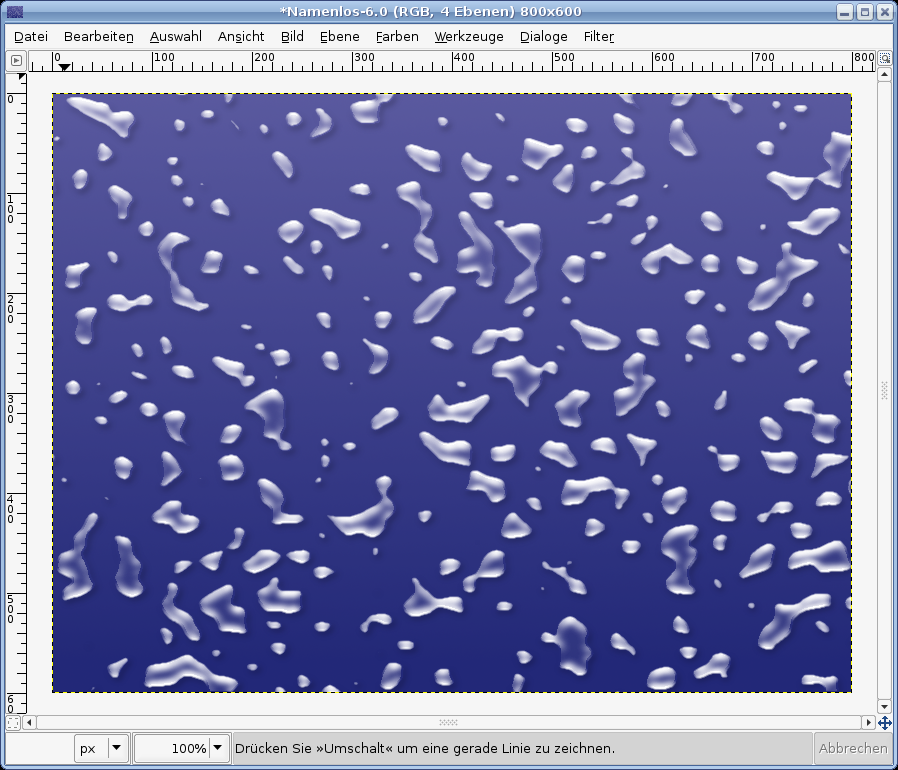
You get the following:
-
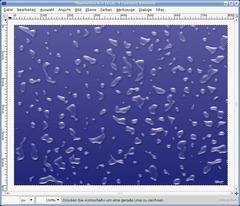
10
As for now the result look already pretty good but we can still make some improvements: Any drop needs a soft black shadow to look more real.
Rightclick the invisible white layer in the layers dialog and choose “Selection from alpha”.
With this selection active use Filter / Light and Shadow / Drop Shadow: X:2,Y:3 – Transparency: 30. Deselect “Allow resize”.
Deselect all: Selection / None.
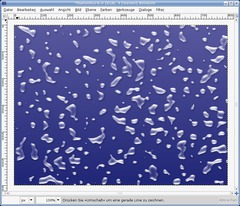
-
11
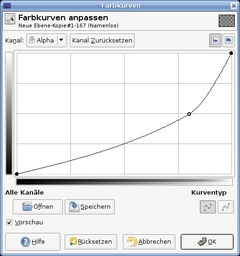
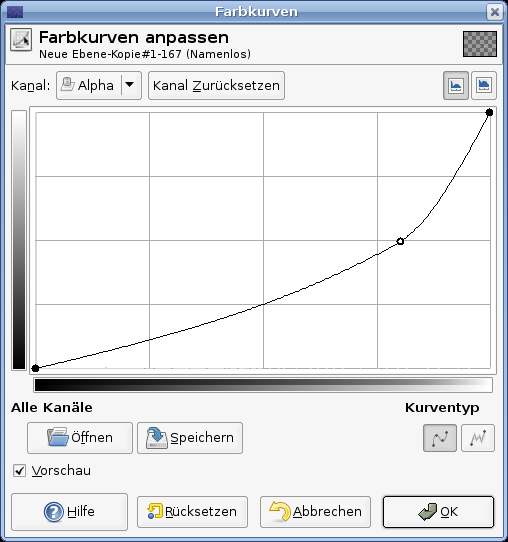
Our drops are a bit too white and not enough transparent. Activate the visible drops layer: Colors / Curves, use the Alpha channel (top left option) and apply the curve seen on the picture. We’re then finished ;)
-
12
Hope you like it!
Tip: Smaller the size of the picture afterwards to get an even more realistic look!


Comments
Post your own comments, questions or hints here. The author and other users will see your posting and can reply to it.
Of course, you can also ask in the chat.
Subscription management
Please log in to manage your subscriptions.
User rating
This topic (How to generate realistic mass waterdrops on a surface) has been rated 5.0/5.0.
New comments are disabled because of spam.