


Tutorial: Create a mystic chaos Voodoo-Pattern
 is licensed under a Create Commons Attribution-Non Commercial 3.0 Unported license.")

Motivation
This tutorial shows you a simple effect which should look like mystical symbols of witches (Voodoo). I hope you understand it well, because it's my first (english) tutorial.
Tutorial details
- Category: Simple effects
- Time to reproduce: ≈5.0 minutes

- Tested with GIMP 2.3.18
-
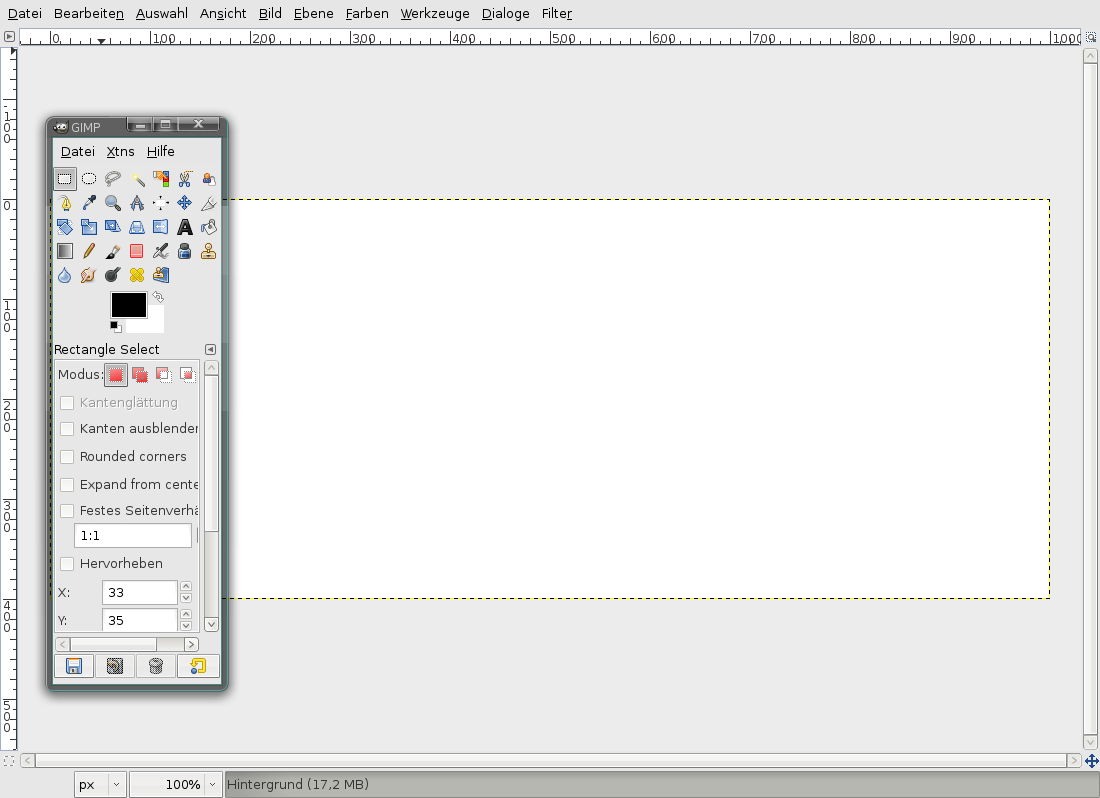
1
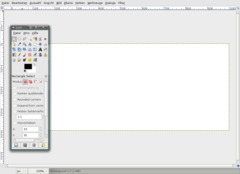
Of course we make a new file first. I take a size of 1000×400px, its the double size of a regular signature. (I do this for a better look, you can make it smaller later of course) Background-color: White
-
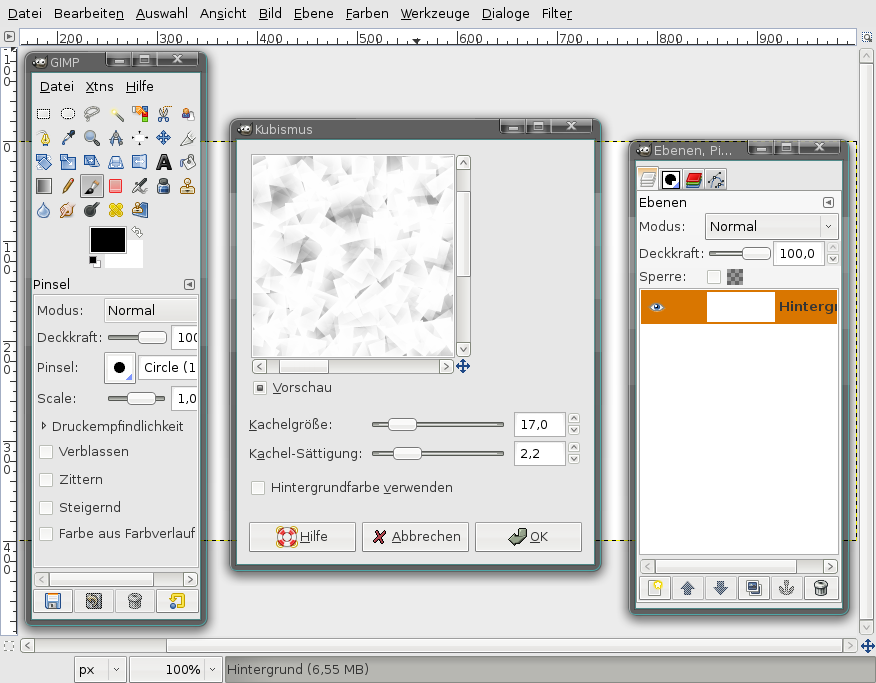
2
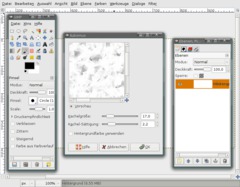
Filter / Artistic / Cubism. Look at the values of the picture.
-
3
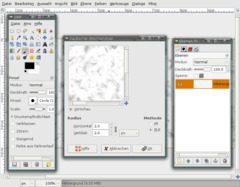
Filter / Blur / Gaussian Blur: 2px.
-
4
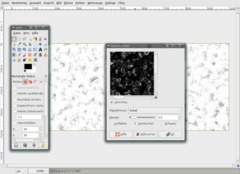
Now the picture is little blurred. Do Filter / Edge-Detect / Edge… now and take these values. You can play around and take what you want.
-
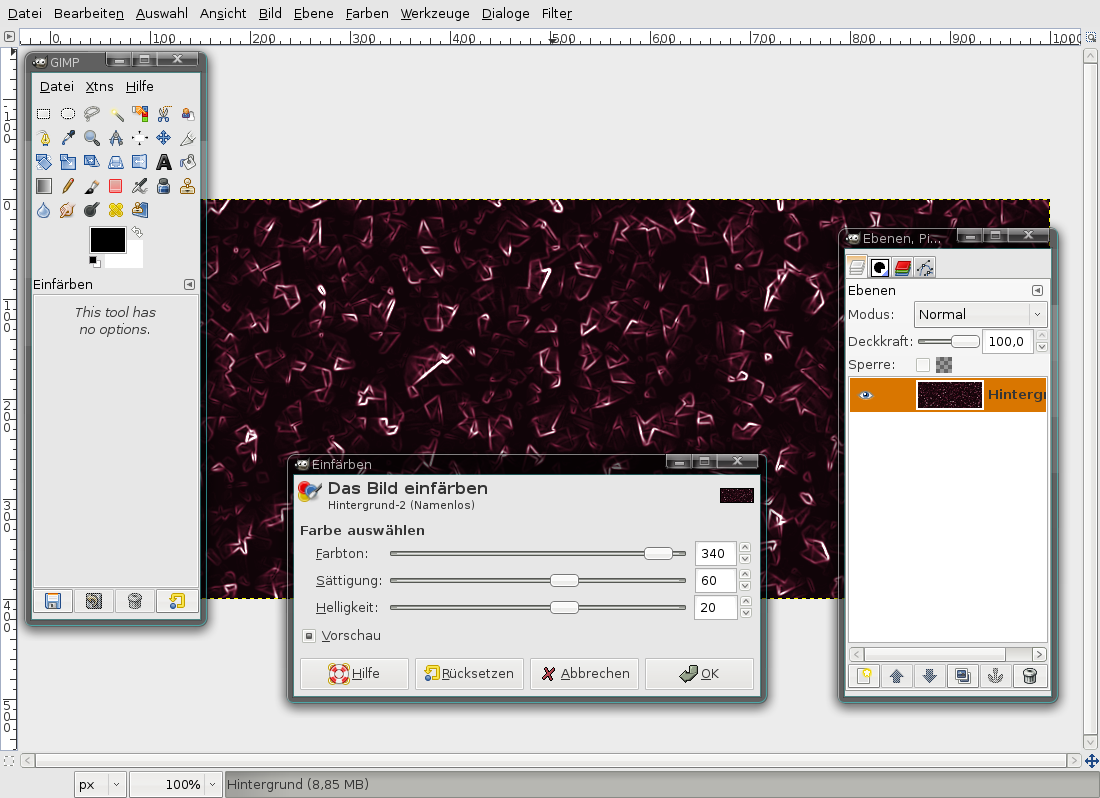
5

We’re almost done now ;) But the picture looks boring without color. You can colorize it by your own. I took these values (Colors / Colorize):
-
6
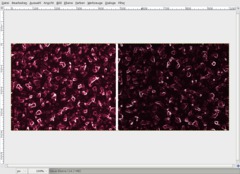
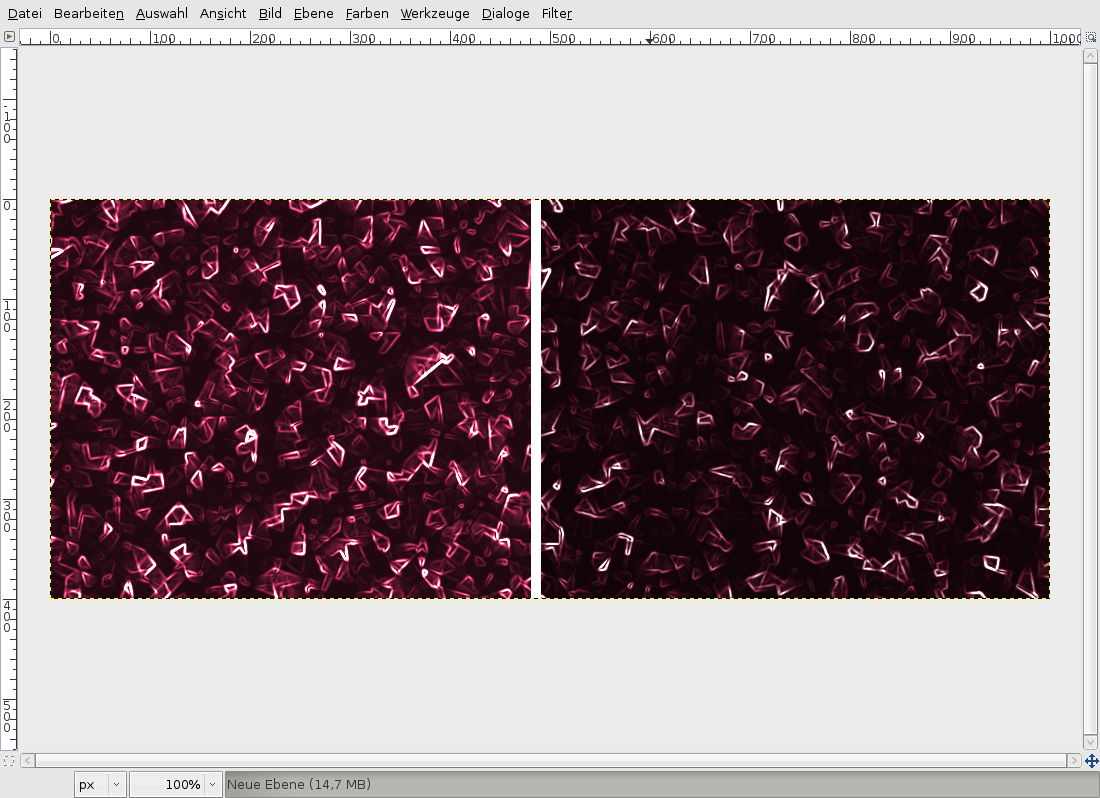
Optionally you can duplicate the layer and set the layers mode (fint it at top of the layers dialog , above all layers) to “Addition”. The pattern looks much more saturated then (see left side of the image below, the original is to the right).
-
7
Done ;) Have fun with this kind of background!


Comments
Post your own comments, questions or hints here. The author and other users will see your posting and can reply to it.
Of course, you can also ask in the chat.
Subscription management
Please log in to manage your subscriptions.
User rating
This topic (Create a mystic chaos Voodoo-Pattern) has been rated 5.0/5.0.
New comments are disabled because of spam.