


Tutorial: Ashes to ashes, dust to dust. Dissolve text into particles
 is licensed under a Create Commons Attribution-Non Commercial 3.0 Unported license.")

Motivation
This tutorial shows you how to dissolve text into fine particles of dust. The text should not have equal amount of same-sized particles/dust, instead it should look like as it dissolves more and more into even finer dust until it finally disappears.
Tutorial details
- Category: Text effects
- Time to reproduce: ≈15.0 minutes

- Tested with GIMP 2.7.3
-
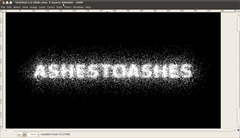
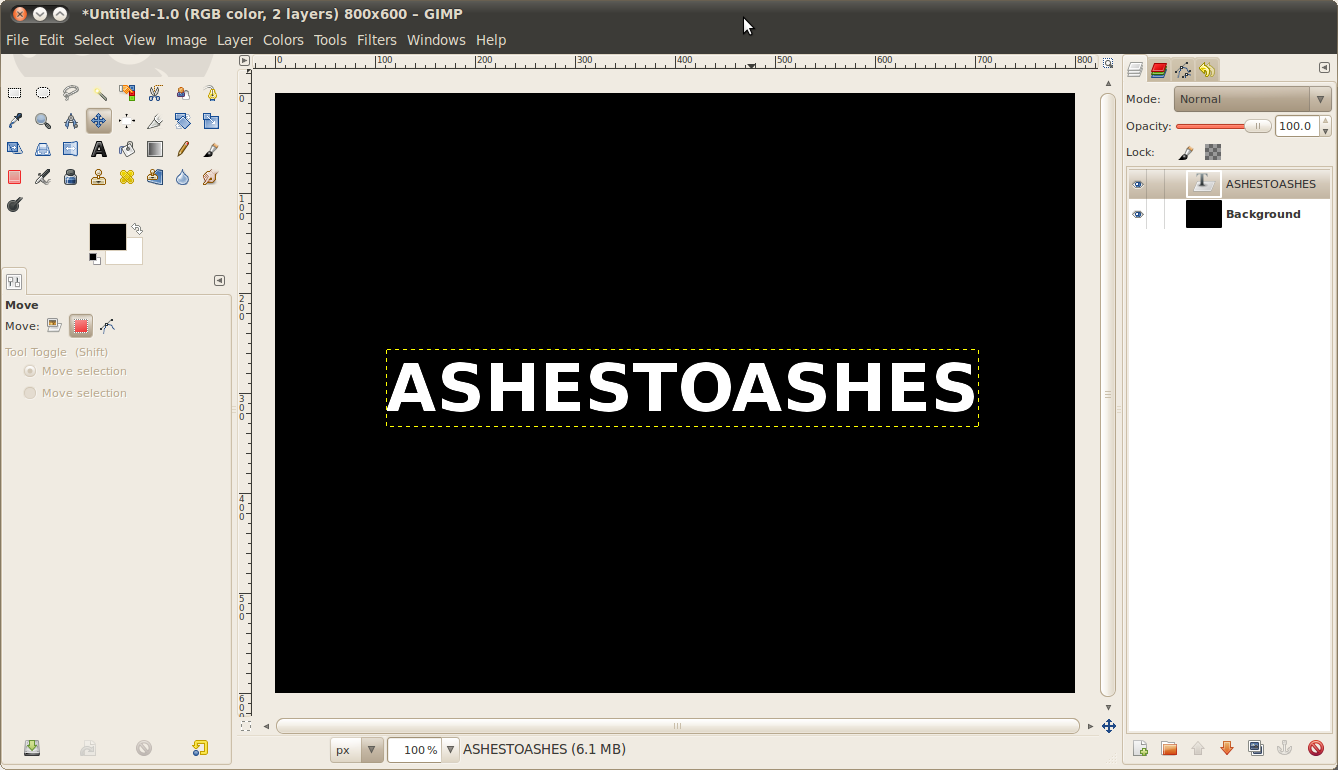
1
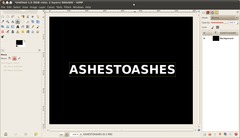
Create a new file: 800×600px. Choose black as background color and add some text in white color. Use a font size of 60-70, however size doesn’t really matter (you know don’t you ;)) Nevertheless it shouldn’t be too small :)
-
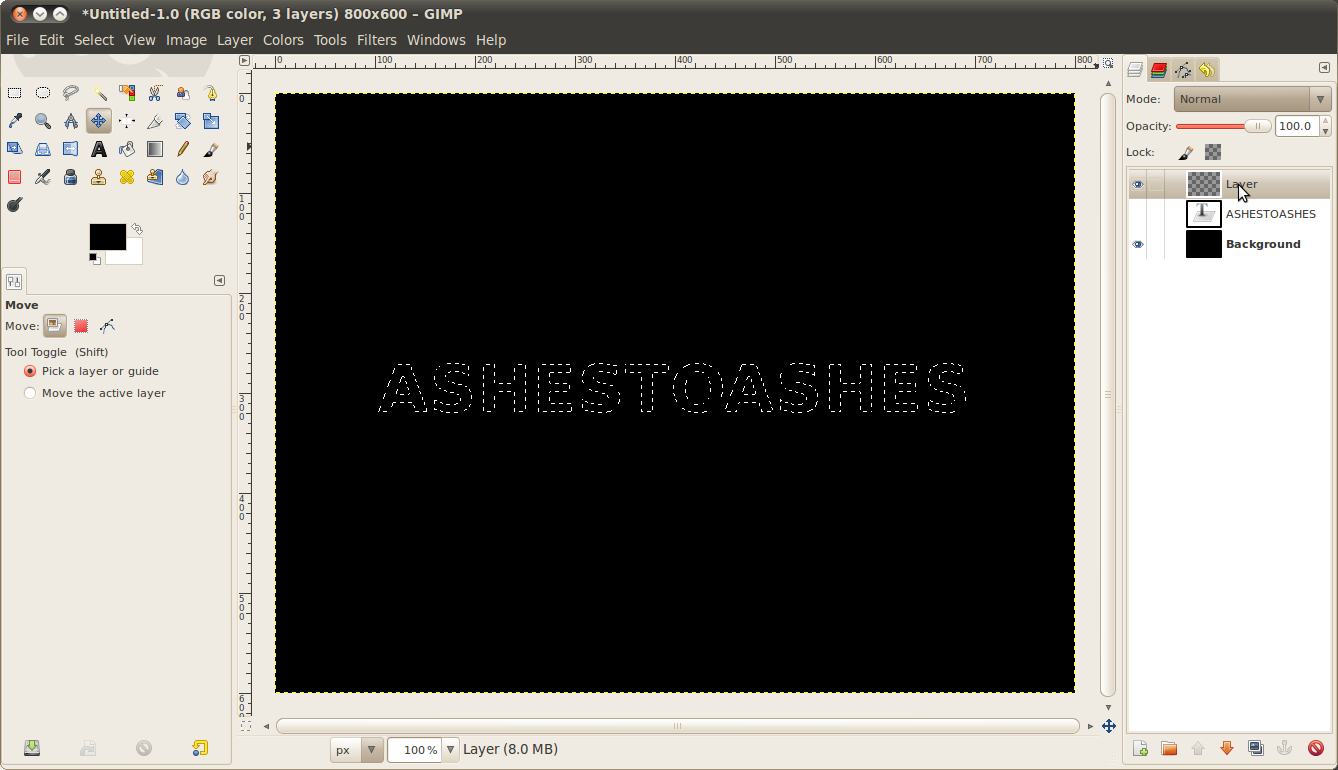
2
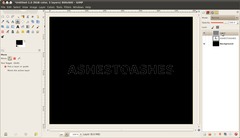
Next you need to make a selection from the text shape.
- Rightclick the textlayer in the layers dialogue and choose “Alpha to selection”.
- Make the text layer disappear (click the eye symbol)
- create a new transparent layer and click on it to make it active.
-
3
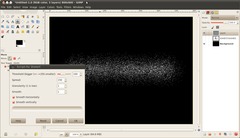
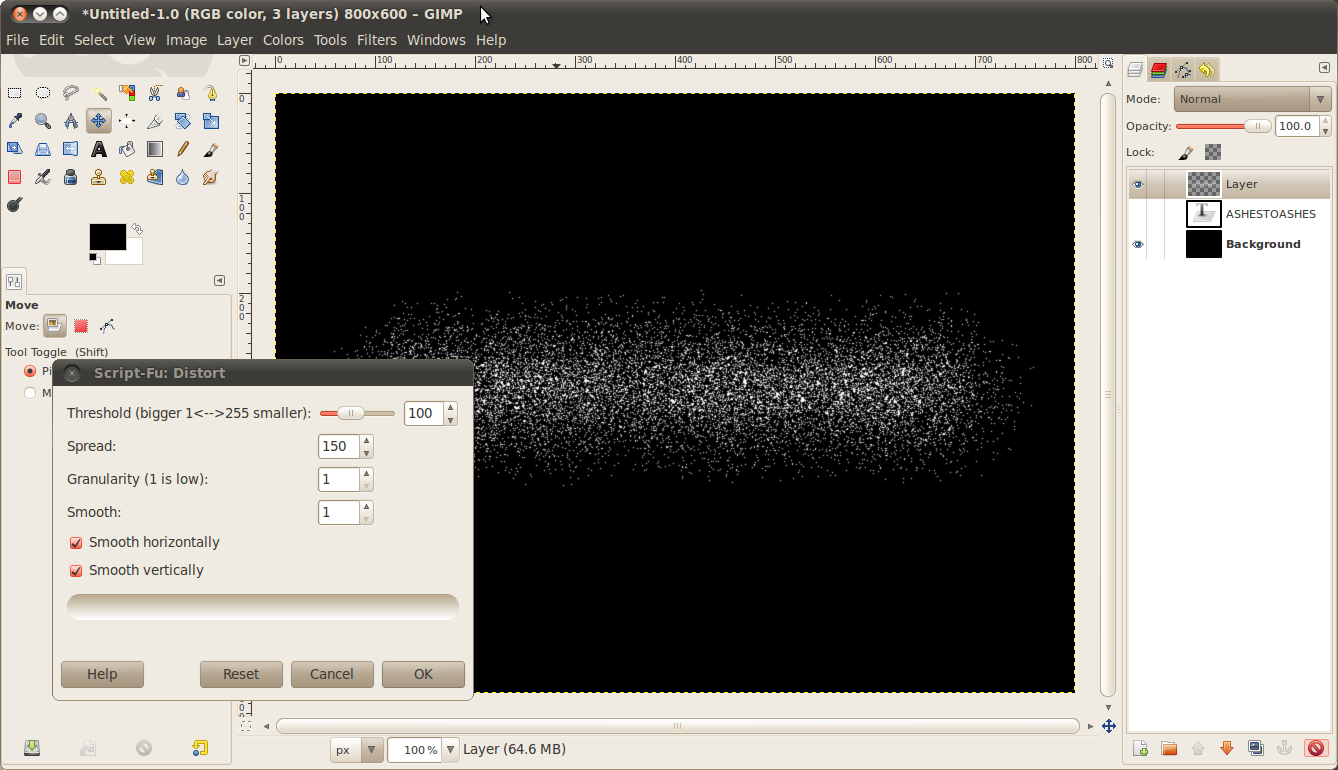
Now choose in the menu:
- Select / Distort. Choose values from the image (100, 150, 1, 1, checked, checked)
- Now fill the selection with white. To do this very fast press D to activate the default colors. Then choose Edit / Fill BG color.
- deactivate the selection (Select / None). Name the layer “very fine” or something like that.
-
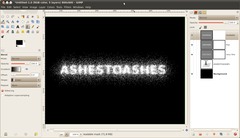
4
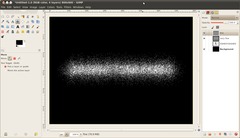
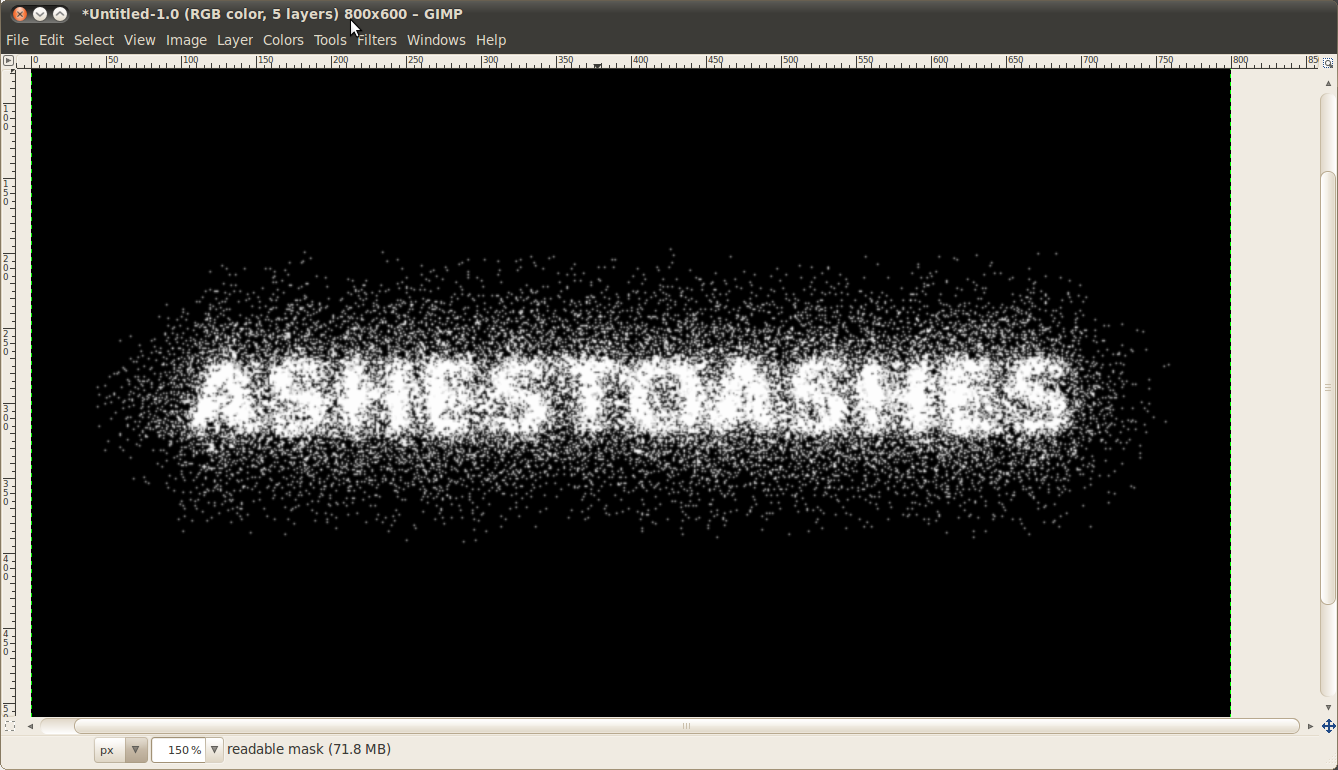
Next we’ve to repeat these steps, but with other values.
What we need now is a layer with dust that is not as fine or widley distributed as the previous one and we need a third one where the text is still a little bit readable.
- Choose “Alpha to selection” again from the text layer.
- Create another transparent layer above the first dusty layer.
- Now choose Select / Distort again. This time use these values: 80 / 90 / 1/ 1
-
5
Repeat step 4 using these values: 120 / 20 / 1 / 1
Now you should have 3 layers with 3 different types of dust followed one by another.
-
6
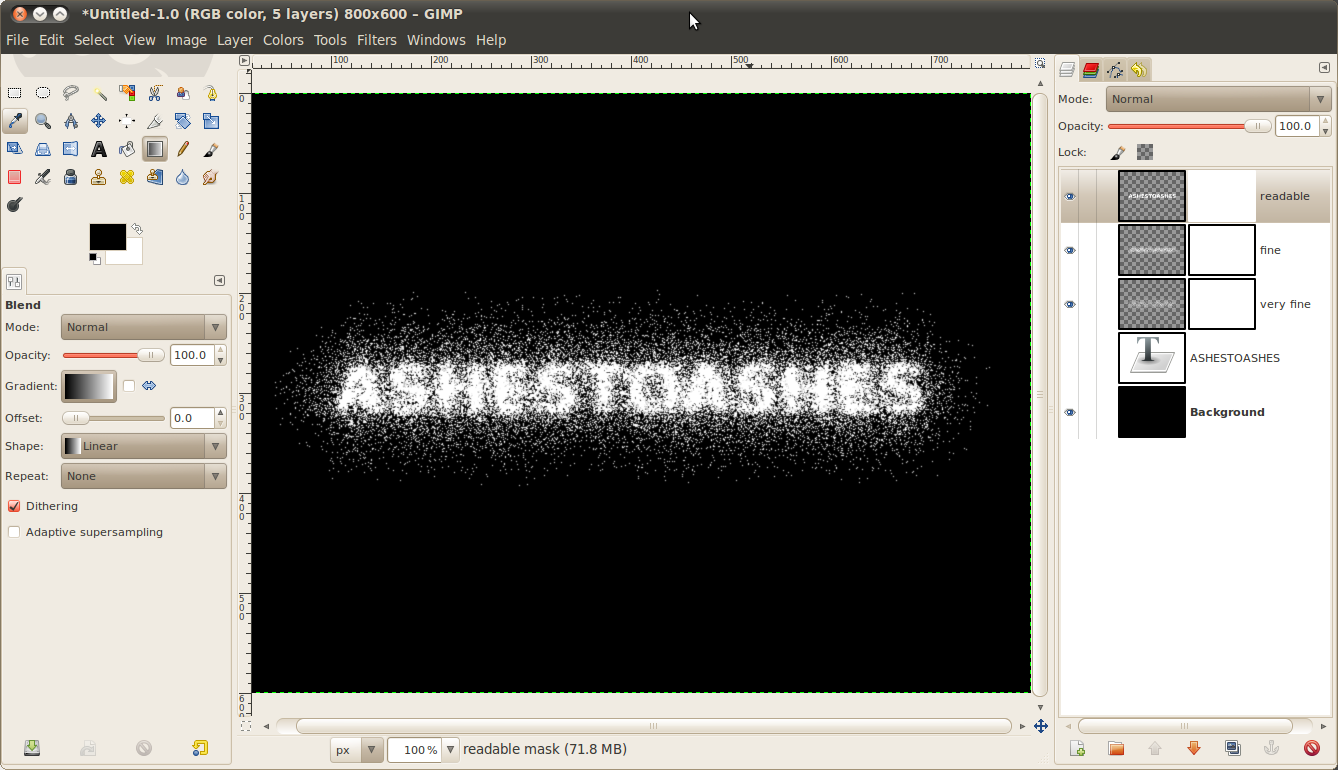
Next we need layer masks to create a nice dynamic looking dissolving text. At the bottom edge of the text the dust should look fairly unvisible and it should look more and more dissolving into ashes as you come to the center of the text.
Create layer masks for all the dust layers (Layer / Mask / Add layer mask), or just right click each layer and choose “Add layer mask”. All masks should be totally white so that everything on the layer is visible.
-
7
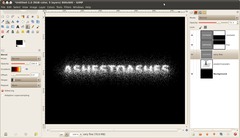
Choose the Blend Tool to create gradients. Use the standard gradient (FG to BG color). For the “fine” (see image) layer create the gradient on the layer mask from the top edge (where you can only see the dust particles a little bit) to the bottom where the dust begins to disappear. It will be black on the top of the layer mask and white at the bottom.
Don’t change the “very fine” layer. On this layer you can experiment with gradients on mask if you want to make differently strong effects of dissolving.
For the layer where the text is well readable make a gradient from the bottom edge of the text to the top edge of it. It should look like that now:
-
8
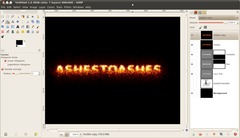
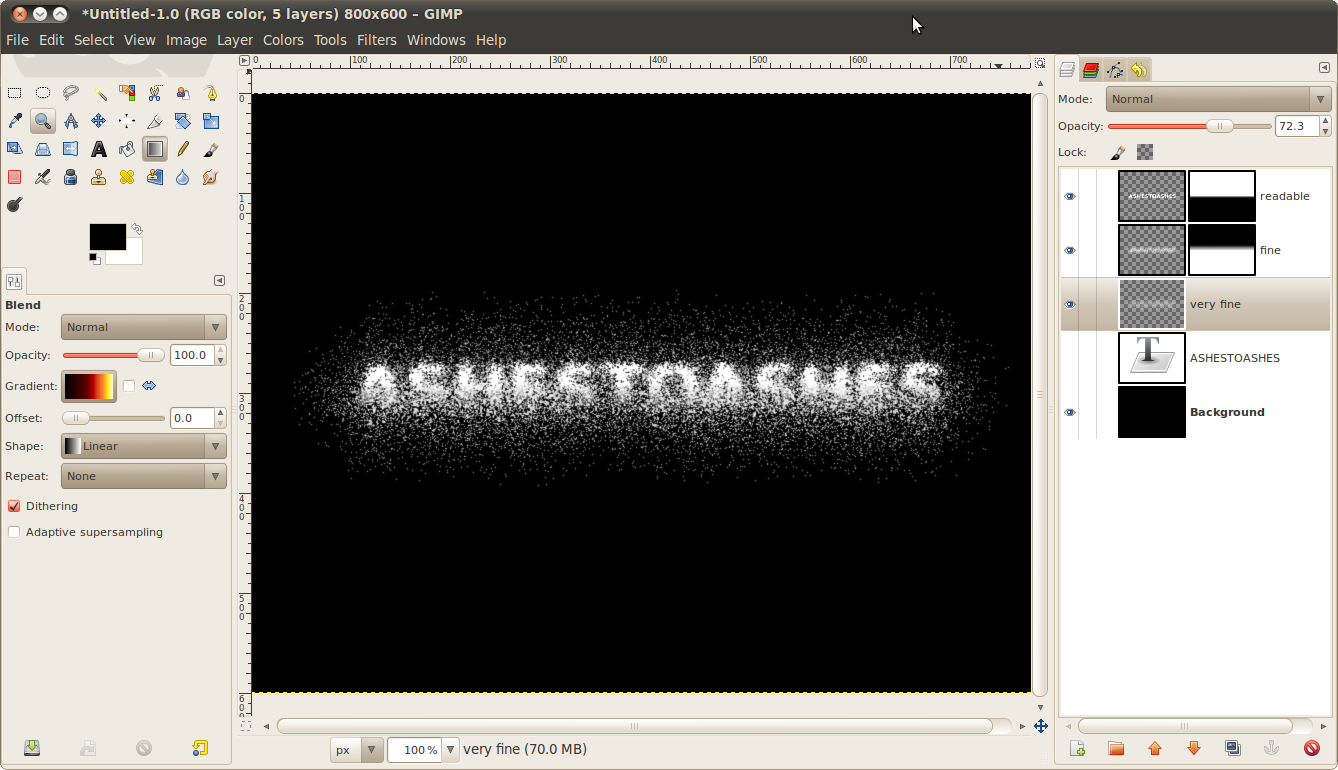
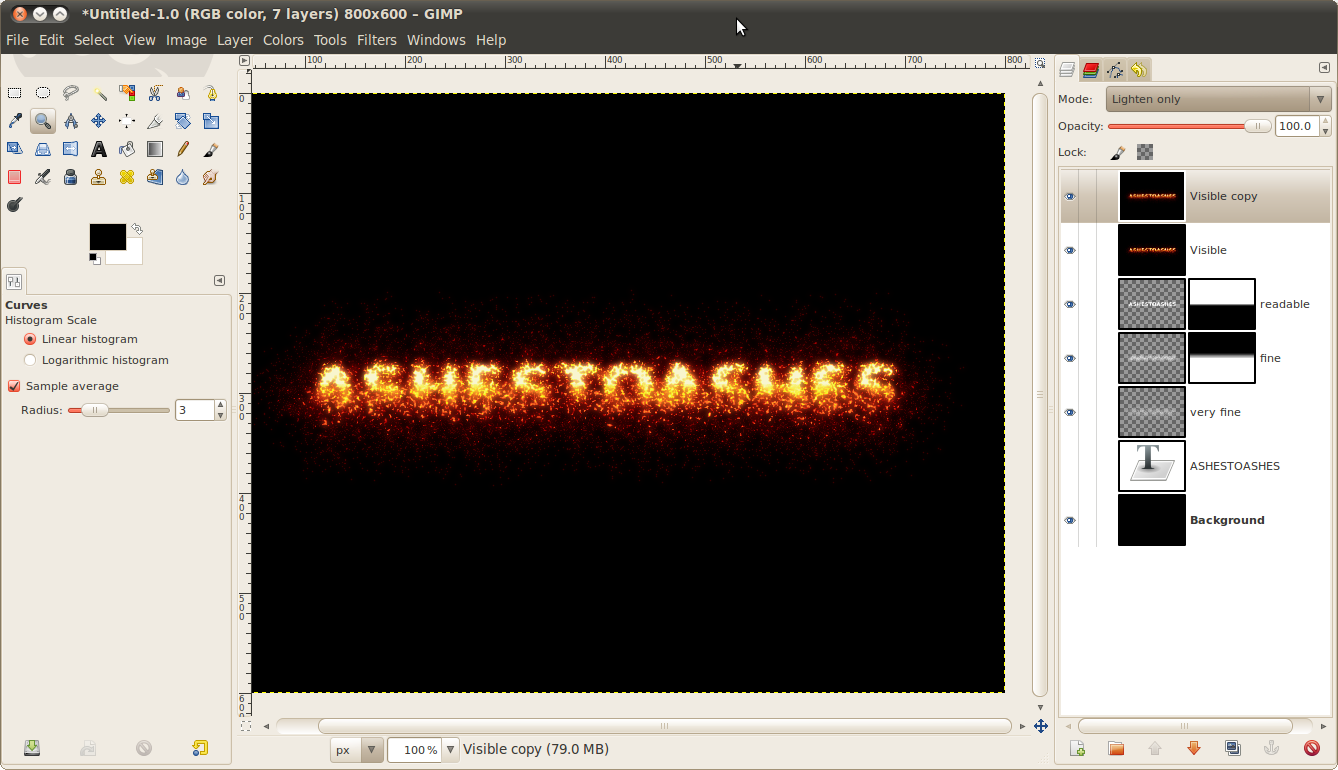
Now click the top layer and choose “New from visible”. On this layer you can now add color to the scene.
I’m going a step further and make the text look like glowing ashes:
Fot that choose the Blend tool again and select the “Incadescent” gradient from the drop down menu. Choose Colors / Map / Gradient Map. To add more glow duplicate the layer and use Filter / Blur / Gaussian Blur: 8px. Set the layers mode to “Lighten only” (the option is found above all layers in the layers dialogue).
Now you should have a very cool glowing ashes effect ;)
-
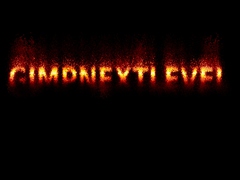
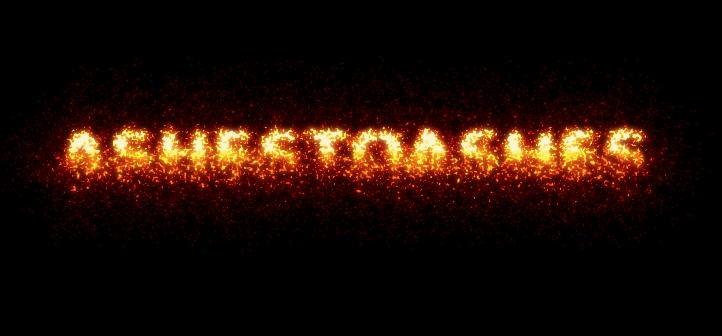
9

This is the final version of our dissolving text.
-
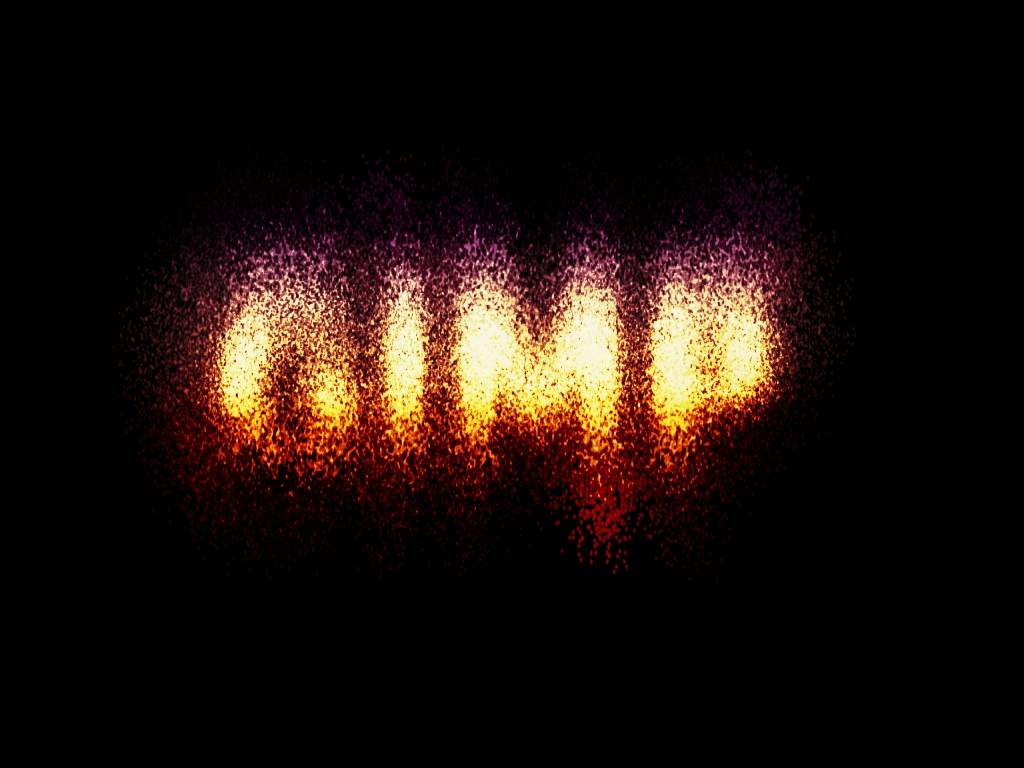
10
Here is my first version. I experimented a bit more on the layer masks – you’ll get different states of the dissolved text – some parts are dissolved more than others.
-
11
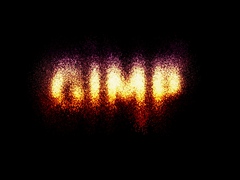
And here’s another one without gradients.


Comments
Post your own comments, questions or hints here. The author and other users will see your posting and can reply to it.
Of course, you can also ask in the chat.
Subscription management
Please log in to manage your subscriptions.
New comments are disabled because of spam.