


Tutorial: Create a shocking sphere/ball
 is licensed under a Create Commons Attribution-Non Commercial 3.0 Unported license.")

Motivation
In this tutorial our user MaleXx wll show you how you can create a shocking sphere by combining some tutorials of gimpusers.de to a new one. Have fun!
Tutorial details
- Category: Photos / wallpapers
- Time to reproduce: ≈15.0 minutes

- Tested with GIMP 2.2.x
-
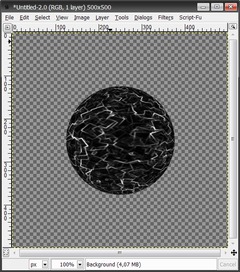
1
First we are making the shock ball. For that we create a new file with the size 500×500px.
-
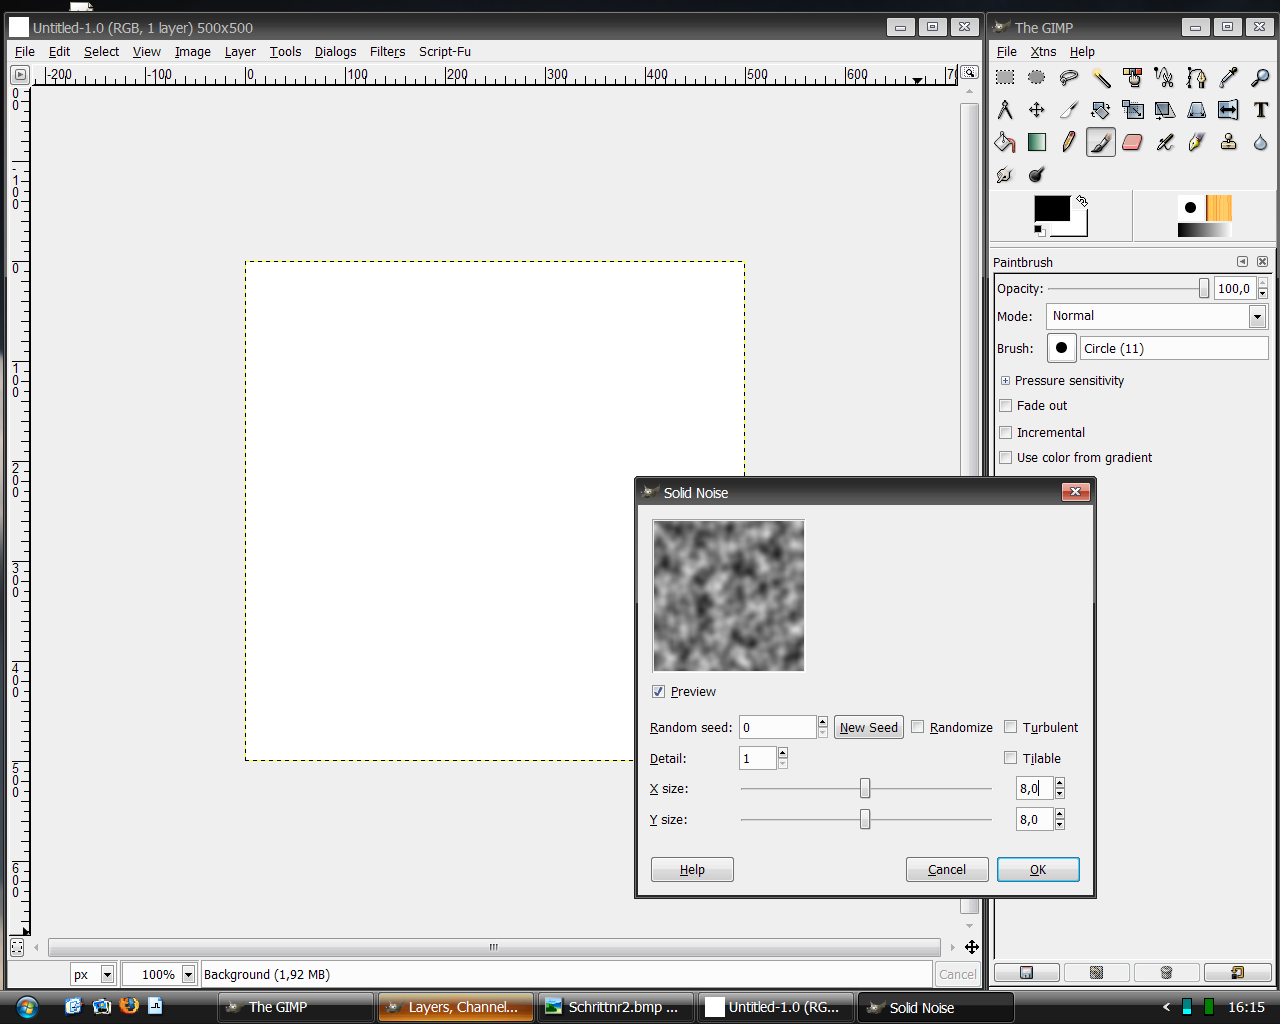
2
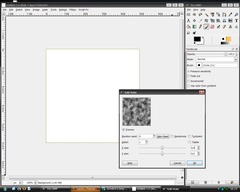
Filters>Render>Clouds>solid noise, use parameters from picture
-
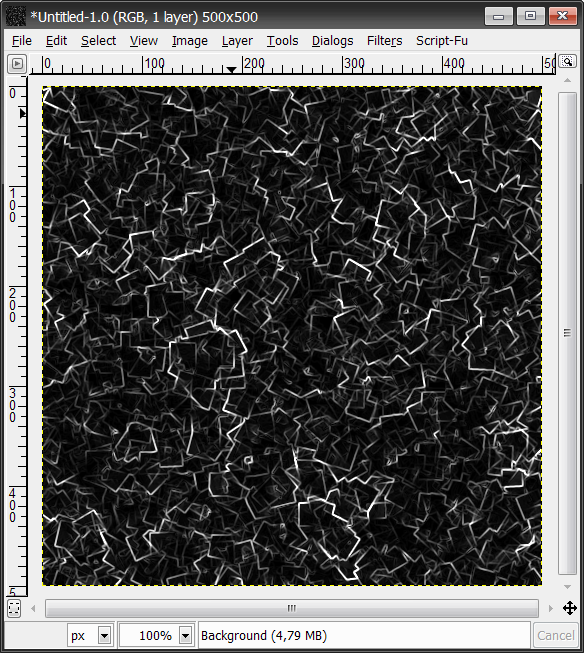
3
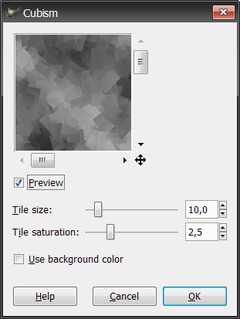
Filters>Artistic>Cubism, use parameters from picture and then Filters>Edge-Detect>Edge with standard parameter
-
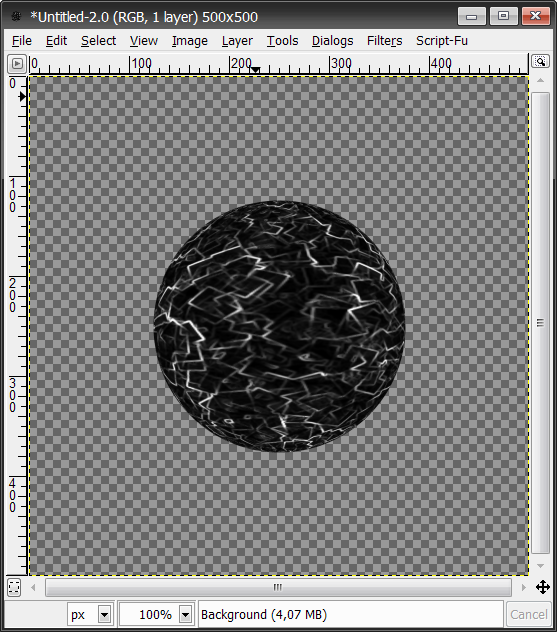
4
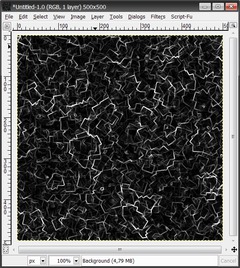
Now your picture should look like this:
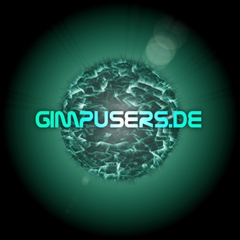
-
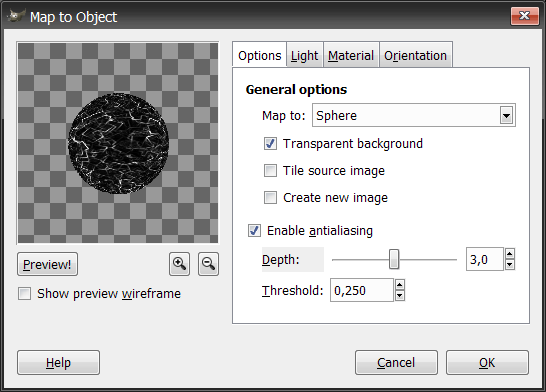
5
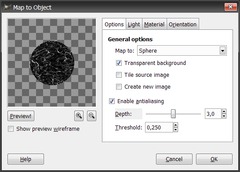
Filters>Map>Map Object, use parameters from picture, select by Lightsource type “no light”
-
6
Now your picture should look like this:
-
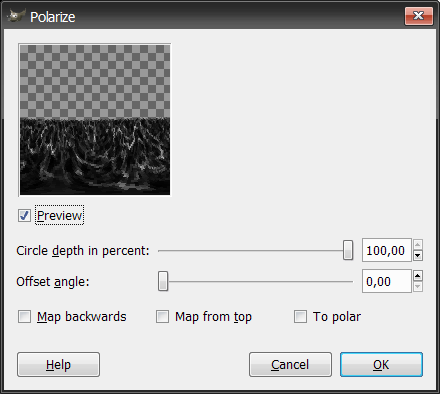
7
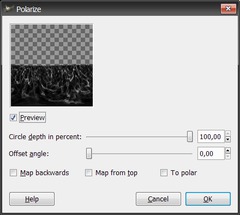
Filters>Distorts>Polar Coords, use parameters from picture
-
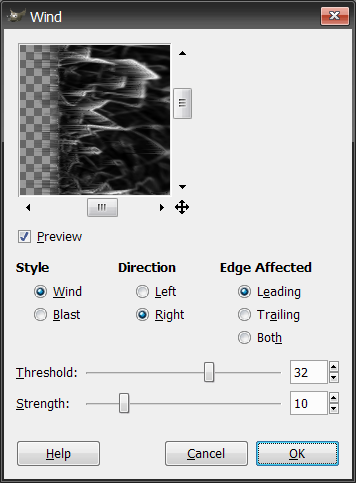
8
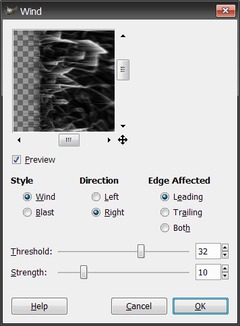
Image> Transform>Rotate 90 degrees CCW, then Filters>Distorts>Wind, use parameters from picture
-
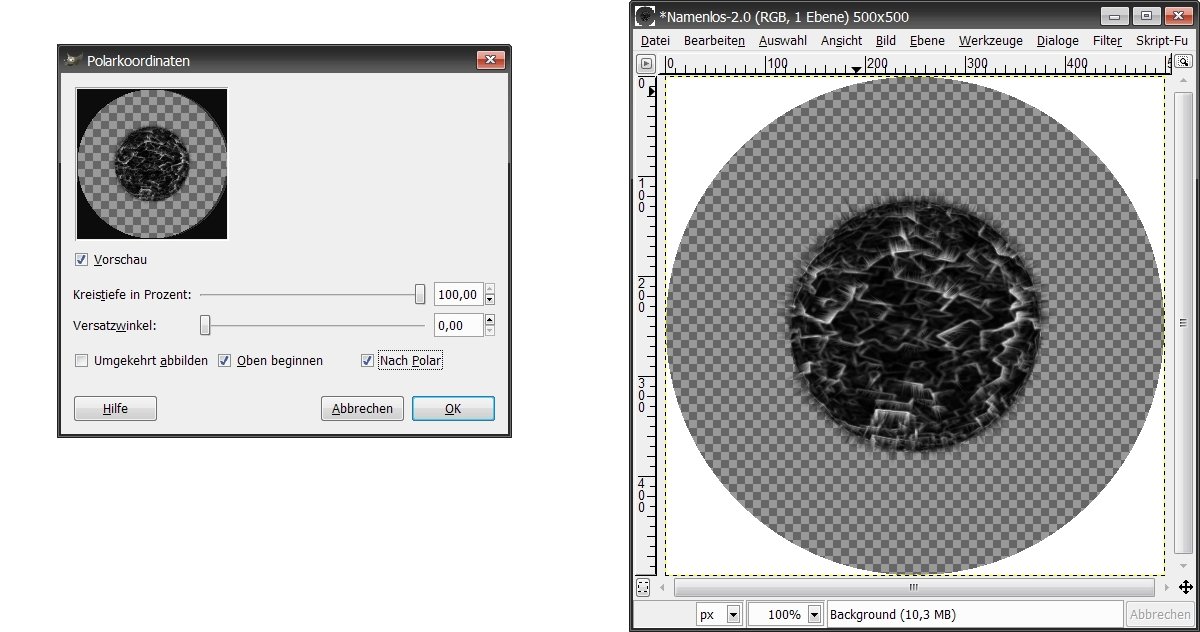
9
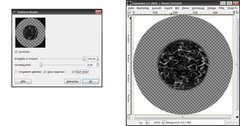
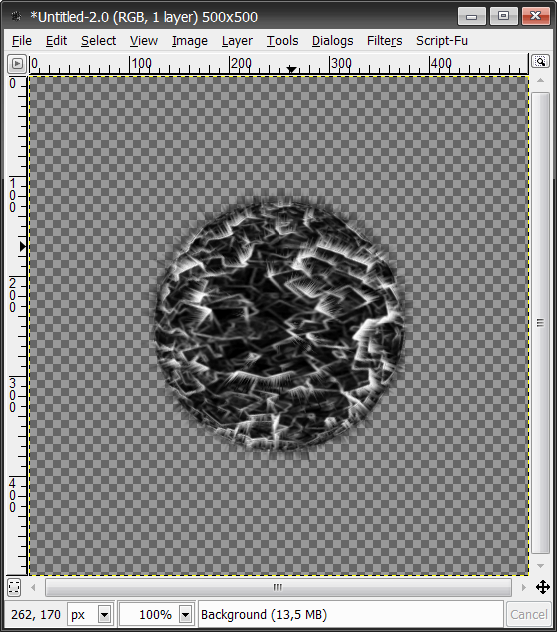
Then repeat with Ctrl+F. Image>Transform>Rotate 90 degrees CCW, then Filters>Distorts>Polar Coords, use parameters from picture (look at the left picture)
Now your picture should look like this:(look at the right picture)
-
10
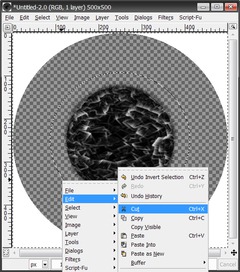
Now there is a white border round the image. Select therefore the ball with the selection tool and click on Select>Invert
-
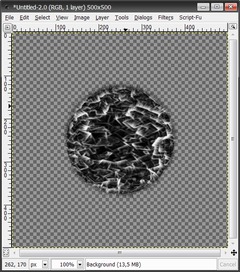
11

After you cut out the white border, duplicate the layer with the ball and adjust the upper layer on “screen” mode.
Now the white parts in the picture are brighter.
-
12
Your picture should look like this now:
-
13
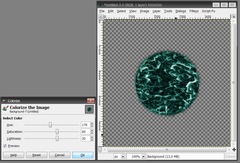
Right click the Layers dialog: “Merge down”.
Here the picture can be colored. For that click on Layer>Colors>Colorize and create the color you like.
-
14
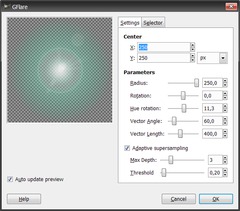
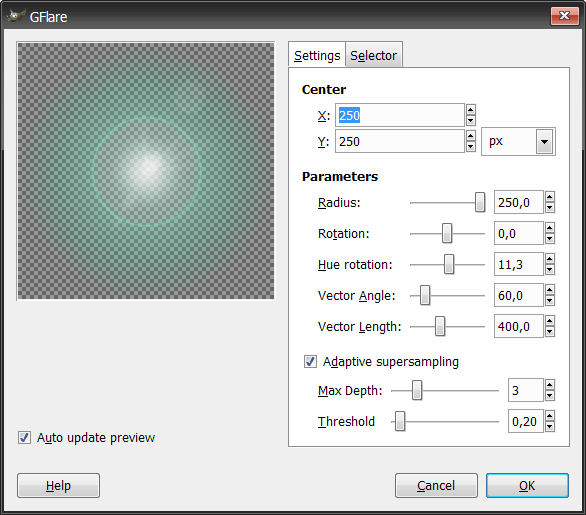
Create the „atmosphere“. Built a transparent layer und put it in the background. Click on >Filters>Light Effects>GFlare and take the parameter out of the next image.
The color doesn´t matter. Repeat effect with Ctrl+F. Create a second layer the same way and click again on Filters>Light Effects>GFlare, with the same parameters. This layer needs to b e shift one level before the planet layer.
-
15
Now create a black layer und put it in the background.
-
16
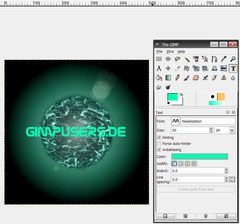
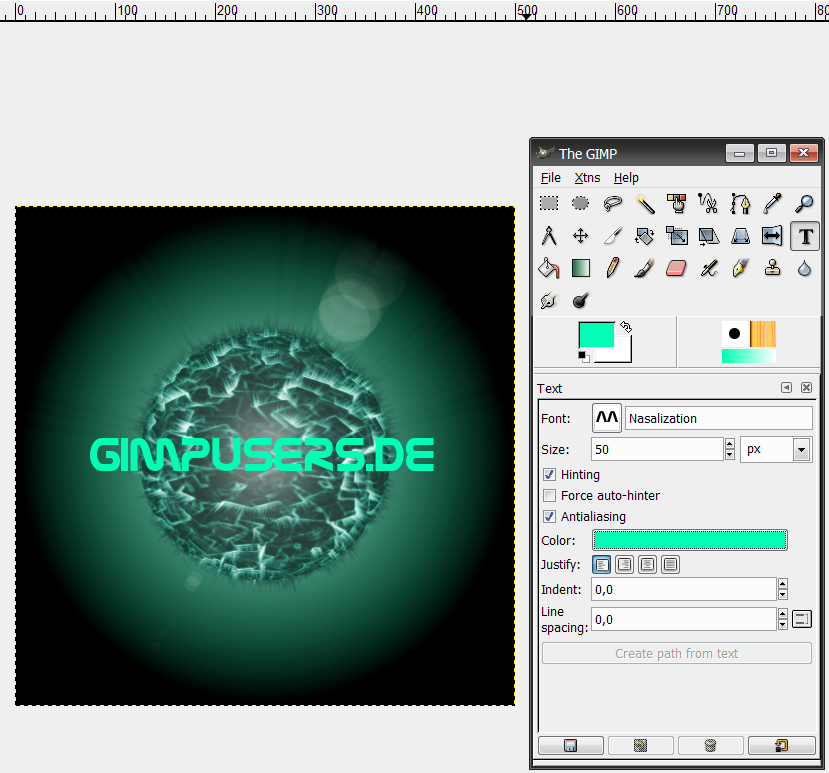
The ball is complete now. Add a name. Use the Text Tool and write a short name with a font with less details.
-
17
The color should be the same as used on the planet.
Your image and the layer now should look like this: -
18
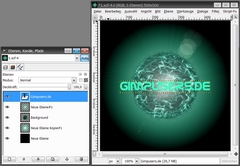
Create a new transparent layer and scroll it under the text layer.
Go to the layer toolbox and select the “text layer”. Then click with the right mouse-button on it and choose “Merge down“
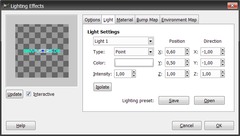
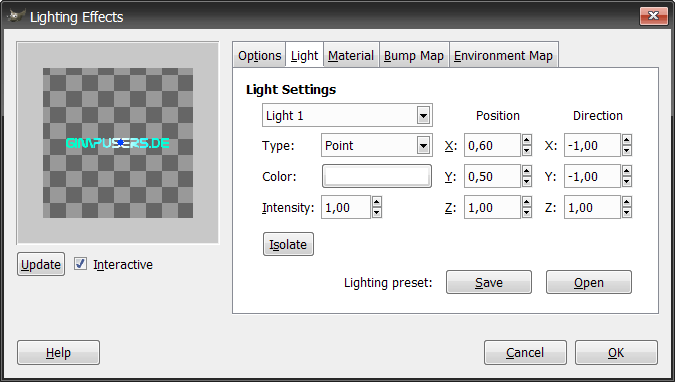
Go to Filters>Light-Effects>Lighting Effects and put the blue point into the middle of your text, that the light flashes text in the middle. After that, choose OK. -
19
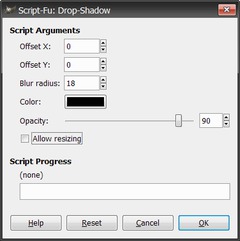
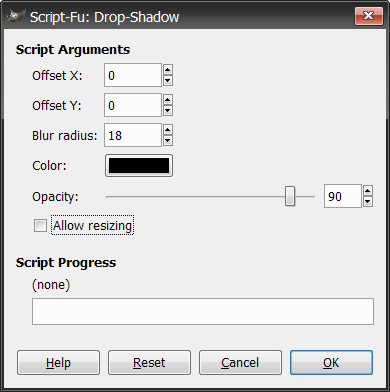
Now click on Script-Fu>Shadow>Drop-Shadow and use the parameters of the next image.
-
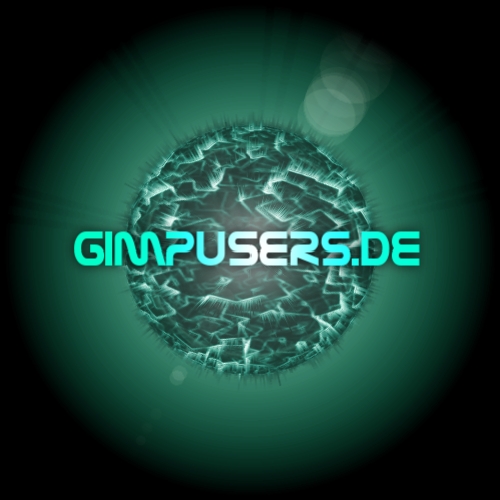
20
Done. The final picture should look like this:


Comments
Post your own comments, questions or hints here. The author and other users will see your posting and can reply to it.
Of course, you can also ask in the chat.
Subscription management
Please log in to manage your subscriptions.
New comments are disabled because of spam.