Last online: Marcel2, eatofid13, bam0, Pianist2, MyOwnOwner0, Avarra24, MaxPhilip14, devvv535, RedHawk20210, Tille0, deni6642, Wambo0
The GIMP
» All GIMP shortcuts / hotkeys
» GIMP changelog
» What's new in GIMP 2.4
» GIMP manual
» Books about GIMP
Making a pencil drawing from a photo Spicing up black/white images Deletion of unused user accounts GIMP 2.4.6 released MeetTheGimp.org is again not reachable Libre Graphics Meeting 2008: Videos online!
Generate a cool tech pattern Simple Scanlines Rounded Corners Orb-Icons for Websites Create futuristic looking tech pattern Neon Glow
- today 06:11 PM [gimp-docs] GIMP help in 2.6
- today 02:56 PM [gimp-tutorials.net] Colourful and glowing text effect tutorial
- today 01:18 PM [gimp-docs] GIMP help in 2.6
- today 10:53 AM [gimp-docs] Migration to *.po
- today 07:04 AM [gimp-developer] potfiles
- today 06:05 AM [gimp-developer] potfiles
- 04 Jul 2008 06:38 PM [gimp-developer] potfiles
- 04 Jul 2008 06:26 PM [meetthegimp] Focus Ring 15 - All Access Le Mans
Difficulty: 
GIMP version: 2.4.rc2
Category: Techniques
Author: devvv
Steps: 8
Needed time: ca. 30 min
Hits: 68271
Others from this category:

Facts and numbers
Current version: 2.4.6
Dev. version: 2.5.1
38 tutorials with
36 downloads,
175 news and
11290 list messages

Tutorial: Perfect masking using a highpass
Written by devvv (05 Sep 2007 08:00 AM)
There are several methods to extract/mask objects or persons from the background. But sometimes you need perfect masking that includes for example the hair of a woman. The method i use for this is called highpass. We need to simulate this filter because there is no filter in GIMP that does this for us. The point of the techqnique is that you'll save lots of time for the difficult hair part, because when you do everything right the hair is extracted automatically.
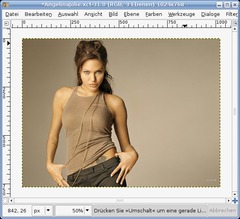
- Open any picture that contains a big shot of a person / celebrity / whatever. I use a picture of a well known celebrity.
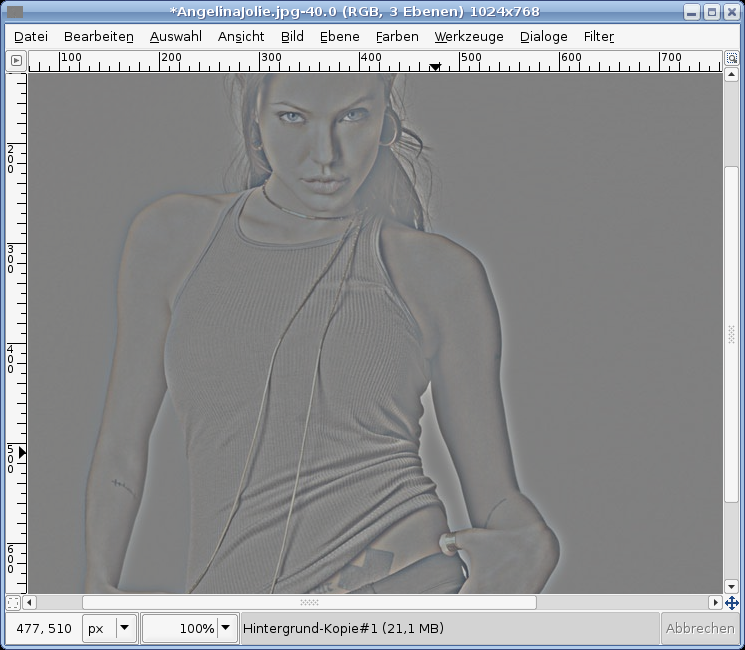
click to enlarge - 
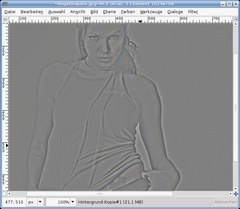
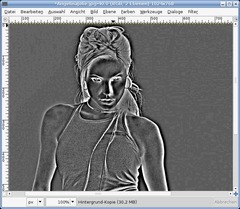
Duplicate the background layer 2 times, you should that layer 3 times then. On the top layer use Filter / Gaussian Blur: 18px. Set the layer to 50% transparency in the layers dialog.
Then go to Colors / Invert. You should have something similar to my picture now.
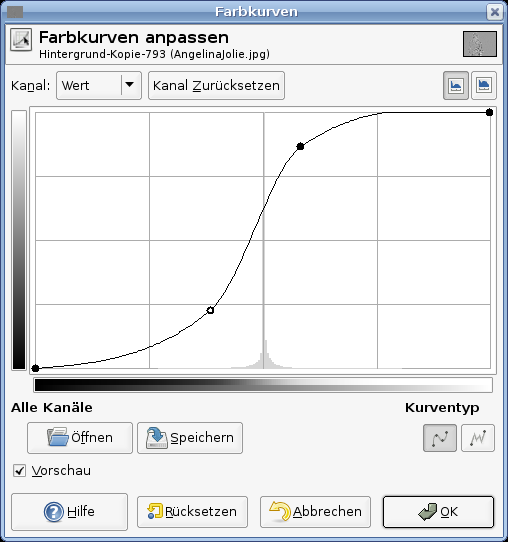
click to enlarge - 
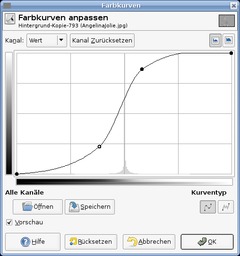
Click the right mousebutton on the layer in the layers dialog and choose "Merge down".
Colors / Desaturate (average). The go to Colors / Curves and apply a soft S-curve as seen on the image below.
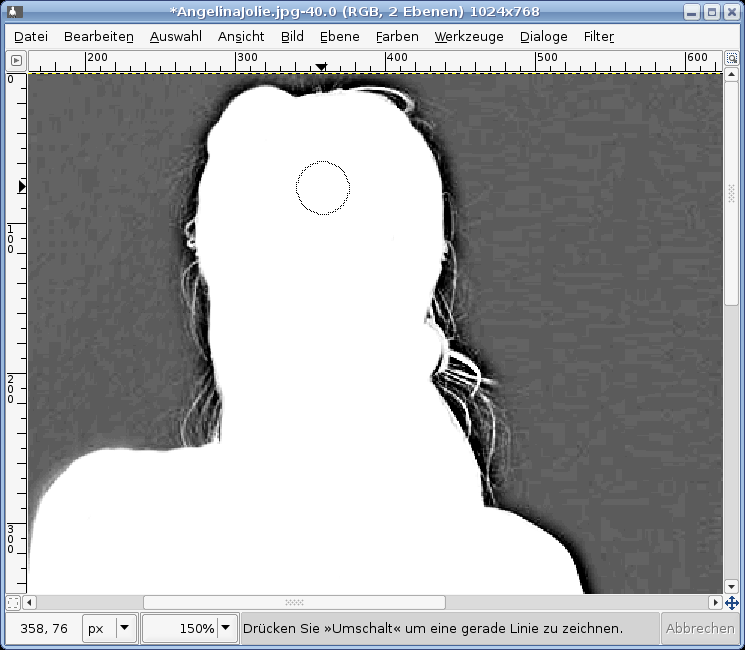
click to enlarge - 
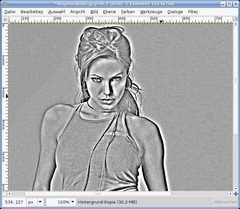
Then choose Brightness & Contrast from the same menu. This step can vary when you use a diferent picture. We're aiming to get a good clearly vivisble contrast. Its important thyt you get nice contrast in the hairs area.
We're now done with the highpass filtering.
click to enlarge - Go to Colors / Invert.

click to enlarge - 
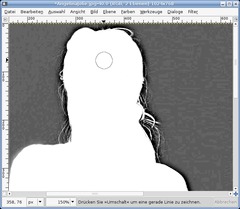
Now you need to take a brush and paint the body of the person / object with white. To make it easier to correct mistakes you should create an empty layer above the highpass-layer and paint on this layer, when done merge the layer down. You can move the background-layer above all layers and set the transparency to 20% or so to see what parts you have to paint.
IMPORTANT
You don't have to paint the hair! Thats the point of this technique / tutorial. The hair should be already white, and everything behind the hair should be dark gray or black so you dont have to use time to get the hair extracted.
click to enlarge - 
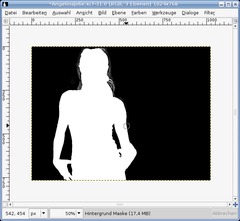
When you have the person white you have to paint the background black. Start at the borders of the body. You can do this fast when you first use a smaller black brush to paint around the person (where the gradient from black to white is visible), and then using a very big brush to fill the rest of the background with black.
If you use a sperate layer dont forget to merge it down at the end.
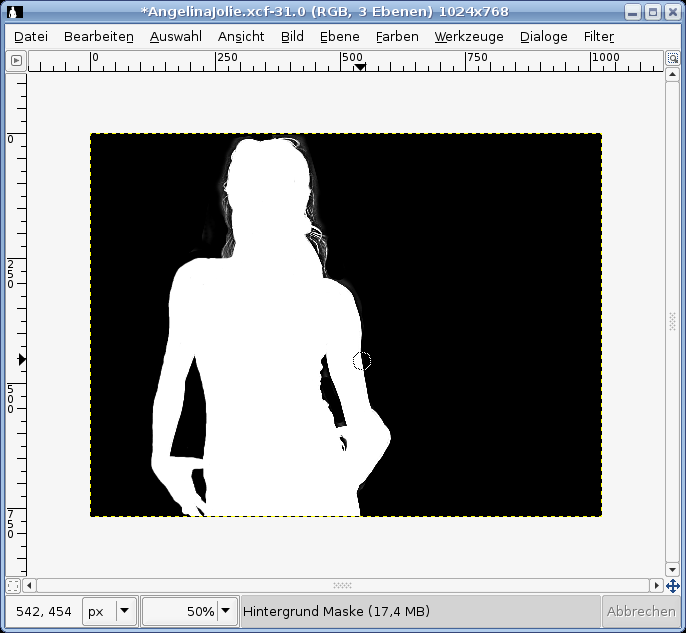
click to enlarge - At the end you should have an image containg almost only black an white. We use this as a layer mask now.
Press CTRL+A (Selection / All), copy this using CTRL+C (Edit / Copy). Activate the background where the person is. Click right in the layers dialog, choose Add Alpha channel.
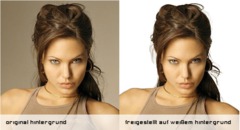
Click right again and add a layer mask. Press CTRL+V (Edit / Paste) then and use the anchor-button in the layers dialog to get the copy onto the layer mask. You should the see the result immideatly. Make a white new layer behind all, then you can see the results even better!
Good luck and have fun!
click to enlarge

This work is licensed under the following license: Creative Commons Attribution-NonCommercial 2.0 Austria.
Discussion / comment this tutorial
Post your own comments, questions or hints here. The author and other users will see your posting and can answer to it. Of course, you can also ask in the chat.
Newer comments are displayed first!
From: devvv (26 May 2008 05:03 PM) – Send a private message
yes, i know. this is another efficient way to do this - and a more common way. you should however know all ways to do such things to combine them. not all photos are the same
From: Alex Railean (26 May 2008 04:55 PM)
I found it, there you go: http://www.gimpguru.org/Tutorials/SimulatedDOF/
This is how you obtain the mask.
And this is how you use it to remove the background: http://www.gimpguru.org/Tutorials/ReplaceBackground/
From: Alex Railean (26 May 2008 04:49 PM)
Interesting, but it is not the most efficient way; there is a similar tutorial that explains how to do this by splitting the image to its individual channels and then ehnancing the contrast on the layer where the shapes are distinct (usually one channel has better contrast). By the time you do that, nothing but the object itself is seen - so you get your mask "for free", with no manual actions.
Unfortunately I can't find that turorial anymore.
From: Greg (24 May 2008 02:38 AM)
This is a very helpful method for certain types of backgrounds. Some people are complaining, but as a professional designer, I can tell everyone that you HAVE to know several different ways to do this. Hair is one of the more complex things to extract from a background. Great tut, another weapon for the arsenal.
From: mulder (28 Feb 2008 05:55 PM)
nice, don't know thats so simply to cut out the background from an complex image
From: Rich (18 Dec 2007 05:41 AM)
This is my second time tring this. and the first time it looked really bad, but I must say if you follow step by step it does really work very well. Thanks
From: ei! (03 Dec 2007 07:25 AM)
the tutorial is awesome, but not applicable to all photos... specially those with complicated backgrounds... but its helpful anyway!!>.<
From: meh (15 Nov 2007 03:58 PM)
Only useful where the background is neutral enough to select with the magic wand.
From: Litchi (10 Nov 2007 02:46 PM)
I think this tutorial is great ! I used it to extract a girl with a lot of hair falling before the background and the result is very satifying. It might work only on simple backgrounds, but it is nevertheless a useful manipulation. Thanks !
From: devvv (25 Oct 2007 10:38 AM) – Send a private message
of course this works best with backgrounds like mine. but nevertheless, this is a common technique in image manipulation, you should know it, its really helpful in some specific situations. of course you may combine some techniques together to get best results.
however, this is not the typical tuitorial for most of you guys. you're better with manual doing with the bezier/paths-tool.
From: M.rSnow (18 Oct 2007 06:51 PM)
Extremely awfull results whit strong backgrounds. extremely meany better ways of doing it. The tool u get when u press [I] is better.(I dont know the name)
From: SasQ (15 Oct 2007 01:49 PM)
I have some questions about this technique:
1. Which one is better: more blur or less?
2. What if there are light background fragments left on hair? [on thin hair lines, especially on their ends].
3. What to do if the background contains hard edges? This technique amplifies them too.
From: Gimp Fan (28 Sep 2007 04:04 AM)
Awsome! It worked great following your instructions step by step! Thanks!
From: Anonymous (25 Sep 2007 03:46 PM)
Awful, simply awful results. Only good for an image with an incredibly neutral background.
From: anon (23 Sep 2007 11:30 AM)
rubbish. left me with a total mess. do you honestly thing painting over something will give you good results?
From: Kushal Abrol (19 Sep 2007 10:00 AM)
One of the most useful tutorials ever seen
From: tyewonk (15 Sep 2007 09:45 PM) – Send a private message
I couldn't finish because Add Alpha Channel was grayed out. My image is set to RGB.
Registered users can log in to use their profile name to post comments, request email notification on new comments and attach images (e.g. their versionen of the effect) to their postings.
Post a comment:
Adobe® Photoshop® is a registered trademark of Adobe Systems, Inc. Linux is a trademark of Linus Torvalds. Ubuntu and Canonical are registered trademarks of Canonical Ltd. | Imprint | powered by bitfire.at


