


Tutorial: Orb-Icons for Websites
 is licensed under a Create Commons Attribution-Non Commercial 3.0 Unported license.")

Download GIMP workspace (.xcfbz2) (39.9 KB)
Motivation
Of course you know these small little icons which can be often seen all around the web that look like a small glossy orb. Pretty nice to enhance also your personal website with it!
Tutorial details
- Category: Buttons, icons, web
- Time to reproduce: ≈10.0 minutes

- Tested with GIMP 2.3.15
-
1
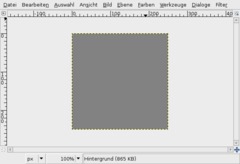
Create a new file: 250×250px. Fill the background with #828282.
-
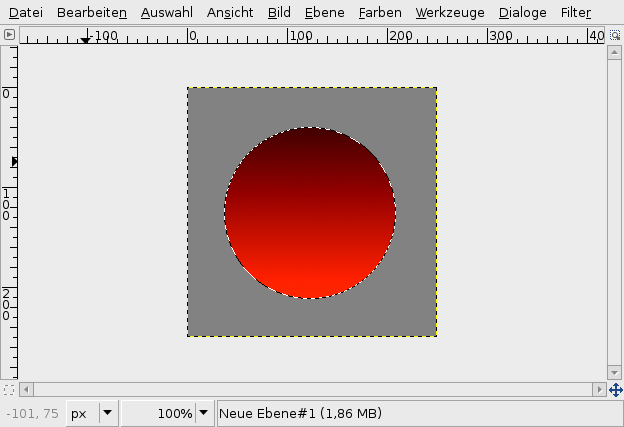
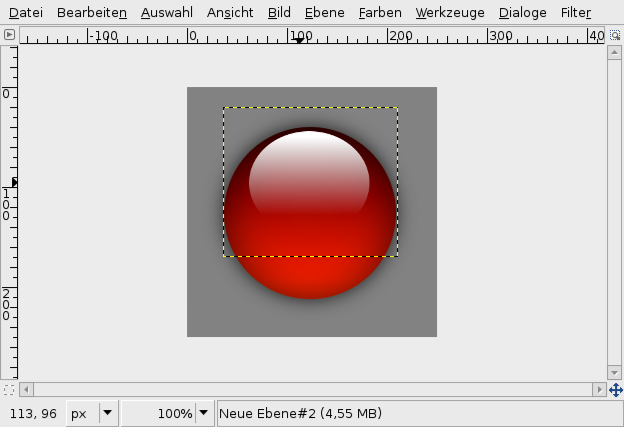
2
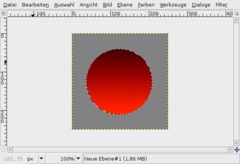
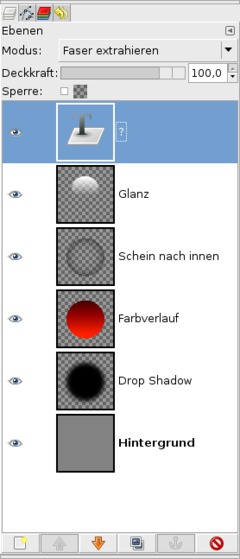
Take the Elliptical Selection-Tool and create an exact circle. After that create a new empty layer, take the Gradient-Tool (L). As a FG-color choose #571f00, for the BG-color choose #ff5a00.
Now draw a gradient from top to the bottom of that layer.
-
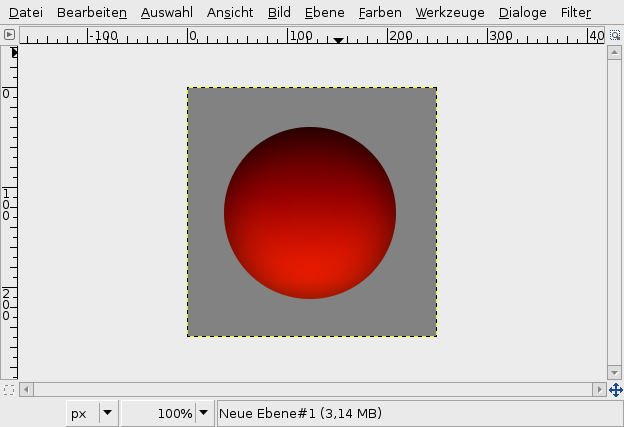
3
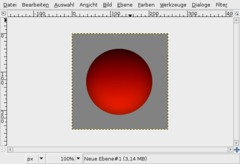
The selection should still be active.
Again create a new layer. Fill it black. To do this very fast first press D then press CTRL+,
Now follow these steps:
- Select / Shrink: 1px
- Select / Feather: 100pxAfter that press DEL two times to delete the selected part.
-
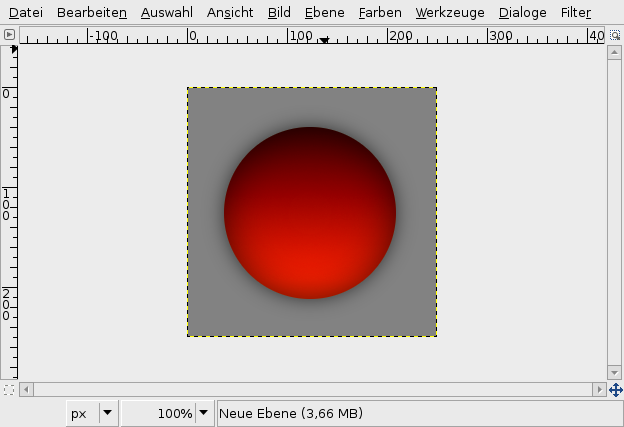
4
Activate the layer that contains the gradient.
Go to Filter / Licht & Shadow: Drop Shadow. X/Y: 0/0, Tranparency: 60%.
-
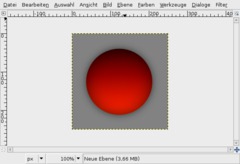
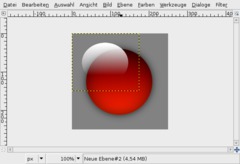
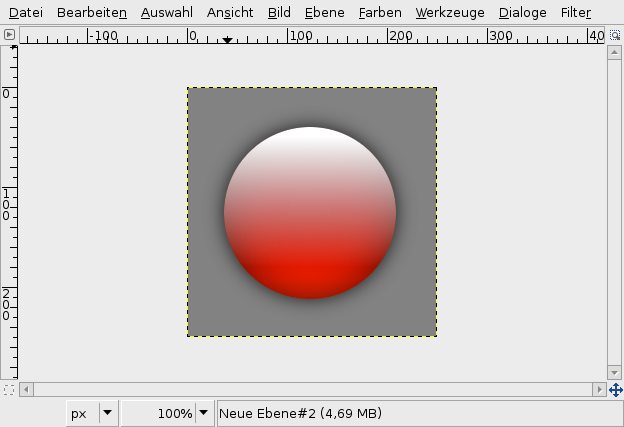
5

Activate the layer that contains the gradient. From the context-menu of the layers-dialog choose “Alpha to selection”.
Add a new layer. Choose white as FG-color. Take the “Gradient-Tool”. In the preferences-box of this tool choose the fourth option in the drop-down-menu for the gradients: “FG to Trasparent”. Apply this gradient from top to bottom.
-
6
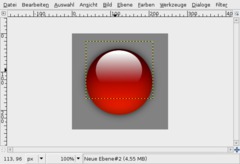
- Select / None
- Activate the Scale-Tool
- Click the layer, when the popup-menu appears enter 175 as width and 150px for the new height. Click OK. -
7
Take the Move-Tool now and move the white shine (the gradient ;)) to the top in the upper center of the sphere.
-
8
Go to Filter / Blur / Gaussian Blur: Value: 5.
-
9
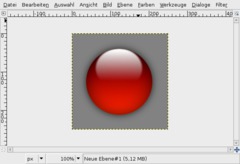
We’re almost done. Now you can add for example a single character or any small symbol you want.
I took the Text-Tool and simply wrote a question-mark “?” in white color into the middle of the orb. Then i chose “Grain extract” from the layers-mode drop-down.
-
10

Thats it! Have fun with your new orbs ;)


Comments
Post your own comments, questions or hints here. The author and other users will see your posting and can reply to it.
Of course, you can also ask in the chat.
Subscription management
Please log in to manage your subscriptions.
User rating
This topic (Orb-Icons for Websites) has been rated 5.0/5.0.
New comments are disabled because of spam.