RSS/Atom feed Twitter
Site is read-only, email is disabled

Tutorial: Creating the Che Guevara Effect
Written by · Created on May 19, 2007, last updated about 13 years ago CC BY-NC License
Creating the Che Guevara Effect

Motivation

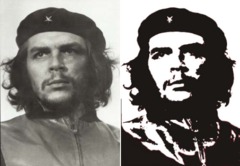
Probably the most popular picture that uses this black/white-effect is one of the famous revolutionist of Cuba: Che Guevara. To create such an effect for your own it is only necessary to take a few minutes of time.

Tutorial details

  1. 1

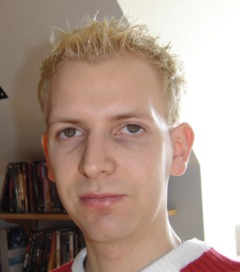
    Take a picture of yourself or anyone else. Open it.

  2. 2

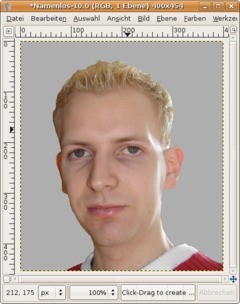
    To get an optimal effect you’ve to mask your face. You don’t have to take special time being very exact. Maybe the fastest way to this us the free selection tool. Make a selection around your face, invert the selection (Select / Invert) and remove the parts.

    Again, it is not important to be too exact.

    Now choose #aeaeae as FG-Color and press CTRL+, (EDIT / Fill FG) to fill the selection with that color. Press CTRL SHIFT A to deselect.

  3. 3

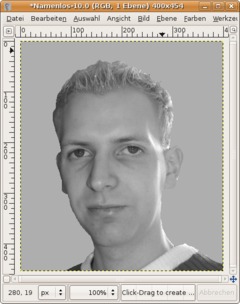
    Now go to (Layer /) Colors / Desaturate. That step is not totally necessary but i helps us to higher the amount of gray tones in the picture.

  4. 4

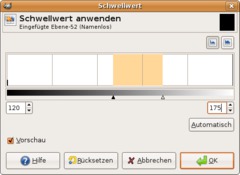
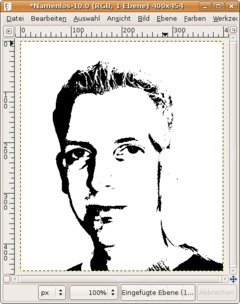
    Next go to: (Layer/) Colors / Threshold and move the little triangle-controls to similar places as I did. Alternatively you could enter 120 to the left and 215 to the right.

    You should have good results with it.

  5. 5

    You’re done ;) Congratulations!

  6. 6

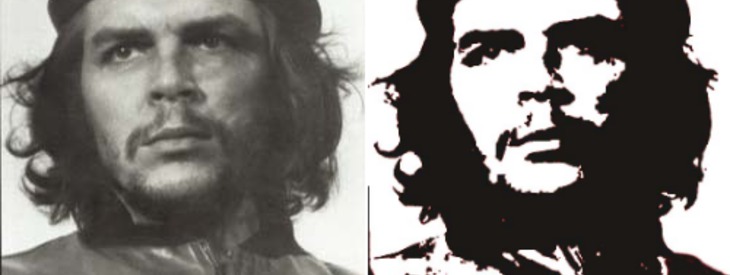
    Here we see the famous original picture of Che Guevara:

Comments

Post your own comments, questions or hints here. The author and other users will see your posting and can reply to it.

Of course, you can also ask in the chat.

Subscription management

Please log in to manage your subscriptions.

User rating

This topic (Creating the Che Guevara Effect) has been rated 3.5/5.0.

New comments are disabled because of spam.

engine777 member for almost 8 years engine777 5 comments
almost 8 years ago

Thank you for tutorial

Vex
over 9 years ago

Thanks for this - simple and helpful.

zomo
almost 12 years ago

thank you

djuniar havid
almost 12 years ago

its nice

Lewis Siragusa rated this topic with 5/5
almost 14 years ago

This was very useful, and contained extra stuff while still maintaining simplicity! Thanks!

t.allen rated this topic with 2/5
about 14 years ago

your tutorial is a little vague. You've written it in a manner that is readily understandable to you;"now choose #aeaeae as fg color + press ctrl + (Edit/fill fg)". What!?. You need to keep in mind that people wont know what you are talking about unless you present the information in a very clear cut way.

Joe
about 14 years ago

Yeah lets celebrate Che, a man who slaughtered thousands of innocent civilians. Good tutorial bad person.

heyche
over 15 years ago

The huge influence of Che Guevara on Art, Literature and Society! A great site about the influence of El Che Guevara in the World Today.

www.hey-che.com

moatedknight member for almost 16 years moatedknight 1 comment
almost 16 years ago

I find it helps to use the Photocopy filter (Filters -> Artistic -> Photocopy) [settings: every bar to the furthest right except sharpness[0 to (.6)] and mask radius [30 to 50] both of those depended on the picture and how you want it to look. The above makes the image look bolder and it removes those pointless little black/white dots.

Also the Che from the attached picture was made with this tutorial.

ducttape member for about 16 years ducttape 1 comment
almost 16 years ago

Very nice, the exact values isn't bad, just give a base, I played with mine some.

ader10 member for over 16 years ader10 2 comments
over 16 years ago

I forgot to say, nice tutorial. I was going to get up and make one pretty much the same but you got to it before I did :)

ader10 member for over 16 years ader10 2 comments
over 16 years ago

Saying specific values is bad, because people can get a variety of brightness and contrast in different images.

What I do: Click and drag in the long white bar until I get something that I like.