


Tutorial: [AVATAR] Become a real Na'Vi using GIMP!
 is licensed under a Create Commons Attribution-Non Commercial 3.0 Unported license.")
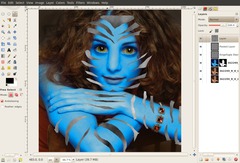
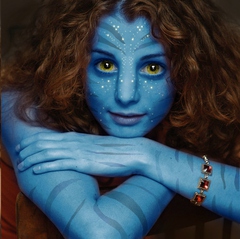
![[AVATAR] Become a real Na'Vi using GIMP!](/system/tutorial_steps/2291/23-final.jpg "[AVATAR] Become a real Na'Vi using GIMP! — Result")
Motivation
Many of you surely know the new film (by James Cameron) which already became the most successful film of all time: AVATAR! I'm a fan of the movie and so finally i had time to write a tutorial on how to make yourself into a real NA'Vi ;) Enjoy!
Tutorial details
- Category: Photos / wallpapers
- Time to reproduce: ≈60.0 minutes

- Tested with GIMP 2.7
-
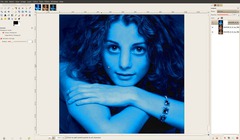
1
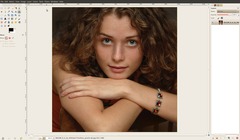
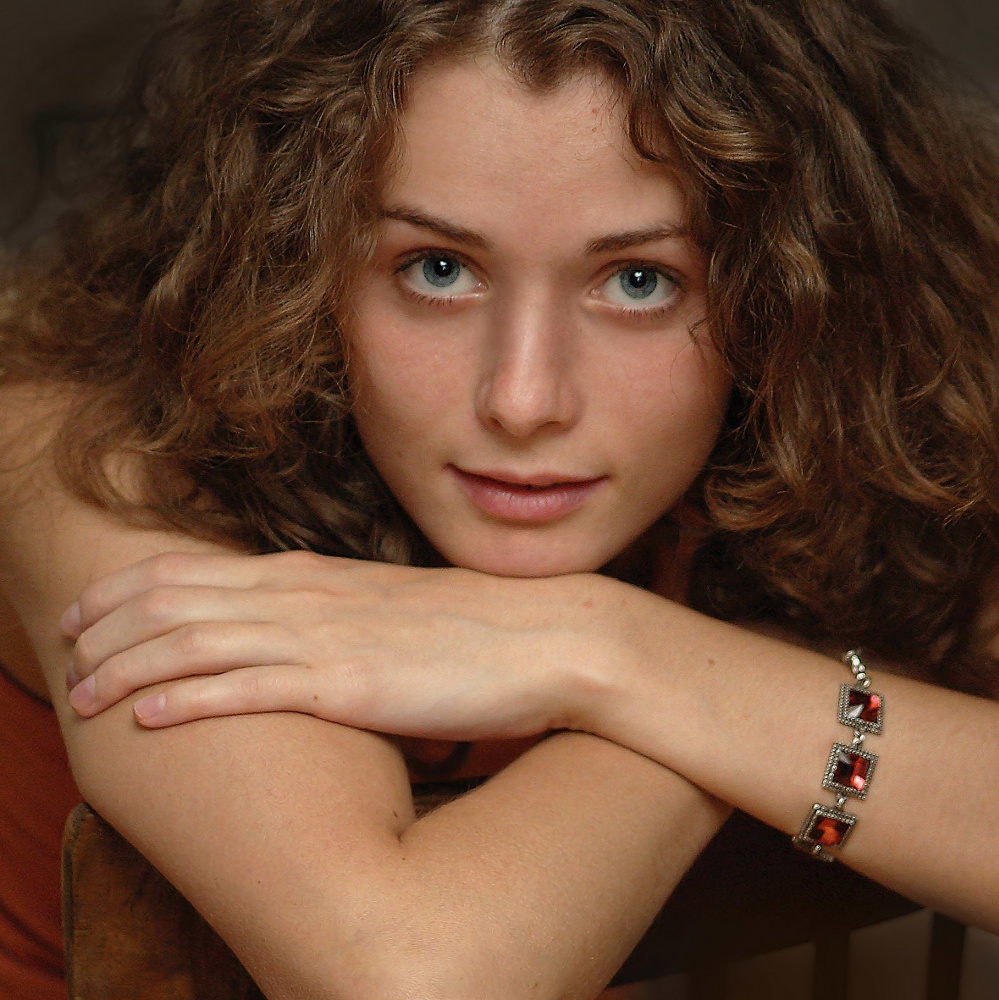
Open up any portrait photo. If you want to use my template please download the image /w the woman above!
-
2
Now duplicate the background layer and work on the copy from now on.
First step is to do some face “correctures” – we’ll need bigger eyes and of course a deformed nose thats more connected with the eyes themselves (these are the typical characteristics of that blue race which is named Na’Vi).
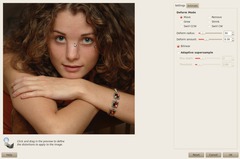
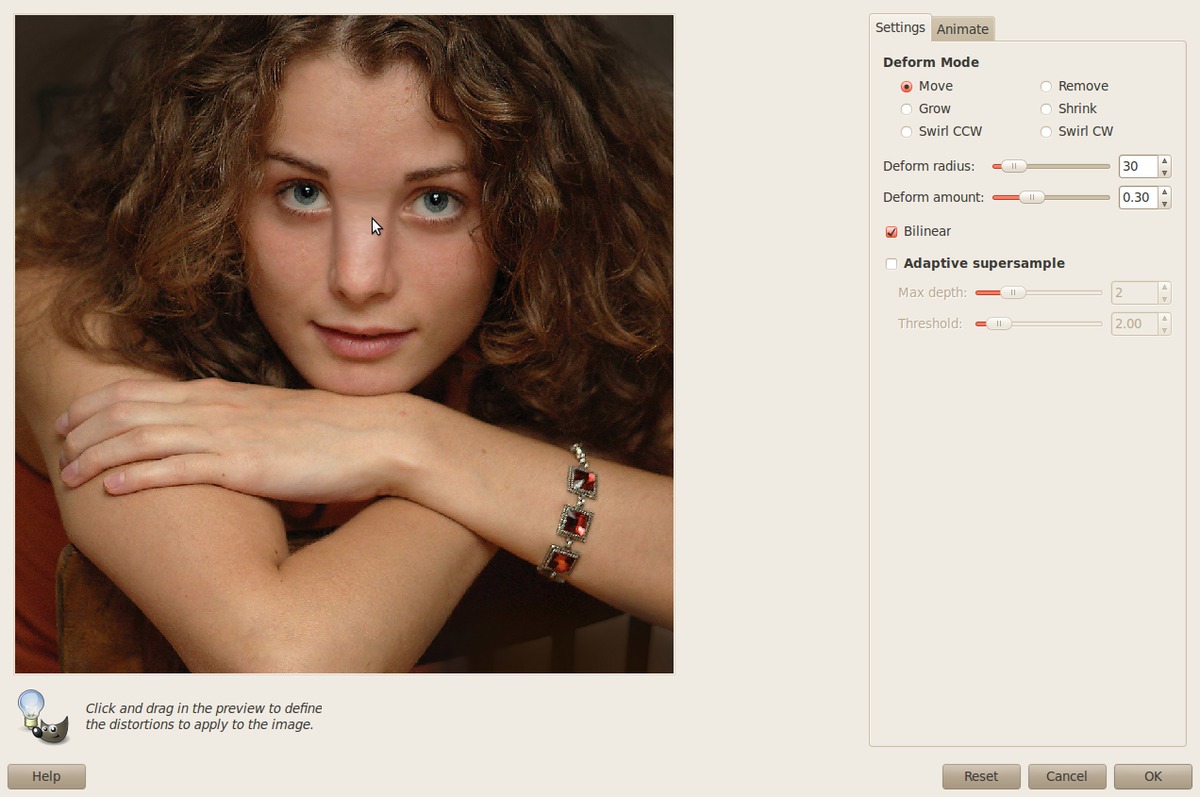
Use the IWARP-filter (Filter / Distort / IWarp).
Select “Move” and change the values to 30 (Radius) and a strength of 0.3. These values are used for an image that is 1000×1000px big. If you have a bigger picture increase the radius.Now start at the top of the nose in the middle: drag the parts of the top nose a little to the left. Work from top to bottom of the nose. Do the same for the right part and be aware not to move to much of the nose into the eyes.
DON’T click OK yet.
-
3
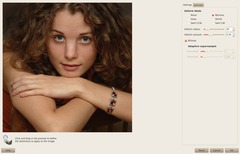
Maybe your eyes are a bit too much distorted, which looks not really nice I think :)
Next use the “Remove” option in the dialogue (which should still be shown). Drag the mouse slowly over the left eye towards the nose. Be sure not to move to much to the nose – otherwise it will remove your distorted nose we just made! Do the same with the right eye
DONT click OK yet, we still continue ;)
-
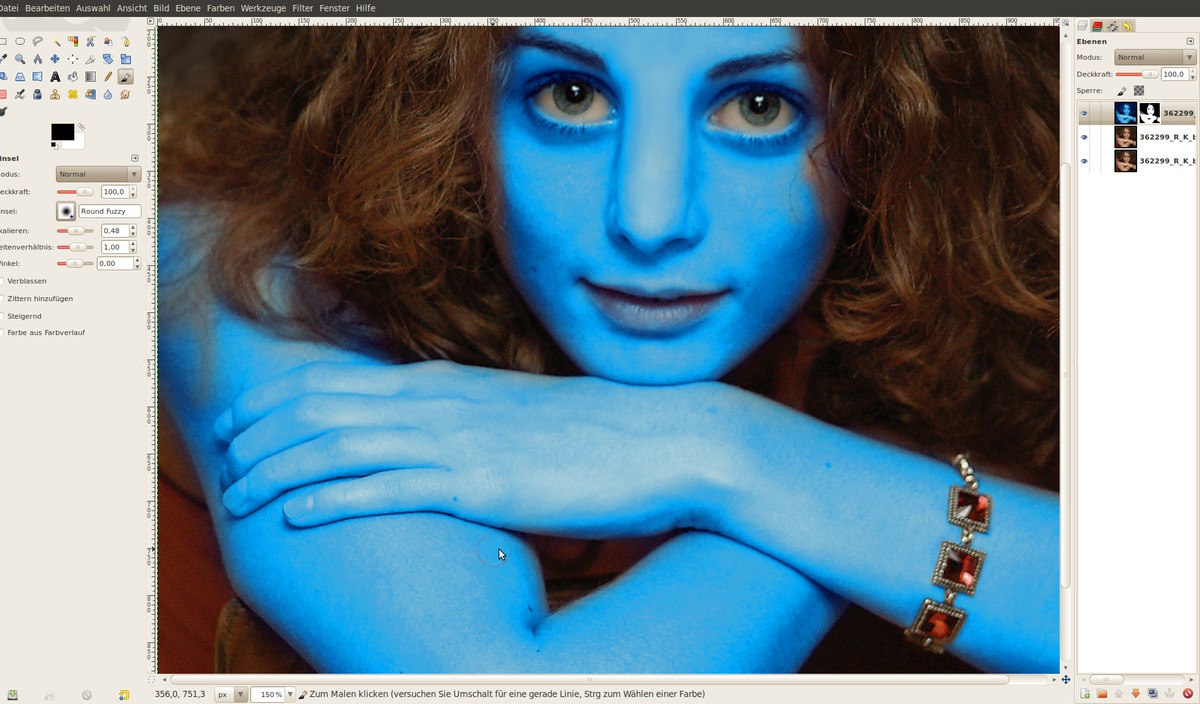
4

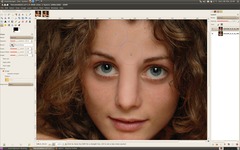
By now the eyes should be looking normal again, we’re now going to make them a bit bigger, Select “Grow” and a radius of 70. Then move the mouse into the center of the pupilles (left and right eye) and click 3 to 4 times, each time the eye should become a little bigger.
-
5

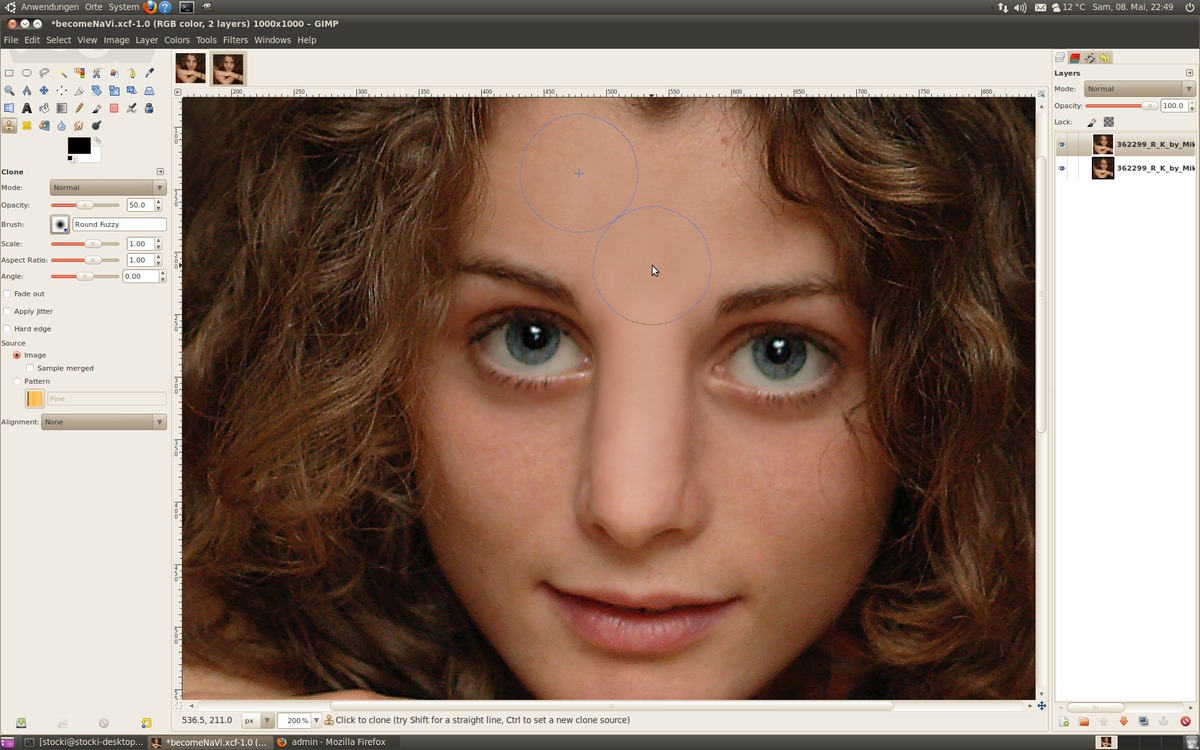
Now click OK! If your new nose is not looking fine repeat the steps 2-4.
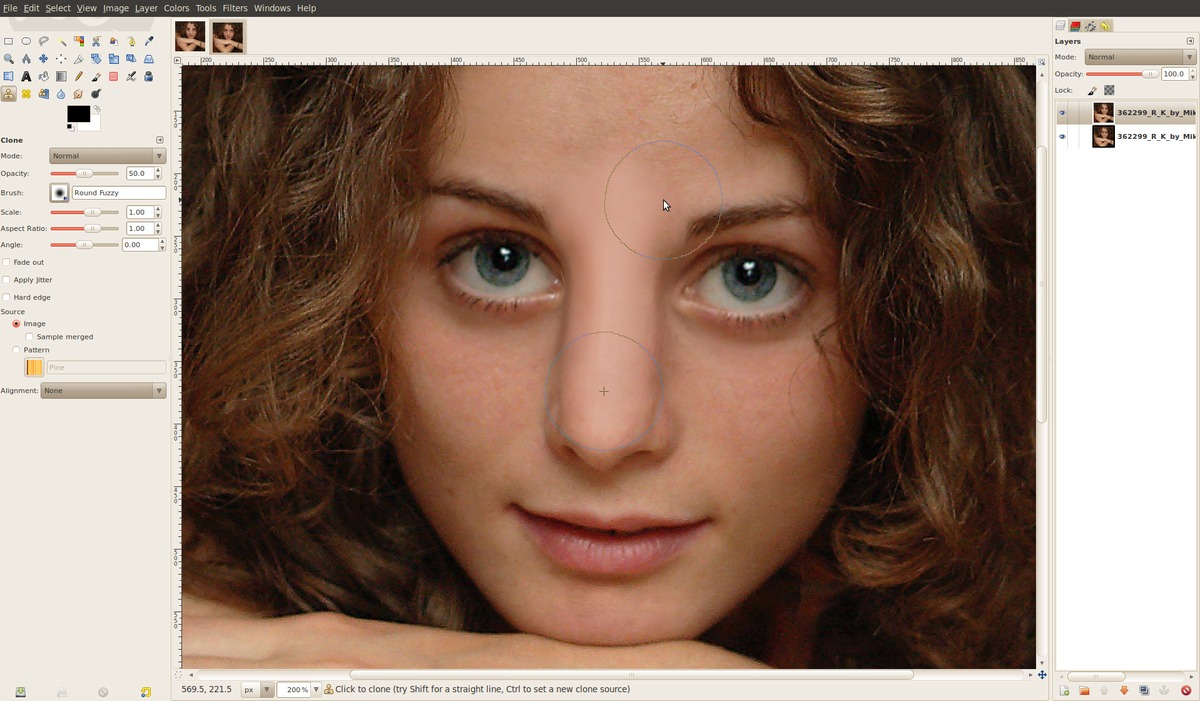
In the middle of the nose the skin is now looking much too deformed and does not look natural.
Use the Clone tool, set the opacity to 50% in the tool adjustments, which will bring you more smoothness. Hold CTRL and set a cloning point at the bottom of the nose (the brighter skin there). From there we’re going to clone: now click the skin above to replace the unnatural looking skin.
-
6
Now choose a starting point to clone inside the forehead and rebalance the skin tone to become a real smooth transition between nose and forehead.
-
7
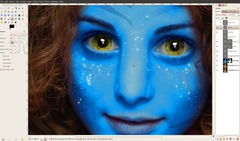
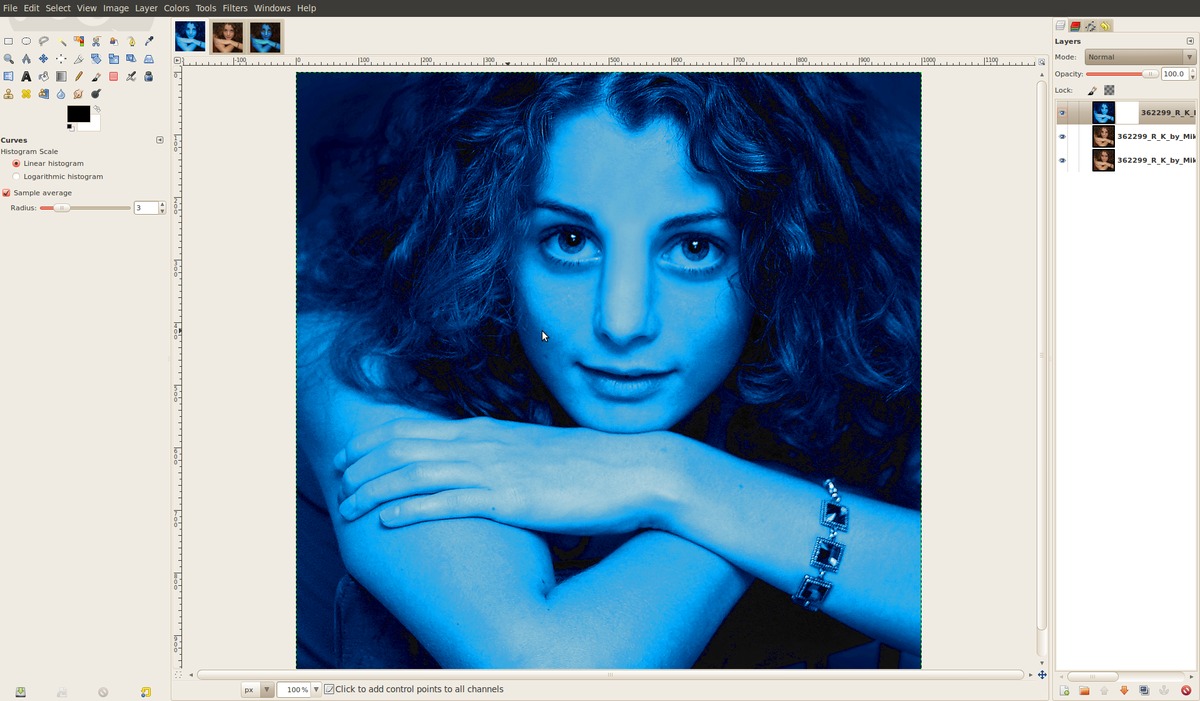
Now we’re getting the cool blue skin in ;) Finding the right blue tone is a pain because the blue skin in the movie is allways a little different because of the different lights.
I exported my color values from the Colors / Color balance dialogue – you can download the file (right click and “Save as…”) and import it using the dialogue (at the top, click the import-button) and just use it easily ;)
-
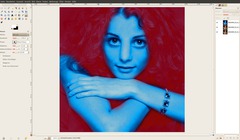
8

Of course the whole picture now is colorized. But we’re working on a copy, so thats good, because we can now use a layer mask to bring the original hair color and else back in.
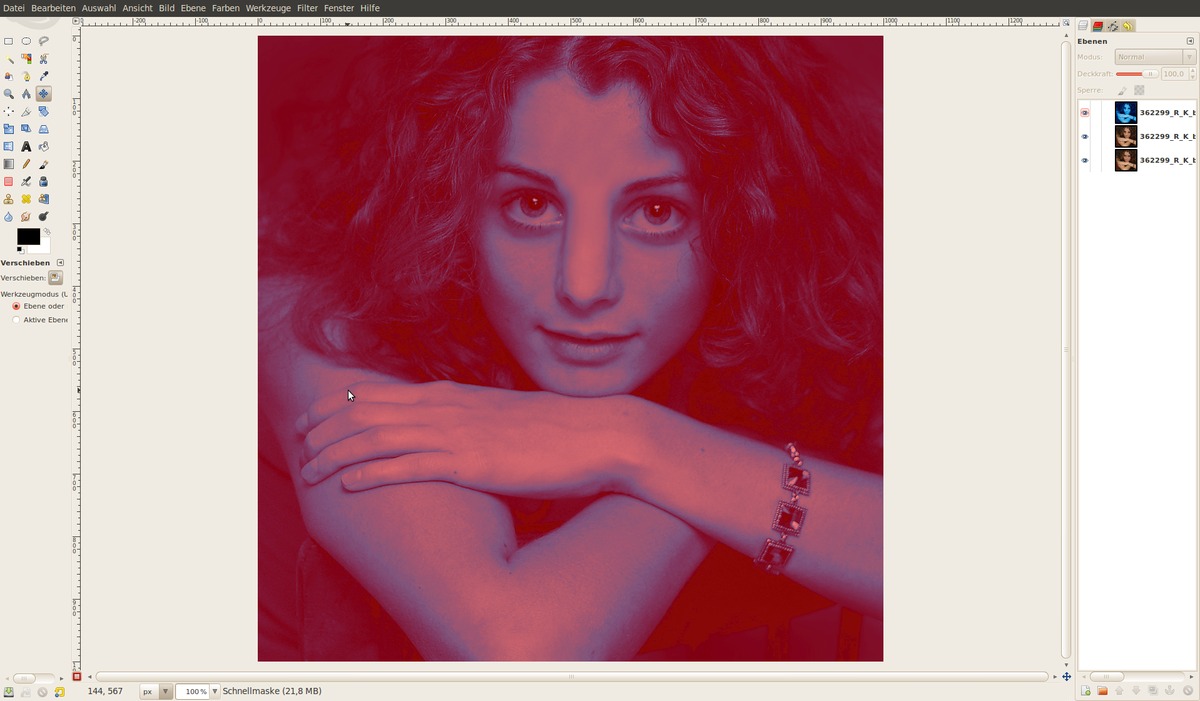
As a preparation for the layer mask we’re goint to use the Quick Mask, where you can paint on a temporary layer using black and white to get a really detailed and nice selection.
Click the “QuickMask”-Button in the bottom left part of the image window. A red overlay is now shown. You can now paint “Black” and “White” and of source with gray tones on this layer. Black color (this is the red overlay in the beginning) represents full transparency in the selection and white represents fully selected parts after finishing the QuickMask.
-
9
Now choose the paint tool and use a big smooth brush that has a radius of more or less of the size of her arm or hand. Using white color, paint all the skin pretty fast – you dont need to be too careful here.
-
10

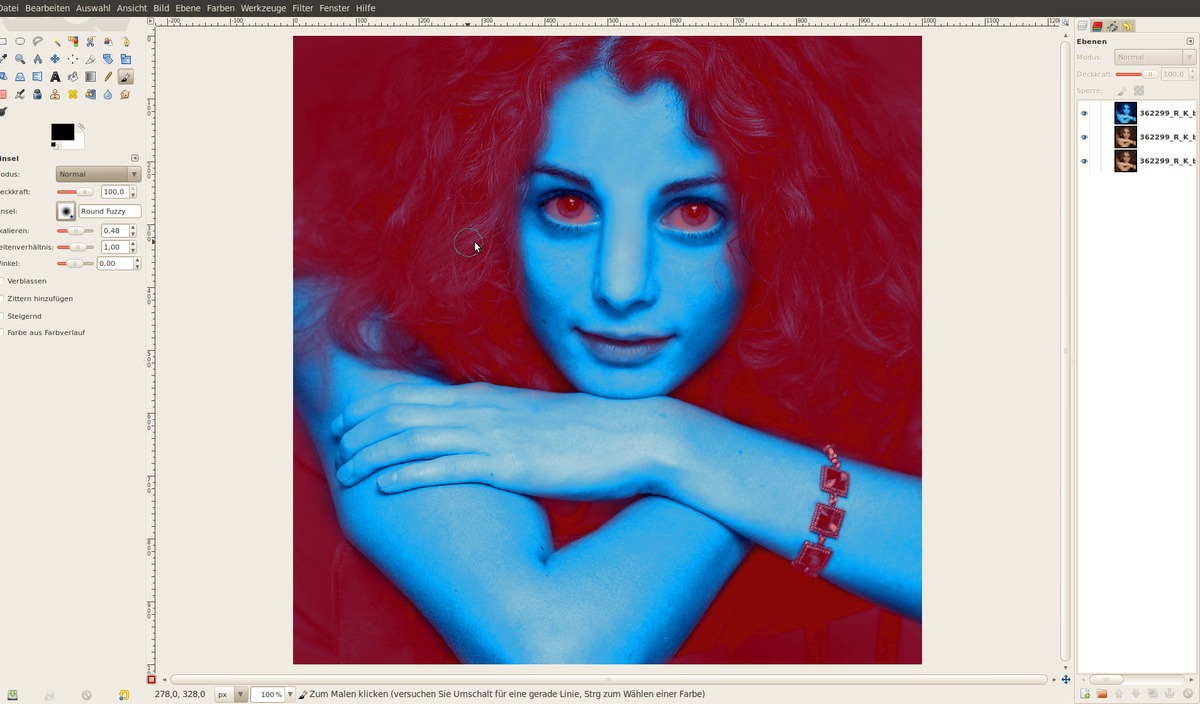
Next choose a smaller brush and carefully paint the eyes with black to make it transparent after we finish the masking.
Tip: Use the X key on your keyboard to swiftly switch between the selected foreground and background color.
Now paint more carefully along the skin (inside the skin use white, outside black) to refine the selection.
- Finally take care of the part with the blurred hair on her left shoulder. Therefore set the opacity of the paint tool to app. 30% and paint over the skin that is covered with hair. This will give you a semi-transparency. Do this for the hair on the head too where the skin is shown.
Also do this for the lips – the Na’Vi have darkred and bluish lips ;)
Take a lot time on this step to create a very nice selection – it is important to get a authentic feeling.
-
11
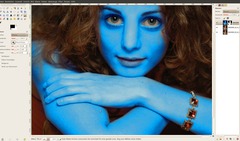
Now it’s going to be interesting ;) Click the QuickMask-button again – you’ll get a nice selection of it.
Right click the layer in the layers dialogue and choose “Add Layer Mask”. Choose “Selection” in the popup dialogue and click OK. Now the below layer should shine through and only the skin will be blue.
-
12

Looks pretty good so far, but the blue skin does not perfectly fit yet. You can refine this now by clicking on the mask beside the layer in the layers dialogue and there use the paint tool again to paint with white (will be shown) or black (will be transparent).
-
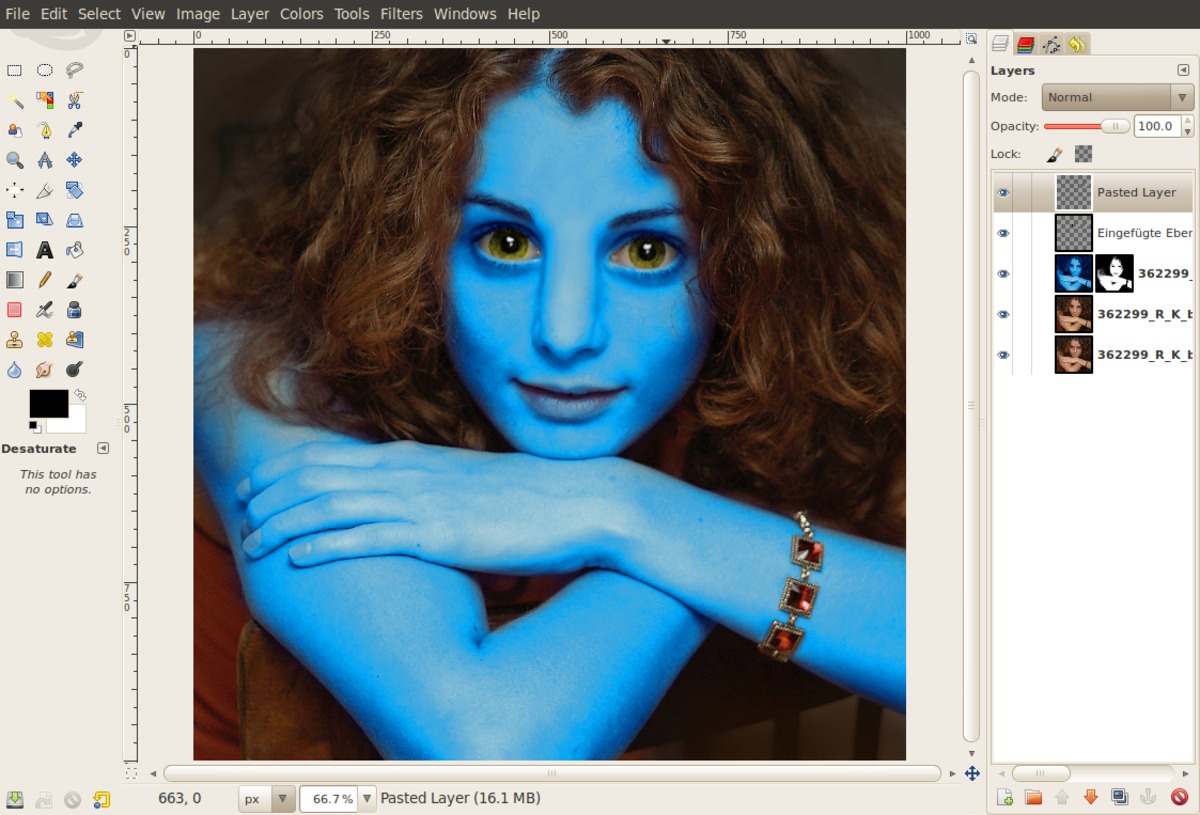
13
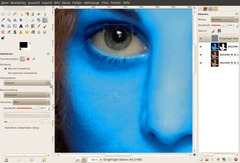
We’re getting to the eyes now. The race on Pandora (the planet where the Na’Vi live) have big yellow/orange eyes.
Choose the Elliptical-Selection tool and drag a selection around the iris. click Edit / Copy visible and Edit / Insert as new layer. Move the part around the eye again. The iris should be on a seperate layer now.
-
14
Use the Transform-tool now and scale the iris to 125%. Use the Eraser tool to cut overlapping parts of the iris so that it fits inside the eye.
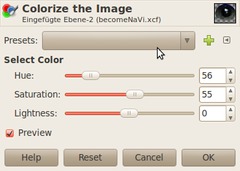
Then use Colors / Colorize to get a yellow into it:
-
15

Now do the same for the right eye. If you’re very exact you can remove the yellowish tone of the little white glare inside the eye by making a selection around it and use Colors / Desaturate.
-
16

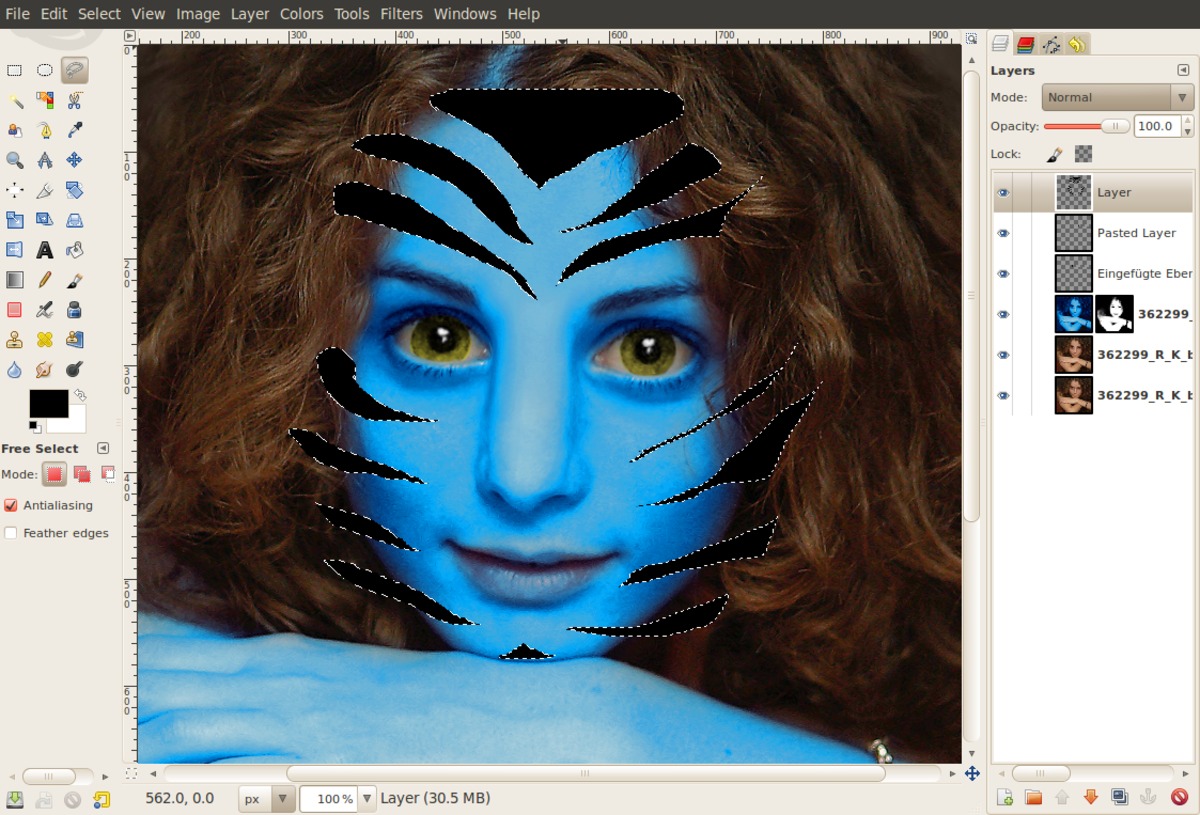
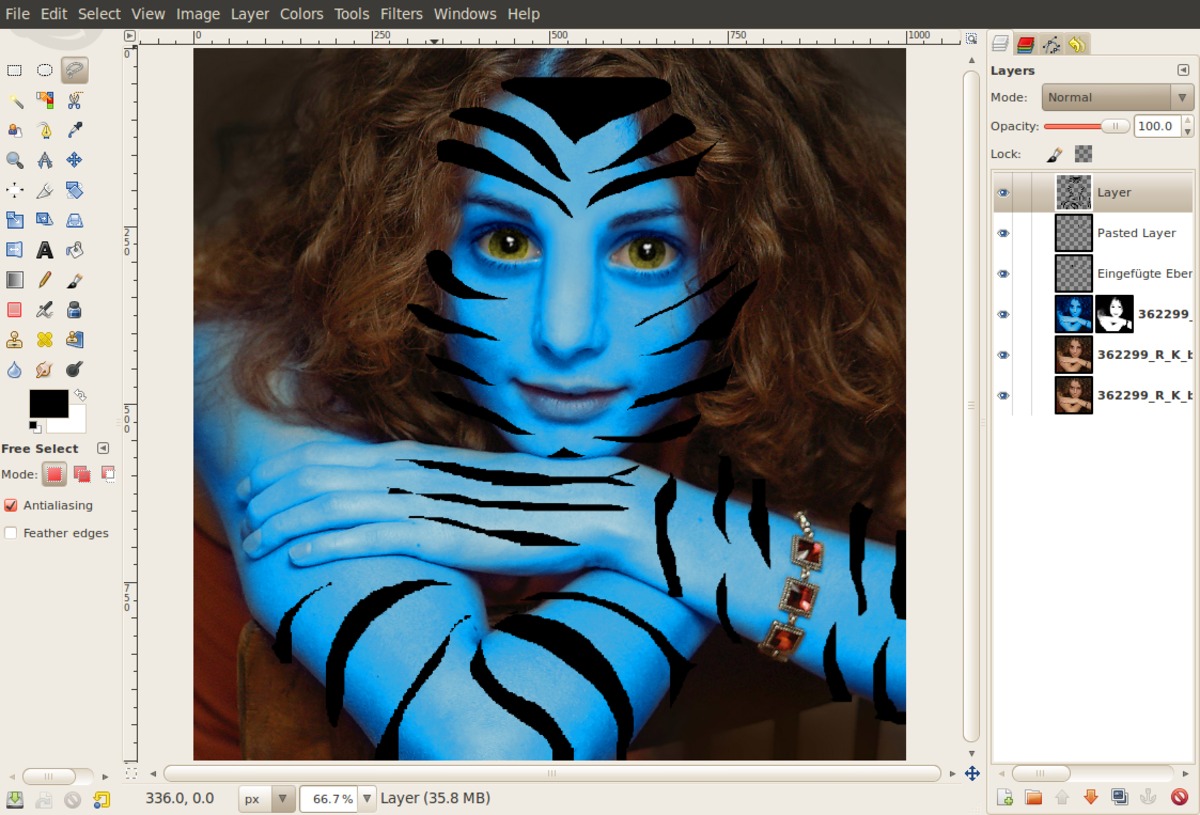
Next we need some cool tattoos. They allways have zig-zag-like paintings on their whole body.
Create a new layer and use the free select tool now to make that kind of painting. Hold SHIFT to add more selections at once.
After you made the selection fill it with Black: Select Black as new Foreground-Color – then do Edit / Fill with Foreground color.
First do the face part – just look at the image below to see how it should look:
-
17

Make the same for the arms.
-
18
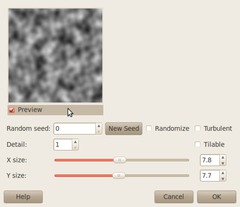
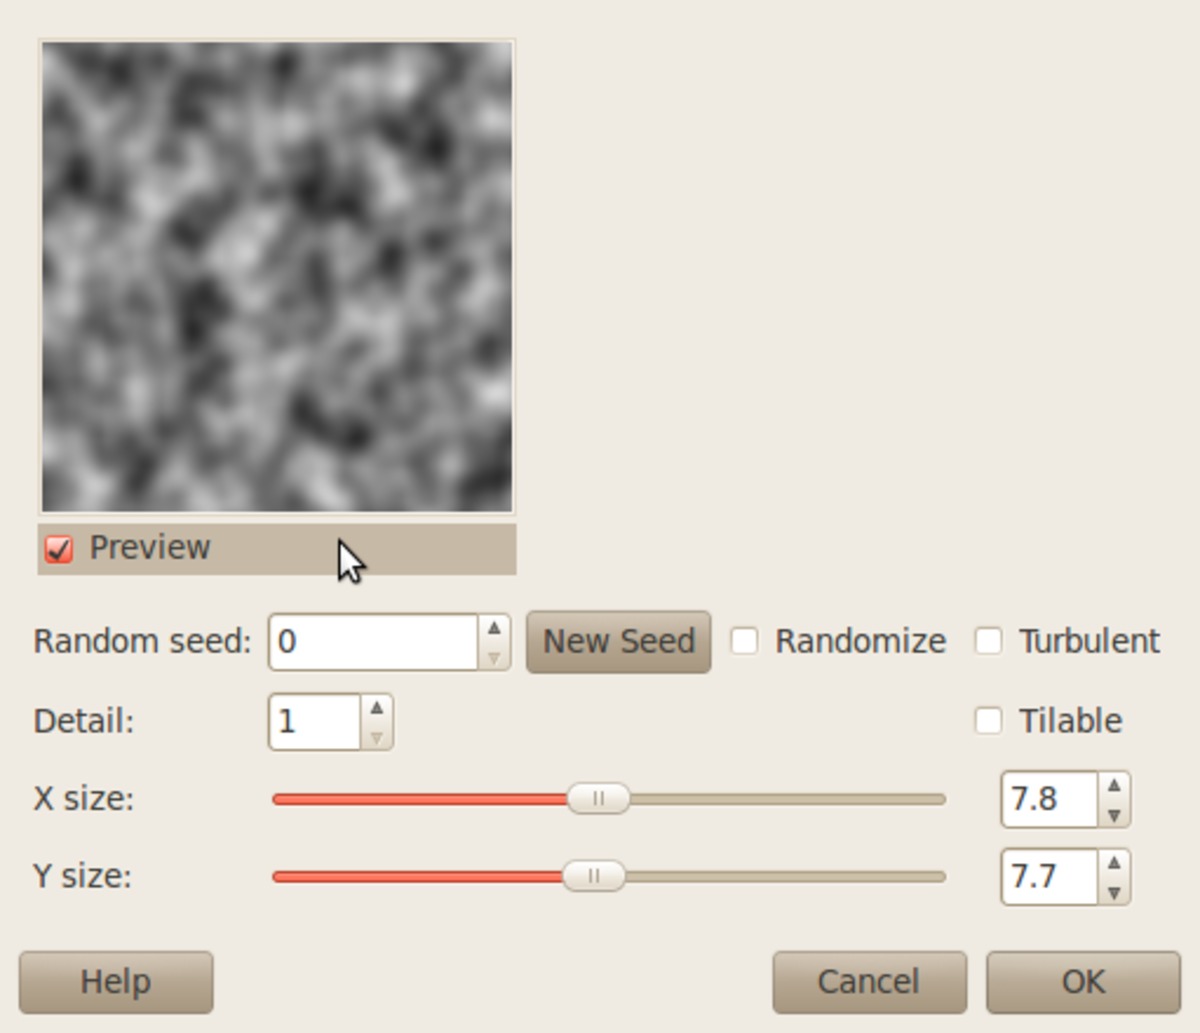
Activate the lock-transparency button above the opacity ruler in the layers dialogue.
- Filter / Redner / Clouds / Solid Noise: 0 / 15 (details) / 5.0 / 5.0
That brings some irregularity into the tattoos.
-
19
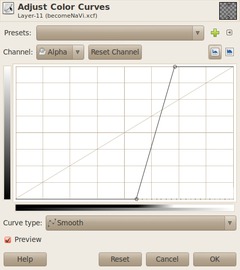
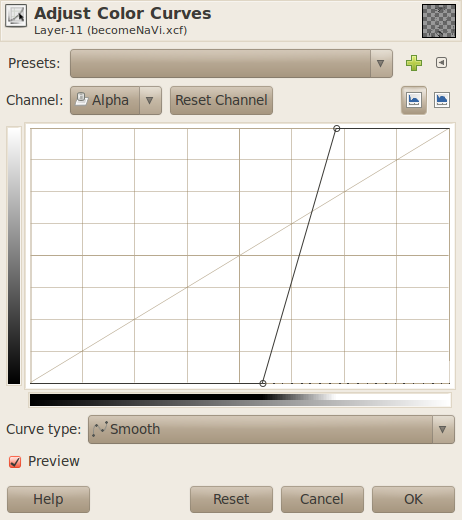
Decativate the lock-transparency. The paintings are a bit too hard on the edges if you look close to it.
We smoothe them now using:
- Filter / Blur / Gaussian Blur: 10px.
- Colors / Curves: Move the curves together as shown below. -
20
Take the eraser-tool and delete overlapping paintings.
Now add a layer mask, activate it by clicking it and use Filter / Render / Plastic Soise again (values below).
then set the layers mode to overlay. You can experiment with other layer modes that darken the image if you want so.
-
21
Now duplicate the layer with the tattoos / paintings again to make the effect a bit stronger if you want (this is optional).
Finally we need some sparkle in her face.
- create a new layer: then take the Brush tool again and use the “Sparks”-brush, use a small brush scale (0.2 or so). Click often to paint single many dots under her eye, on her nose and on the forehead. If you dont like some of the sparkle you can remove it using the eraser tool.
Set the layers mode to “Dodge”.
-
22
Duplicate the sparke layer and do a Filter / Blur / Gaussian:8px.
I hope you enjoyed the tutorial ;)
-
23

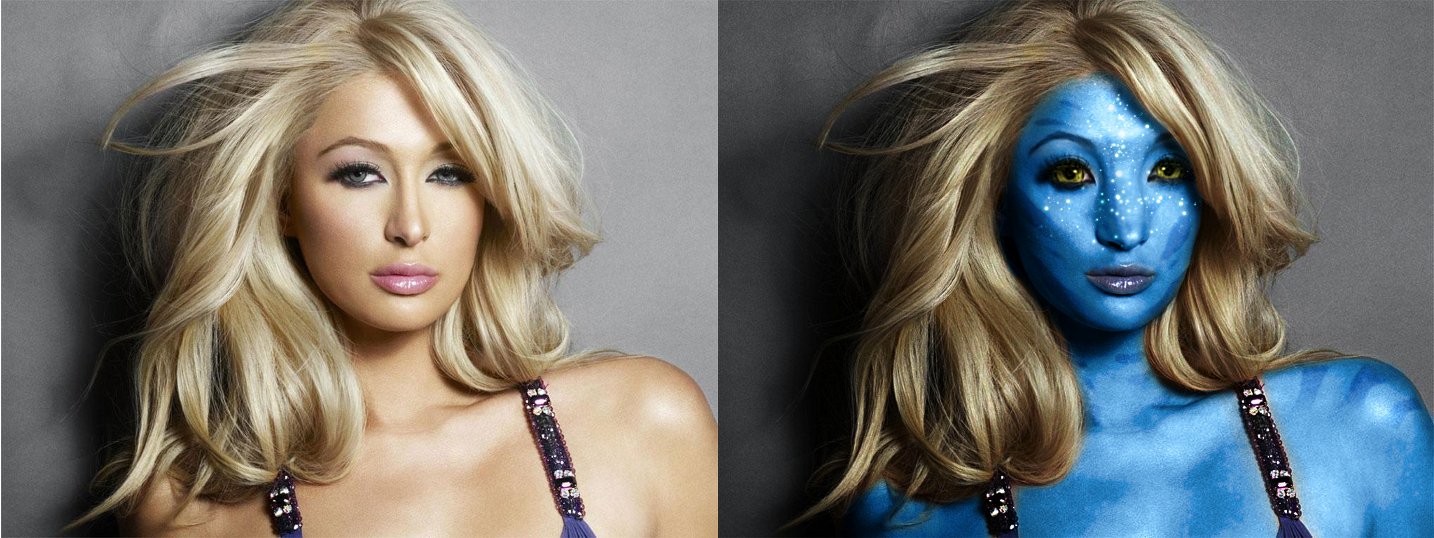
Here is my first version – i na’vi’ized Paris Hilton – hahaha – looks imo a bit too plastic tho.


Comments
Post your own comments, questions or hints here. The author and other users will see your posting and can reply to it.
Of course, you can also ask in the chat.
Subscription management
Please log in to manage your subscriptions.
User rating
This topic ([AVATAR] Become a real Na'Vi using GIMP!) has been rated 4.7/5.0.
New comments are disabled because of spam.