At 100%, my selection hasn't the size it should have
This discussion is connected to the gimp-user-list.gnome.org mailing list which is provided by the GIMP developers and not related to gimpusers.com.
This is a read-only list on gimpusers.com so this discussion thread is read-only, too.

- postings
- 12
At 100%, my selection hasn't the size it should have
Hello,
I have an image and I'd like to define the dimension of a selected area. I fisrt select the area that I want to resize. I then select the tool (Shift + T) and resize the selection. I noticed that after resizing, when I visualize the image with a 100% scale, the size of the image is not correct. I have not a little difference of one or two millimiters that could be due to the screen or whatever. But a big difference (30cm instead of 35cm in my case). Is it a normal display problem ? I mean, if I print it, will the dimensions be good ?
Second question : with this method of resizing, I only resize the selection. But what I'd like to do is to resize the hole image thanks to a reference within the image whose size is known. For example. if there is a rule on the image, I'd like to resize the whole image thanks to a size reference given by the rule.
I don't know if it is really clear. I don't speak english good enough to explain myself correctly on such a subject.
Thank you in advance for your help !
At 100%, my selection hasn't the size it should have
Hello,
I have an image and I'd like to define the dimension of a selected area. I fisrt select the area that I want to resize. I then select the tool (Shift + T) and resize the selection. I noticed that after resizing, when I visualize the image with a 100% scale, the size of the image is not correct. I have not a little difference of one or two millimiters that could be due to the screen or whatever. But a big difference (30cm instead of 35cm in my case). Is it a normal display problem ? I mean, if I print it, will the dimensions be good ?
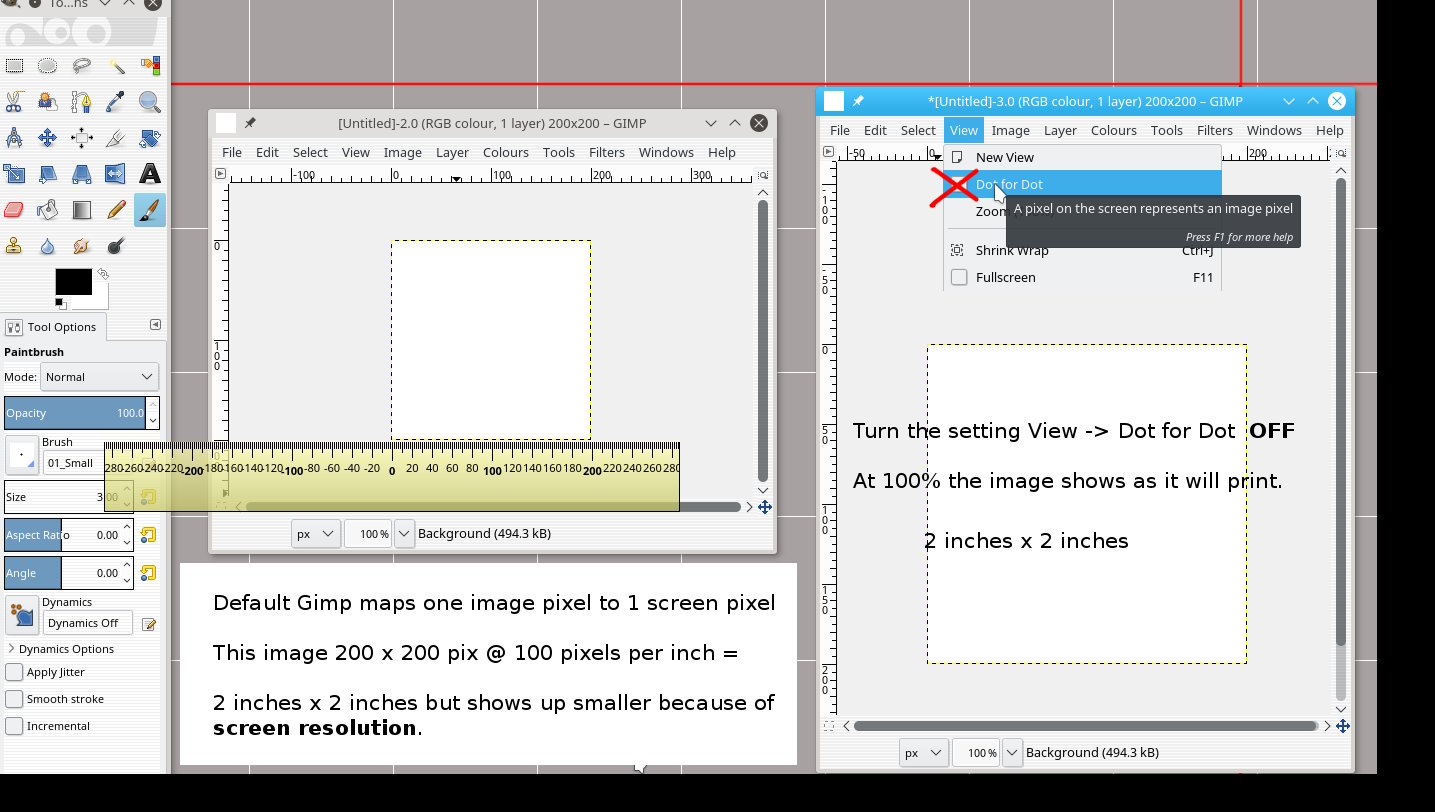
First and most important. Gimp is a raster editor and works in pixels. It can show cms as units for your convenience, but it still works in pixels.
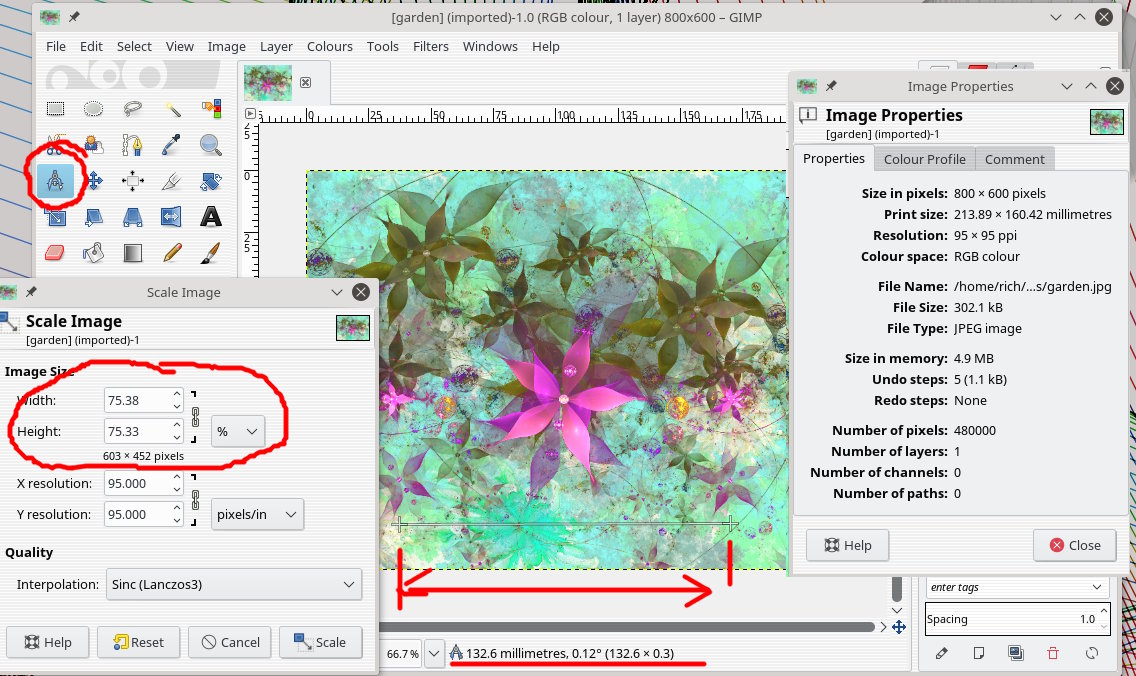
If you are not sure about the printing size. Check Image -> Image Properties and that shows information: Size in Pixels / Print Size / and Resolution (ppi)
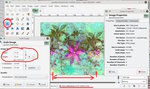
Another way is turn off View -> Dot-for-Dot see: https://docs.gimp.org/en/gimp-view-dot-for-dot.html
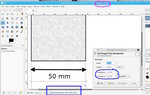
Providing the screen resolution is correctly set then, at 100% the image displays as it is printed. See screenshot
Second question :
with this method of resizing, I only resize the selection. But what I'd like to do is to resize the hole image thanks to a reference within the image whose size is known. For example. if there is a rule on the image, I'd like to resize the whole image thanks to a size reference given by the rule.
Second Question. Not sure what you want.
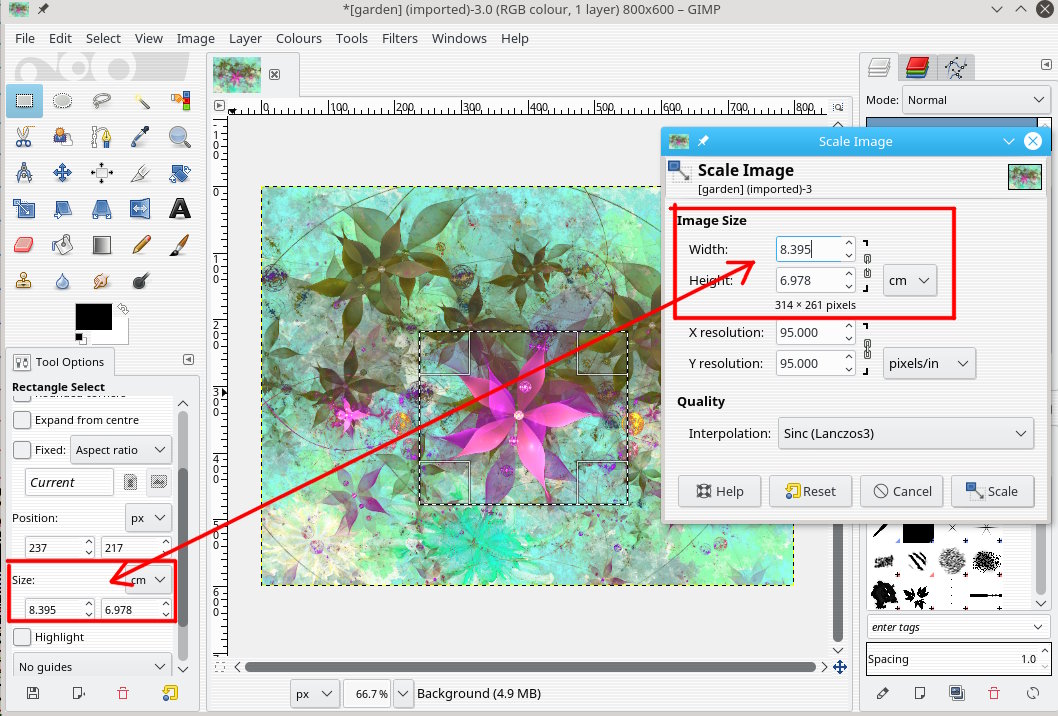
A selection can be set to show centimetres in the tool options. Use the value from that selection to enter into Image -> scale image. You might have to break the link if the width / height proportions are different. See screenshot
rich: www.gimp-forum.net
-
 dot-for-dot
dot-for-dot.jpg (172 KB) -
 use selection value
thesame.jpg (194 KB)
- postings
- 12
At 100%, my selection hasn't the size it should have
First and most important. Gimp is a raster editor and works in pixels. It can show cms as units for your convenience, but it still works in pixels.
When I use the scale tool, I can see the dimension in pixels of my selection. I can also switch the unit and see measurement in mm. When printing this image, will I get the mm annouced in Image --> scale image ? Which are the same seen with the scale tool by the way. Because if I get what I have at the screen, it will be much smaller. Indeed, taking off the dot for dot, changes quite a lot the visual dimension. And it is much closer but still different... The screen resolution seems to be good though... I don't understand the difference between the image properties and the measurement on the screen...
Second Question. Not sure what you want.
I am trying to resize an image according to an image detail (the rule in my exemple) of which I know the size. When I select my detail reference, and set the dimensions with the scale tool, what I get is the resizing of the selection. The rest of the image is not resized at all. What I'd like to have is a homgenous resizing of the whole image thanks to the detail reference. To say it differently. I'd like to say to gimp : "resize the whole image knowing that this little detail is 100mm long".
Thank you !
- postings
- 12
At 100%, my selection hasn't the size it should have
My screen is a LG flatron w2246
My resolution is 1920*1080 which seems to be the native resolution if I'm not wrong...
At 100%, my selection hasn't the size it should have
When I use the scale tool, I can see the dimension in pixels of my selection. I can also switch the unit and see measurement in mm. When printing this image, will I get the mm annouced in Image --> scale image ? Which are the same seen with the scale tool by the way. Because if I get what I have at the screen, it will be much smaller. Indeed, taking off the dot for dot, changes quite a lot the visual dimension. And it is much closer but still different... The screen resolution seems to be good though... I don't understand the difference between the image properties and the measurement on the screen...
Sorry I do not really understand you.
When you use Image -> Scale Image you change the number of pixels in the image. Gimp will produce an image width pixels x height pixels.
see: https://docs.gimp.org/en/gimp-image-scale.html
Printing is a different matter. The printed width is from the width pixels divided by the pixels per inch (ppi). So the same image can be printed in many different sizes just by changing the ppi.
see: https://docs.gimp.org/en/gimp-image-print-size.html
You can get the actual print size there or as before in Image Properties.
I am trying to resize an image according to an image detail (the rule in my exemple) of which I know the size. When I select my detail reference, and set the dimensions with the scale tool, what I get is the resizing of the selection. The rest of the image is not resized at all. What I'd like to have is a homgenous resizing of the whole image thanks to the detail reference. To say it differently. I'd like to say to gimp : "resize the whole image knowing that this little detail is 100mm long".
It is possible but you will have to do some arithmetic. use the gimp measure tool
https://docs.gimp.org/en/gimp-tool-measure.html
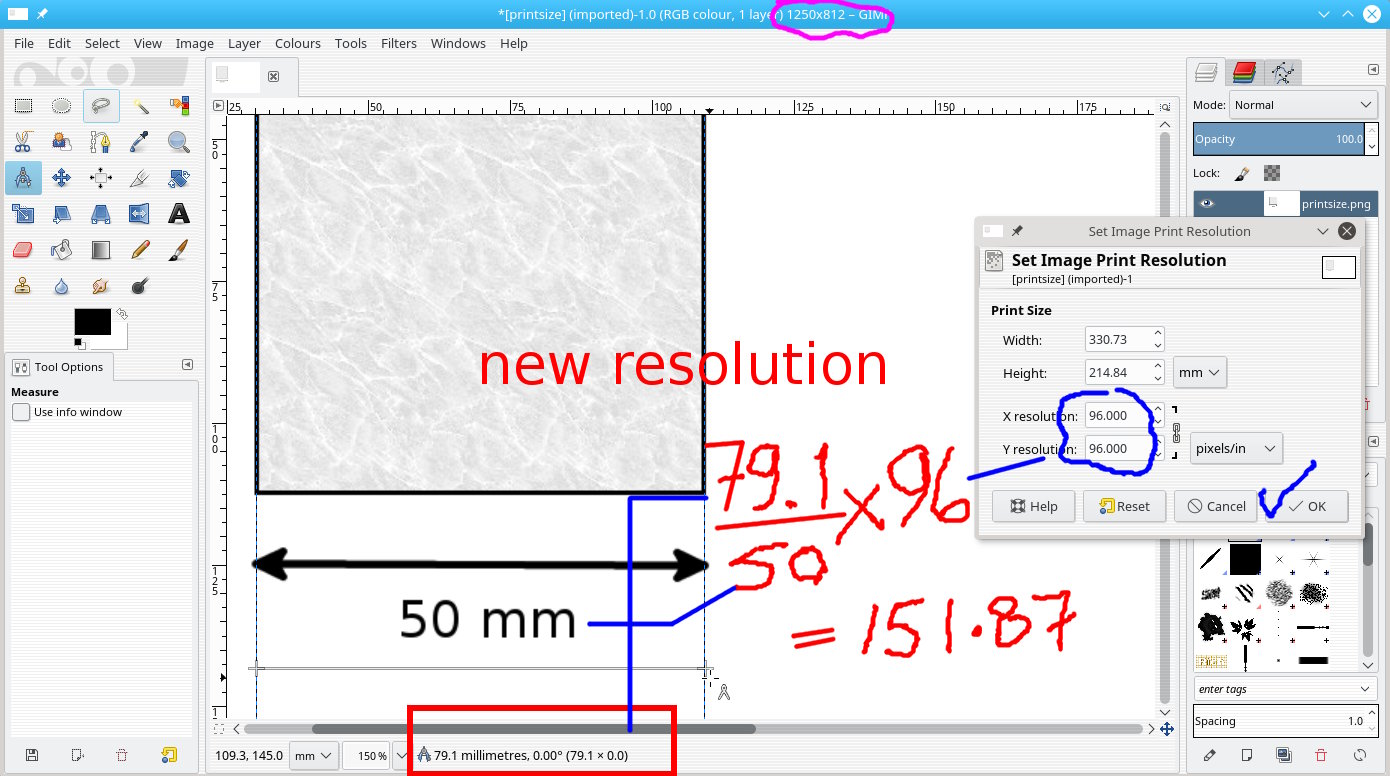
Measure the distance on the image - the example is 132.6 mm needs to be 100 mm scale factor is 100/132.6 As a percentage 77.4% There is a small error because Gimp has to fit it to ***pixels***. see screenshot
The other question on screen resolution. Has to do with the monitor pixel density.
There is a setting Edit -> Preferences -> Display. Gimp might not get the automatic setting correct. Sometimes you have to set it manually. The screenshot shows my HD laptop (1920x1080) settings.
-
 measure the image
scale.jpg (197 KB) -
 display resolution
display_resolution.jpg (124 KB)

At 100%, my selection hasn't the size it should have
On 01/04/2018 12:04 PM, qsdqsd wrote:
First and most important. Gimp is a raster editor and works in pixels. It can show cms as units for your convenience, but it still works in pixels.
When I use the scale tool, I can see the dimension in pixels of my selection. I can also switch the unit and see measurement in mm. When printing this image, will I get the mm annouced in Image --> scale image ? Which are the same seen with the scale tool by the way. Because if I get what I have at the screen, it will be much smaller.
Indeed, taking off the dot for dot, changes quite a lot the visual dimension. And it is much closer but still different... The screen resolution seems to be good though... I don't understand the difference between the image properties and the measurement on the screen...
When editing images for print, step one is to decide what the size in inches or cm the printed image will be, and the resolution needed in pixels per inch or cm. Multiply the physical size of the finished printed image by the desired resolution, to find the height and width in /pixels/ of the image file you need to create. From that point on, forget that "inches" or "centimeters" exist.
Typically, high resolution color printing is done at 300 DPI (or more), while lower resolution black and white printing is typically done at 150 DPI. These are general rules only, but they do give good results in most applications.
Example: Editing a photo that will be 4 x 6 inches on the printed page, you might want 300 dpi resolution if it's a color image that will be printed on glossy paper. 4 x 300 = 1200, 6 x 300 = 1800, so your finished image will be 1200 x 1800 pixels in size. Once you have calculated the height and width in pixels, you can forget that inches exist: 1200 x 1800 is the size of the finished image as seen by your image editor.
Example 2: Editing a photo that will be 4 x 6 inches on the printed page, you might want 150 dpi resolution if it's going to be printed in black & white on regular paper. 4 x 150 = 600, 6 x 150 = 900, so your finished image will be 600 x 900 in size. As before, once you have calculated the height and width in pixels you can forget that inches exist: 600 x 900 is the size of the finished image as seen by your image editor.
Editing images for screen display (photos for display on web pages, etc.), physical measurement units do not matter at all, just the height and width in pixels.
:o)
- postings
- 12
At 100%, my selection hasn't the size it should have
Thank you both of you for the answer. So if I understand well, to have the printed dimensions I want, it is not necessary to resize the image or play with the scale tool. All the more so as I get a quality loss by doing so, right ? But what I can do is do some calculation with the method below.
When editing images for print, step one is to decide what the size in inches or cm the printed image will be, and the resolution needed in pixels per inch or cm. Multiply the physical size of the finished printed image by the desired resolution, to find the height and width in
/pixels/ of the image file you need to create.
Get the correct amount of pixels height and width. After checking the printed dimension in Image --> Properties, I can eventually adjust these parameters with the scale tool. Tell me if I am right, with this method, on the screen, at 100%, I will not have the correct size ? Because it is only an information for printing ? In my case, when I do like that, the size dimension on the screen doesn't change at all, but the values in "Image --> Properties" do.
I tried to figure out how I could get the same result by only changing the ppi. Is there a calculation that allows to get the same result that with the first method ?
thank you again
- postings
- 12
At 100%, my selection hasn't the size it should have
I have another question regarding the ppi question. The image I have has 72ppi*72ppi. I would like to print it even if I am far from the 300dpi quality. Does it has a sense to take a resolution of 300dpi to do the calculation you have done to determine the size in pixels of the image ?
In my case I'd like the image (once printed) to be 13,8189in lenght and 7,9370079in width. I want the image to have the best quality possible. Am I supposed to use 300dpi for the calculation
13.8189 * 300 = ... 7.9370079 * 300 = ...
or it will change nothing for the image quality because, natively, the image has 72dpi ? And I should rather do :
13.8189 * 72 = ... 7.9370079 * 72 = ...
?
At 100%, my selection hasn't the size it should have
So if I understand well, to have the printed dimensions I want, it is not necessary to resize the image or play with the scale tool. All the
-----snip------
I tried to figure out how I could get the same result by only changing the ppi. Is there a calculation that allows to get the same result that with the first method ?
A simple proportion calculation similar to scaling the image.
Open the Print size dialogue: Image -> Print size and note the print resolution.
Use the the measure tool to get a size for the known dimension.
Then it is measured size divided by known multiplied by existing print resolution. see example.
Enter the result in the print size dialogue and ok it
Check the known dimension again with the measure tool. see example.
Note that the size of the image - top of window - remains the same. the image has not been scaled only the information sent to the printer.
Notes on printing:
If using Windows Gimp is not good at printing. Use some other application. I use linux and that is a little better.
Some printers enforce small margins. Your 100% A4 size image might be scaled by the printer to 95% Nothing to with Gimp up to you to ensure a suitable image size.
-
 calculation
proportion.jpg (192 KB) -
 result
newsize.jpg (163 KB)

At 100%, my selection hasn't the size it should have
I have another question regarding the ppi question. The image I have has 72ppi*72ppi.
I would like to print it even if I am far from the 300dpi quality. Does it has a sense to take a resolution of 300dpi to do the calculation you have done to determine the size in pixels of the image ?In my case I'd like the image (once printed) to be 13,8189in lenght and 7,9370079in width.
I want the image to have the best quality possible. Am I supposed to use 300dpi for the calculation
Give us a clue on the ***actual size*** of the image in ***pixels*** (remember Gimp works in pixels) and you will get some advice on fitting the image to the size you specified.
- postings
- 12
At 100%, my selection hasn't the size it should have
Give us a clue on the ***actual size*** of the image in ***pixels*** (remember Gimp works in pixels) and you will get some advice on fitting the image to the size you specified.
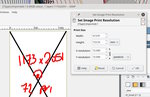
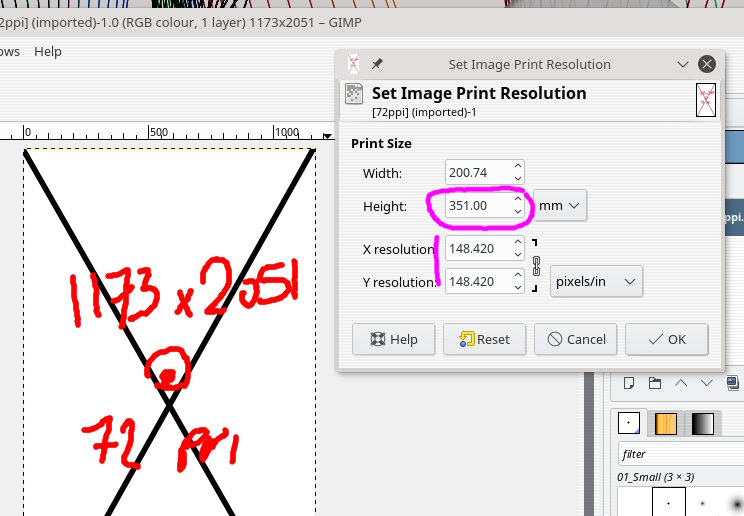
Ok here is the actual size of the image : 1173 x 2051 pixels Printing size is : 413.81mm * 723.55 mm And I want 201.6mm * 351mm
(413.81/201.6) * 72 = 147.789 ppi (723.55 / 351) * 72 = 148.42 ppi
(the difference is probably due to some shooting deformation. But if I apply the first result to the height, then the height is not perfectly good)
I think I was wrong in my last post when I wrote that the first method does not change the scale of the image. Because changing the number of pixels of an image, changes the scale of it, right ? On the other hand, the method consisting in changing the ppi is not changing the scale of the image, but the printing size.
I hope I get it. I really know nothing about images and I realise how confused is my mind
- postings
- 12
At 100%, my selection hasn't the size it should have
*************
I don't know why but the text was posted without enter key. I try to post it again
**************
Ok here is the actual size of the image : 1173 x 2051 pixels
Printing size is : 413.81mm * 723.55 mm
And I want 201.6mm * 351mm
(413.81/201.6) * 72 = 147.789ppi
(723.55 / 351) * 72 = 148.42ppi
At 100%, my selection hasn't the size it should have
Ok here is the actual size of the image : 1173 x 2051 pixels
Printing size is : 413.81mm * 723.55 mm
And I want 201.6mm * 351mm
(413.81/201.6) * 72 = 147.789ppi
(723.55 / 351) * 72 = 148.42ppi
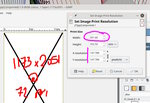
Original size 1173 x 2051 pix @ 72 ppi - Required print size 201.60 x 351.00 mm
Open the Image -> Print Size dialogue. see: screenshot 1
The pixel size proportions and the required size proportions are not a perfect match
The options -
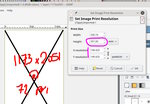
set the width to 201.6 height is a little off (352.5) see screenshot 2
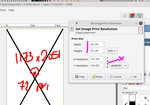
set the height to 351.0 and the width is a little off (200.74) see: screenshot 3
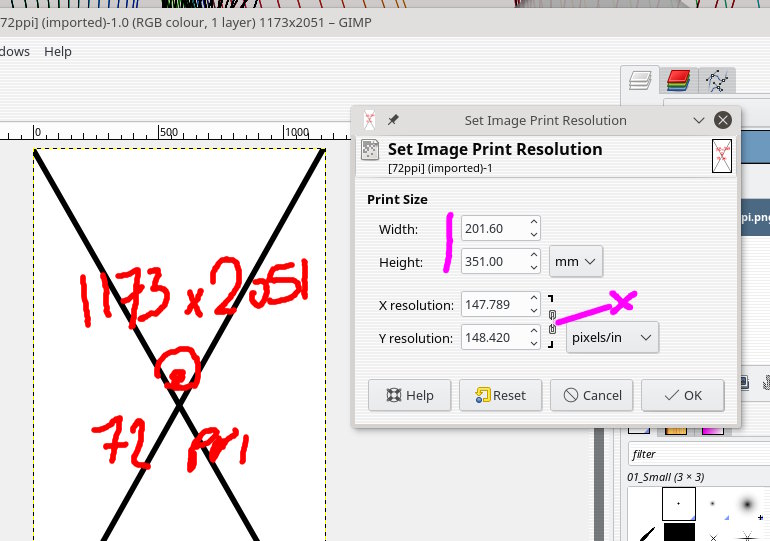
You can break the link between x and y resolution and have 201.60 x 351.00 mm This is ***never*** a good idea. It creates distortion in the image. see: screenshot 4
rich: www.gimpforum.net
-
 screenshot 1
orig.jpg (70.8 KB) -
 screenshot 2
width.jpg (73.8 KB) -
 screenshot 3
height.jpg (71.1 KB) -
 screenshot 4
breaklink.jpg (76.1 KB)


- postings
- 12
At 100%, my selection hasn't the size it should have
Ok thanks
This is what I got too. I accept distorsion in my image. So it's ok.
Thank you very much for the time you have spent to give me all these explanations. This was very helpful !
- postings
- 12
At 100%, my selection hasn't the size it should have
Ahah I have another question because I realise that for what I really need, maybe this is not the correct solution..
Actually, I have six photos. I must put these photos on two .jpg files in order to print only two files instead of six. And also to see at the same time differents details of the same object. Of course, these elements are all different one compared to the other. They have different size. So I guess that what I did first with the ppi calculation to have the correct printed size is good for one photo right ? But it doesn't work anymore if I must put these photos on the same file ? I suppose that I must first resize them one compared to the other ? Or is there some trick I don't know ?
You can go back to the first posts.
Gimp is a raster editor that works in pixels. If you use the measure tool between two defined points and it is 100 pixels in first image and 120 pixels in second image then to match, one of the images has to be scaled in the ratio 100:120
Another way is adding images as layers. When you open the first image (base layer) then **open-as-layers** a second image. The second layer takes the properties of the first image. The second layer can be scaled in place.
I am not sure if this is what you want but layers can be 'matched' using plugins, it is called image registration.
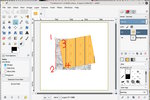
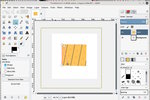
This example uses a plugin ofn-layer-aligner.py from http://sourceforge.net/projects/gimp-tools/files/scripts/
The top layer in screenshot 1 is rotated and scaled to match the base layer as screenshot 2. Notice how the whole layer is scaled (dotted line) and could be lost if you do not resize the canvas.
If you are going to put 3 images side-by-side in a jpeg obviously a bit more work is required. But the earlier comment still applies. The additional images will take the properties (ppi etc) of the first opened image.
rich: www.gimp-forum.net
-
 screenshot 1
skewed.jpg (75.1 KB) -
 screenshot 2
scaled-rot-moved.jpg (69.8 KB)


- postings
- 12
At 100%, my selection hasn't the size it should have
Tell me if I'm wrong, but this time, when the second layer will be scaled in place, there will be a loss of quality of the second layer ? This loss of quality is due to the scaling, which is intrinsic to the tool whether you scale up or down. It also depends on how much the scaling is important no ?
If you need to combine 3 images into one image somehow and two of those need to be scaled to match, then you will have to accept that scaling down throws away some pixels and scaling up guesses added pixels. You have an additional factor in that the original image(s) are jpeg and there can be jpeg artifacts along edges.
I saw your other post and while the reply was very detailed there is not indication of the amount of scaling and the algorithm used. Gimp choices are None - Linear - Cubic - Sinc(Lanczos3) Usually Sinc is better than the default Cubic.
If the amount of scaling is large say 50% down to 25% then it is customary to give the image a pre-blur using Gaussian blur with a suitable radius value ( 2 for 50%, 4 for 25% ) In my opinion not worth scaling to less than 50%.
Always difficult to give a proper answer when working in the dark. I have no idea of the nature of the images you are using.