


Tutorial: Rounded Corners
 is licensed under a Create Commons Attribution-Non Commercial 3.0 Unported license.")

Motivation
In this tutorial I show you how to easily round off existing hard edges from text or other objects.
Tutorial details
- Category: Techniques
- Time to reproduce: ≈5.0 minutes

- Tested with GIMP 2.3.11
-
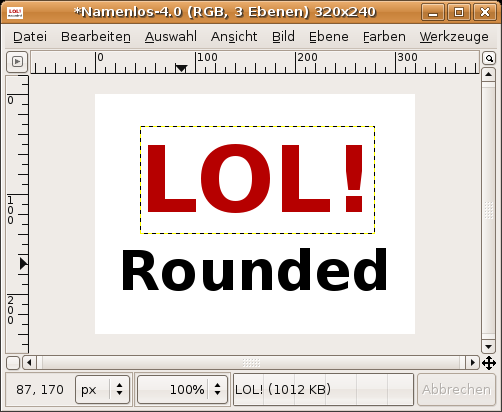
1
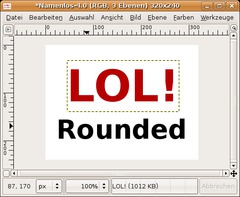
Open up a new file. Create one or more layers with text on it. The written text should be relatively big in size so that you can see the final effect clearly.
-
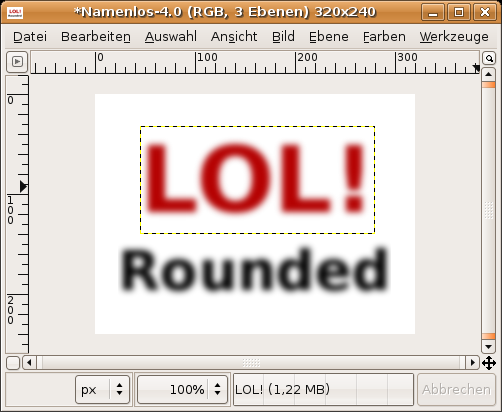
2
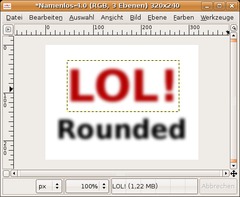
Now render the text (Layer / Discard Text Information) and apply a Gaussian Blur. → Filter / Blur / Gaussian with a value of 15. The higher the value the more rounded are the edges at the end. It should look like that now:
-
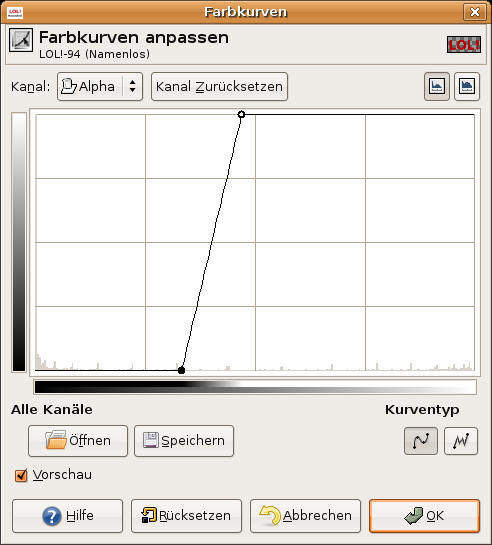
3
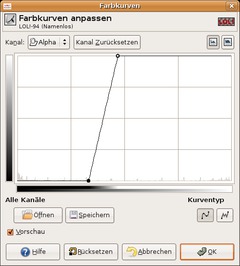
Click right on on this layer, apply Colors / Curves. At the top left set the channel to “Alpha”. After that move the point at the bottom left to the middle, the one top right move at the opposite direction, also towards the middle.
What happens here? The transparent part (the socalled alpha-channel) is moved together as far as possible until there is no half-transparent space left in the layer. The result of this is that there are either totally visible (100% transparency) pixels or totally invisible pixels (0% transparency).
-
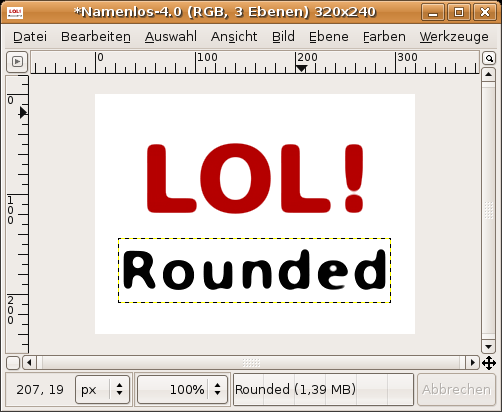
4
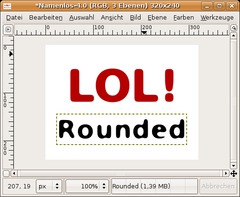
Thats it! The final result should look like this:


Comments
Post your own comments, questions or hints here. The author and other users will see your posting and can reply to it.
Of course, you can also ask in the chat.
Subscription management
Please log in to manage your subscriptions.
New comments are disabled because of spam.