


Tutorial: Create the Dragan effect
 is licensed under a Create Commons Attribution-Non Commercial 3.0 Unported license.")

Motivation
The so called "Dragan" effect is a technique that is usually made through photography with special lights and some soft post production. It is an effect that relies on heavy/extreme (but specific) contrasts. The technqiue itself is pretty easy, but it is pretty nice if you pay attention to some basic things. The effect is a little "plastic" and looking unnatural, but thats the way why people look at it twice. As a basis mostly portrait photos are used where it looks best. The original art of this comes from Andrzej Dragan. See link to his website to the right.
Tutorial details
- Category: Techniques
- Time to reproduce: ≈20.0 minutes

- Tested with GIMP 2.7
-
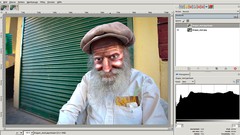
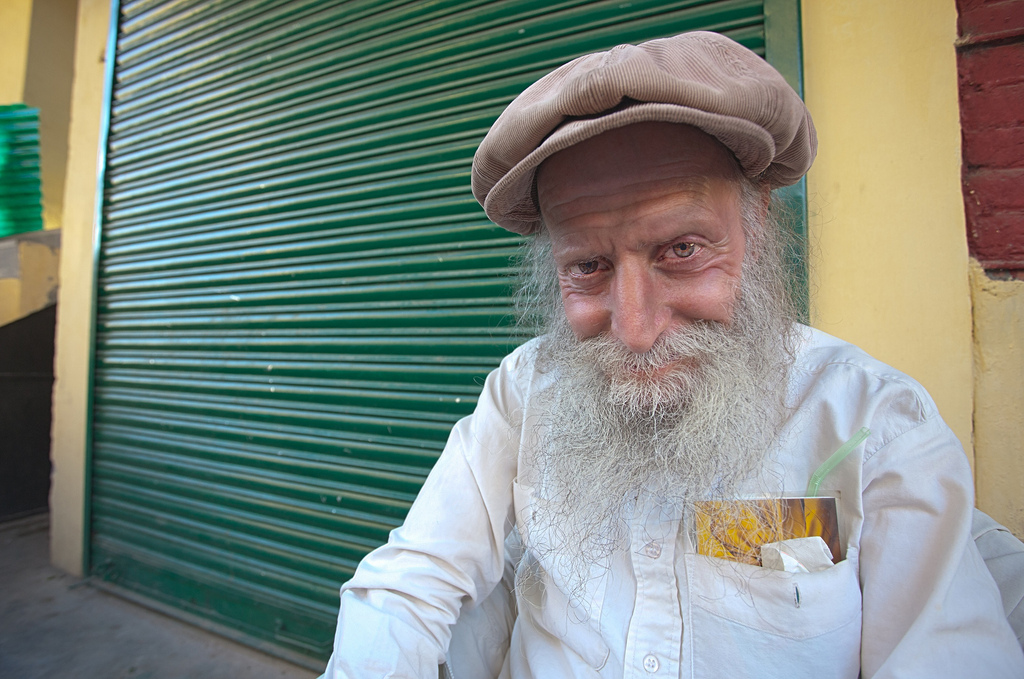
1
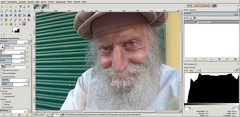 dragan_start.jpg
As a starting image I searched for a sharp porttrait photo of an old man with beard. You can download it above to try the effect by yourself. The effect is pretty nice when using white beards ;)
Download the image. I’ve also payed attention to a nice distribution of the brightness (nothing too white/nothing too black). Due to that we can create nice contrasts by ourself.
-
2
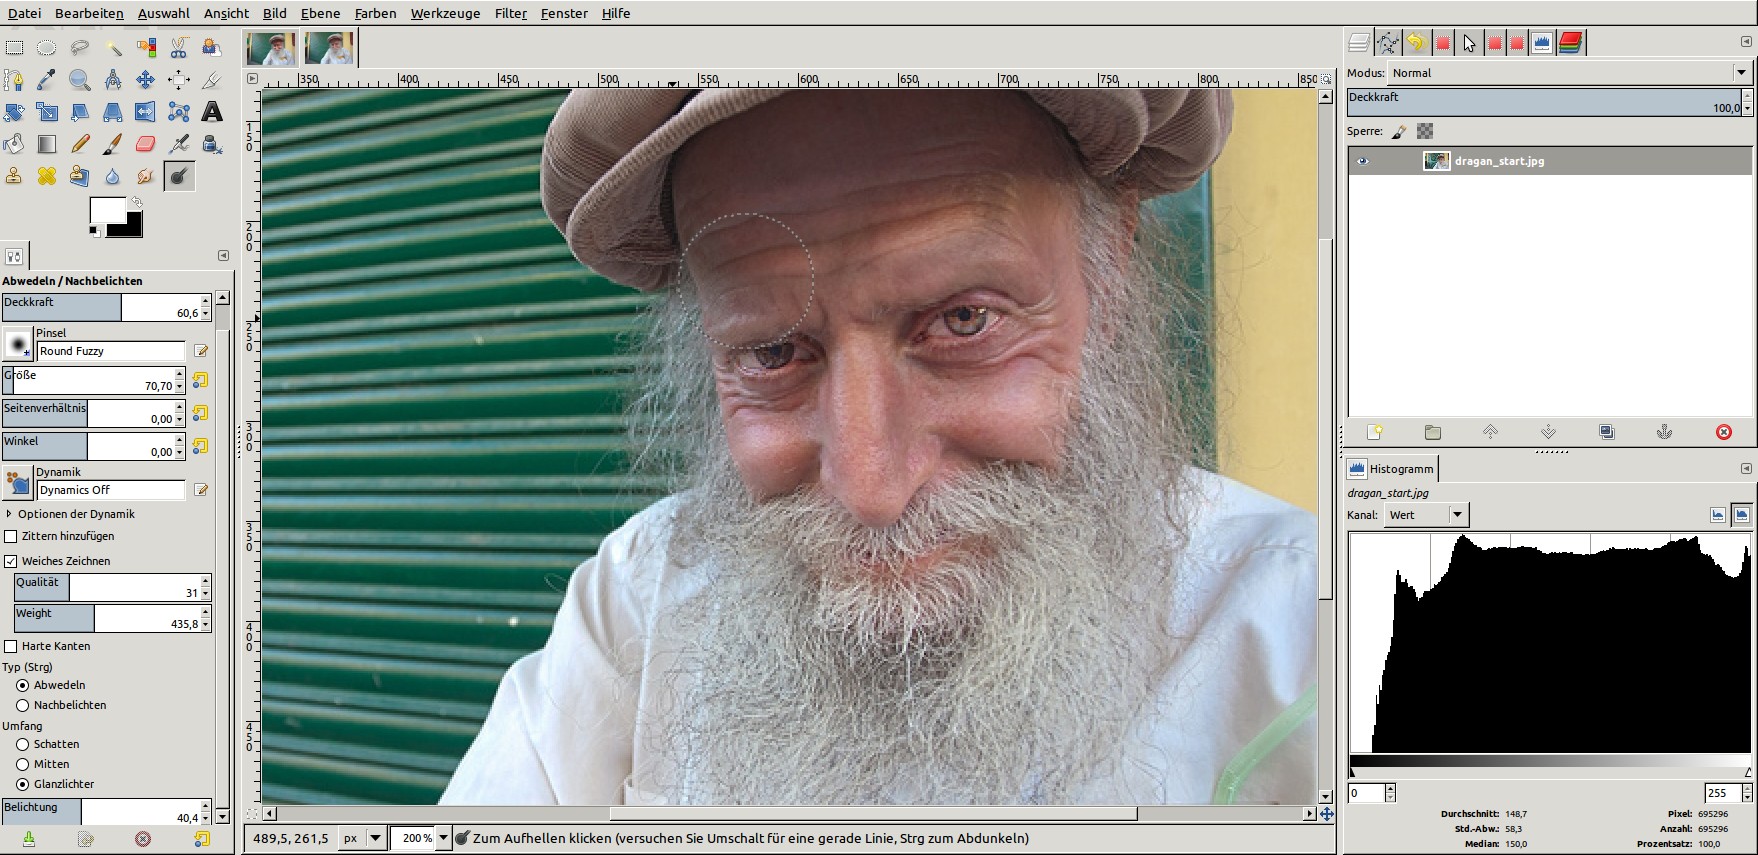
First we want to make the bright parts on the face (the highlights) little more white.
- Use the Dodge/Burn tool. Set the option to “Dodge”, “Highlights” and a Lighting of 40. Don’t forget to lower the opacity in the preferences of this tool. By doing that you’ll have much more control over what you make brighter.
- paint with a soft brush (size of 30 – can vary if you have other picture) a few times on the cheeks of the man. Do this again for the eyes, eye wrinkles, and nose. Everything that is in the same size of the brush.Hint: It is not so good when “drifting” into pure white when increasing the brightness.
-
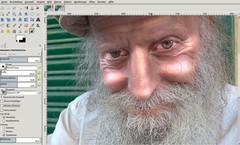
3
Lower the size of the brush, and paint over the bright parts of the forehead. After that make the brush again smaller and paint over the eyebrows unti they’re better visible (in the meaning of “brighter”).
-
4
Next, switch from “dodge” to “burn” in the preferences. Set the options to “shadows” instead of “highlights”. Lower the opacity even more and paint (with a larger brush again) some times over the dark shadowy parts of the portrait. This will darken the areas.
- Set the size of the brush to about 10px. Lower the opacity again and paint over the darker parts of the eye wrinkles and forehead.
Hint: The “plasticness” heavily relies on how much opacity you use for brightening/darkening the selected areas.
-
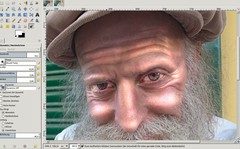
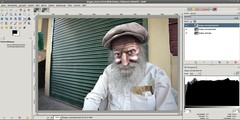
5
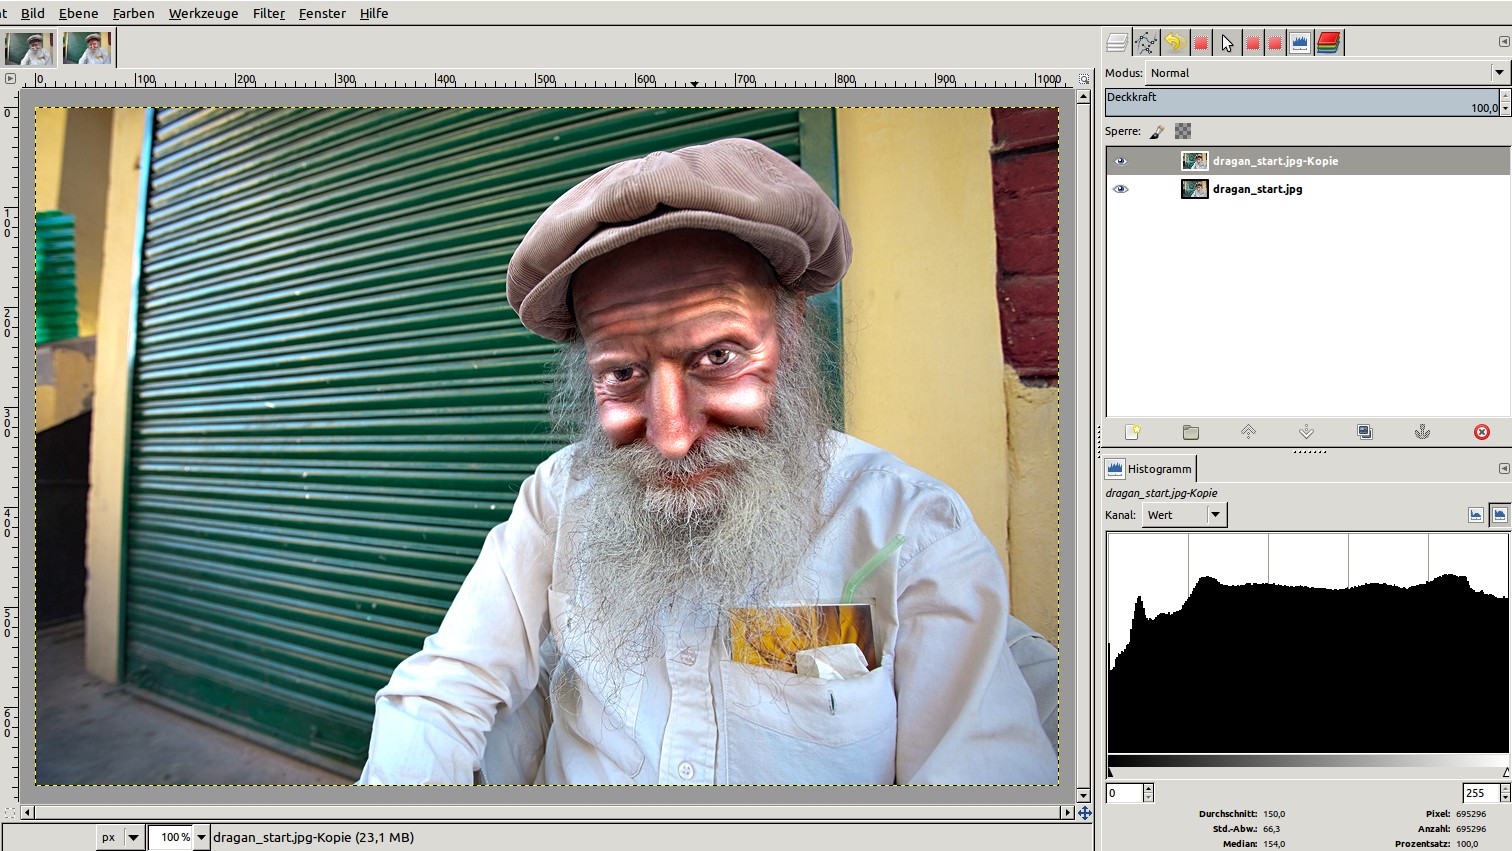
Looks good so far! But to get a better overall feeling we want to sharpen the image by enhancing the contrasts.
- Duplicate the layer
- Filter / Enhance / Unsharp Mask: 60 / 0.25 / 0It should look like that now:
-
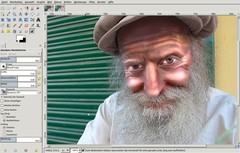
6
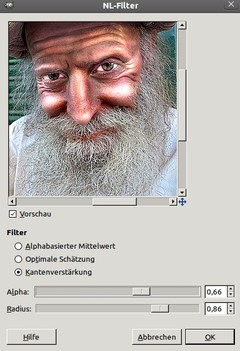
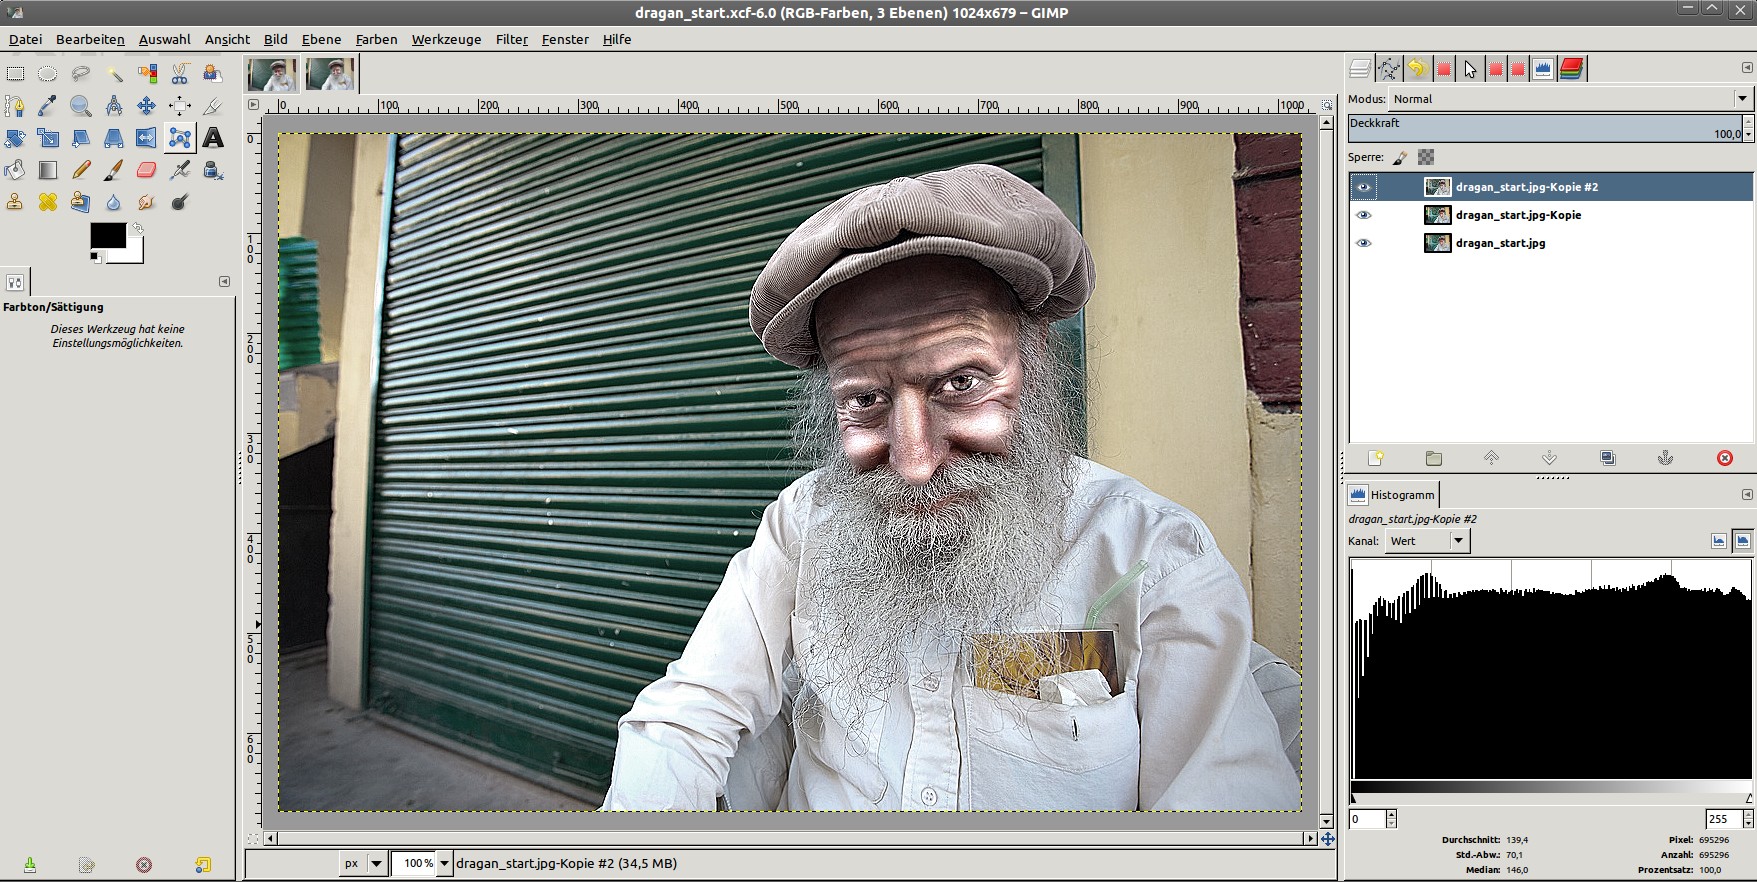
Now we need to sharpen again in another way. We cannot use the standard sharpen filter nor the unsharp mask filter for this since we need to only get better visible edges in the picture. This only works on pictures that are already pretty sharp.
You’ll find the edge sharpening filter under (this is not very intuitive :P) NL-filter in the menu Filter / Enhance. Plase use the values from the image. The more “alpha” you use the more edges will be detected and sharpened.
This filter will get us pretty nice details on the white beard.
-
7
The last step is to desaturate the image a bit by using:
- Colors / Hue/Saturtion. Set the saturation ruler to about -35. -
8
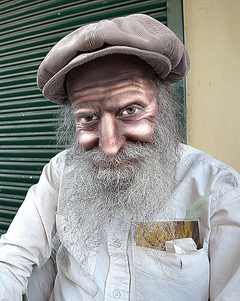
The final picture looks like this:
This effect can also be used very well to enhance muscles.
I hope you enjoyed this one ;)


Comments
Post your own comments, questions or hints here. The author and other users will see your posting and can reply to it.
Of course, you can also ask in the chat.
Subscription management
Please log in to manage your subscriptions.
New comments are disabled because of spam.